30-12-2024
11:35
GNOME’s New Image Viewer Adds Image Editing Features [OMG! Ubuntu!]
 Loupe (aka Image Viewer) is GNOME’s modern successor to the venerable Eye of GNOME has picked up its first batch of image editing features. The features in question were only recently merged upstream, aren’t finished, and not yet included in a stable build. But they’re an interesting addition that furthers the likelihood that Loupe could become the default image viewer on Ubuntu. At present, Ubuntu continues to use Eye of GNOME as the default tool for opening and browsing image files on desktop, despite Loupe having officially replaced it upstream in the GNOME project as a GNOME Core app. Loupe […]
You're reading GNOME’s New Image Viewer Adds Image Editing Features, a blog post from OMG! Ubuntu. Do not reproduce elsewhere without permission.
Ghostty: New Open Source Terminal That’s Spookily Good [OMG! Ubuntu!]
![]() We’re seeing something of a terminal emulator renaissance of late, with developers eager to reimagine, rethink, and rewire the humble console to leverage modern hardware, GPU acceleration, containerised workflows, and (in some cases) AI/LLMs. Ghostty, a new open-source and cross-platform terminal application created by Mitchell Hashimoto (co-founder of HashiCorp) is the latest to join the fray. Hashimoto’s says he “set out to build a terminal emulator that was fast, feature-rich, and had a platform-native GUI while still being cross-platform.” The first public release materialised over Christmas, rather like a festive Dickensian spook seeking to give us a glimpse into the […]
We’re seeing something of a terminal emulator renaissance of late, with developers eager to reimagine, rethink, and rewire the humble console to leverage modern hardware, GPU acceleration, containerised workflows, and (in some cases) AI/LLMs. Ghostty, a new open-source and cross-platform terminal application created by Mitchell Hashimoto (co-founder of HashiCorp) is the latest to join the fray. Hashimoto’s says he “set out to build a terminal emulator that was fast, feature-rich, and had a platform-native GUI while still being cross-platform.” The first public release materialised over Christmas, rather like a festive Dickensian spook seeking to give us a glimpse into the […]
You're reading Ghostty: New Open Source Terminal That’s Spookily Good, a blog post from OMG! Ubuntu. Do not reproduce elsewhere without permission.
See Pinned Ubuntu Dock Apps in the Application Grid [OMG! Ubuntu!]
 You may have noticed (or not) that if an app is pinned to the Ubuntu Dock you don’t see a shortcut for it in the applications grid. This approach is by design to avoid duplication since the dock is always visible (by default) so those app shortcuts are always in reach – each app shortcut only shows once. Not everyone likes this behaviour, especially if Ubuntu Dock auto-hide is enabled. Naturally, there are 3rd-party GNOME Shell extensions one can install to make sure all apps show in the main applications grid irrespective of whether they’re pinned to Ubuntu Dock (or […]
You're reading See Pinned Ubuntu Dock Apps in the Application Grid, a blog post from OMG! Ubuntu. Do not reproduce elsewhere without permission.
How to Hide Ubuntu Pro Updates in Ubuntu 24.04 LTS [OMG! Ubuntu!]
 Ubuntu Pro is an optional security feature that Ubuntu LTS users can enable to receive critical updates for an extra 25,000 packages which would otherwise sit unpatched. If you use Ubuntu 24.04 LTS you will have seen Ubuntu Pro security updates in Software Updater (or when running apt commands). And you will have noticed you can’t install those updates without having an Ubuntu Pro subscription. Ubuntu Pro is free for all users on up to 5 machines, meaning the only ‘cost’ involved is the time it takes to register and setup Ubuntu Pro. Businesses (or home users) with fleets of […]
You're reading How to Hide Ubuntu Pro Updates in Ubuntu 24.04 LTS, a blog post from OMG! Ubuntu. Do not reproduce elsewhere without permission.
OpenShot Video Editor Puts Out an Effortless, Seamless, Etc Update [OMG! Ubuntu!]
![]() A new version of OpenShot video editor is out (a video editor which doesn’t have the best reputation for stability hence the nickname OpenShut). OpenShot—more accurately, ChatGPT or similar—says “OpenShot 3.3 is here to transform your editing experience! This release is as powerful as it is beautiful […] Take your video editing to the next level with OpenShot 3.3. Download it now and see the difference”. The headline change in OpenShot 3.3 is the use of a new default theme called Cosmic Dust. This apparently offers a “modern editing experience”. The new theme looks nice, it I’m not sure it […]
A new version of OpenShot video editor is out (a video editor which doesn’t have the best reputation for stability hence the nickname OpenShut). OpenShot—more accurately, ChatGPT or similar—says “OpenShot 3.3 is here to transform your editing experience! This release is as powerful as it is beautiful […] Take your video editing to the next level with OpenShot 3.3. Download it now and see the difference”. The headline change in OpenShot 3.3 is the use of a new default theme called Cosmic Dust. This apparently offers a “modern editing experience”. The new theme looks nice, it I’m not sure it […]
You're reading OpenShot Video Editor Puts Out an Effortless, Seamless, Etc Update, a blog post from OMG! Ubuntu. Do not reproduce elsewhere without permission.
Spyder IDE: Spyder 6 project lead: Remote development interface and application UI/UX improvements [Planet Python]
Spyder's lead maintainer, Carlos Cordoba, shares his insights on the projects and features he helped develop for Spyder 6.0, particularly UI/UX and where the IDE is headed next.
29-12-2024
20:38
How to Append a Line After a String in a File Using sed Command [Linux Today]
If you’re working with text files on a Linux system, you may need to modify the contents of those files. One useful tool for this task is sed, which stands for stream editor, which allows you to perform various text manipulations, such as replacing text, deleting lines, and adding new lines.
In this article, we’ll show you how to use sed to add a new line after a specific string in a file.
The post How to Append a Line After a String in a File Using sed Command appeared first on Linux Today.
12:25
How to Set Up an AI Development Environment on Ubuntu [Linux Today]
Artificial Intelligence (AI) is one of the most exciting and rapidly evolving fields in technology today. With AI, machines are able to perform tasks that once required human intelligence, such as image recognition, natural language processing, and decision-making.
If you’re a beginner and want to dive into AI development, Linux is an excellent choice of operating system, as it is powerful, flexible, and widely used in the AI community.
In this guide, we’ll walk you through the process of setting up an AI development environment on your Ubuntu system.
The post How to Set Up an AI Development Environment on Ubuntu appeared first on Linux Today.
28-12-2024
20:45
Bah Hum-bugfix – it’s the Christmas Update to Calibre! [OMG! Ubuntu!]
 In deep mid-winter nothing beats curling up with a good book, in-front of a roaring fire – the crackle of all the unwanted Christmas tat your nearest and dearest bought you chars, melts, and burns providing a warm aural soundtrack. Thankfully, not everyone’s feeling as seasonably irascible as I am – like the folks behind open-source ebook reader, manager, and converter Calibre. They’ve hand-wrapped a bug-fix update to help tide us over the festive season. Hurrah! As gifts that arrive in late December go, Calibre 7.23 is a modest one: more ‘last-minute box of chocs’ than something you really wanted […]
You're reading Bah Hum-bugfix – it’s the Christmas Update to Calibre!, a blog post from OMG! Ubuntu. Do not reproduce elsewhere without permission.
How to Use sed for Dynamic Number Replacement in Linux [Linux Today]
The sed command, short for Stream Editor, is a powerful text processing tool in Linux, which is widely used for text manipulation tasks, including searching, finding and replacing text, and even performing advanced scripting.
This article will guide you through the basics of sed, explain how to use it for dynamic number replacement, and provide practical examples for beginners.
The post How to Use sed for Dynamic Number Replacement in Linux appeared first on Linux Today.
Ghostty 1.0 Released, A New GPU-Accelerated Terminal Emulator [Linux Today]
Meet Ghostty 1.0: The GPU-accelerated terminal emulator exits beta after two years, challenging Kitty and Alacritty with its speed and features.
The post Ghostty 1.0 Released, A New GPU-Accelerated Terminal Emulator appeared first on Linux Today.
An Introduction To Wiki.js, a Modern, Lightweight and Powerful Wiki Software Built on NodeJS [Linux Today]
Wiki.js is a powerful and extensible open source wiki software to create the perfect wiki and knowledge base documentation.
The post An Introduction To Wiki.js, a Modern, Lightweight and Powerful Wiki Software Built on NodeJS appeared first on Linux Today.
12 Best Free and Open Source TypeScript-Based Web Content Management Systems [Linux Today]
Here are our favorite TypeScript-based web content management systems. They are all free and open source software.
The post 12 Best Free and Open Source TypeScript-Based Web Content Management Systems appeared first on Linux Today.
How to Install FreshRSS with Docker: A Step-by-Step Guide [Linux Today]
Learn how to install FreshRSS, a self-hosted RSS feed aggregator, with Docker in just a few easy steps and centralize your news feed experience.
The post How to Install FreshRSS with Docker: A Step-by-Step Guide appeared first on Linux Today.
StackLok Is Making Security ‘Boring’ for Open-Source AI-Assisted Devs [Linux Today]
Stacklok’s new CodeGate software removes many of the pain points and security traps for those developing using AI tools.
The post StackLok Is Making Security ‘Boring’ for Open-Source AI-Assisted Devs appeared first on Linux Today.
Zero to Mastery: Python Monthly Newsletter 💻🐍 [Planet Python]
61st issue of Andrei Neagoie's must-read monthly Python Newsletter: Octoverse Results Reveal, GPU Computing, and much more. Read the full newsletter to get up-to-date with everything you need to know from last month.
TestDriven.io: Deploying a Django App to AWS ECS with AWS Copilot [Planet Python]
This tutorial looks at how to deploy a Django app to AWS ECS with AWS Copilot.
Daniel Roy Greenfeld: TIL: yield from [Planet Python]
A variant of the yield statement that can result in more concise code.
Kushal Das: pastewindow.nvim my first neovim plugin [Planet Python]
pastewindow is a neovim plugin written in Lua to help to paste text from a buffer to a different window in Neovim. This is my first attempt of writing a plugin.
We can select a window (in the GIF below I am using a bash terminal as target) and send any text to that window. This will be helpful in my teaching sessions. Specially modifying larger Python functions etc.

I am yet to go through all the Advent of Neovim videos from TJ DeVries. I am hoping to improve (and more features) to the plugin after I learn about plugin development from the videos.
Talk Python to Me: #491: DuckDB and Python: Ducks and Snakes living together [Planet Python]
Join me for an insightful conversation with Alex Monahan, who works on documentation, tutorials, and training at DuckDB Labs. We explore why DuckDB is gaining momentum among Python and data enthusiasts, from its in-process database design to its blazingly fast, columnar architecture. We also dive into indexing strategies, concurrency considerations, and the fascinating way MotherDuck (the cloud companion to DuckDB) handles large-scale data seamlessly. Don’t miss this chance to learn how a single pip install could totally transform your Python data workflow!<br/> <br/> <strong>Episode sponsors</strong><br/> <br/> <a href='https://talkpython.fm/sentry'>Sentry Error Monitoring, Code TALKPYTHON</a><br> <a href='https://talkpython.fm/citizens'>Data Citizens Podcast</a><br> <a href='https://talkpython.fm/training'>Talk Python Courses</a><br/> <br/> <h2>Links from the show</h2> <div><strong>Alex on Mastodon</strong>: <a href="https://data-folks.masto.host/@__Alex__?featured_on=talkpython" target="_blank" >@__Alex__</a><br/> <br/> <strong>DuckDB</strong>: <a href="https://duckdb.org/?featured_on=talkpython" target="_blank" >duckdb.org</a><br/> <strong>MotherDuck</strong>: <a href="https://motherduck.com/?featured_on=talkpython" target="_blank" >motherduck.com</a><br/> <strong>SQLite</strong>: <a href="https://sqlite.org/?featured_on=talkpython" target="_blank" >sqlite.org</a><br/> <strong>Moka-Py</strong>: <a href="https://github.com/deliro/moka-py?featured_on=talkpython" target="_blank" >github.com</a><br/> <strong>PostgreSQL</strong>: <a href="https://www.postgresql.org/?featured_on=talkpython" target="_blank" >www.postgresql.org</a><br/> <strong>MySQL</strong>: <a href="https://www.mysql.com/?featured_on=talkpython" target="_blank" >www.mysql.com</a><br/> <strong>Redis</strong>: <a href="https://redis.io/?featured_on=talkpython" target="_blank" >redis.io</a><br/> <strong>Apache Parquet</strong>: <a href="https://parquet.apache.org/?featured_on=talkpython" target="_blank" >parquet.apache.org</a><br/> <strong>Apache Arrow</strong>: <a href="https://arrow.apache.org/?featured_on=talkpython" target="_blank" >arrow.apache.org</a><br/> <strong>Pandas</strong>: <a href="https://pandas.pydata.org/?featured_on=talkpython" target="_blank" >pandas.pydata.org</a><br/> <strong>Polars</strong>: <a href="https://pola.rs/?featured_on=talkpython" target="_blank" >pola.rs</a><br/> <strong>Pyodide</strong>: <a href="https://pyodide.org/?featured_on=talkpython" target="_blank" >pyodide.org</a><br/> <strong>DB-API (PEP 249)</strong>: <a href="https://peps.python.org/pep-0249/?featured_on=talkpython" target="_blank" >peps.python.org/pep-0249</a><br/> <strong>Flask</strong>: <a href="https://flask.palletsprojects.com/?featured_on=talkpython" target="_blank" >flask.palletsprojects.com</a><br/> <strong>Gunicorn</strong>: <a href="https://gunicorn.org/?featured_on=talkpython" target="_blank" >gunicorn.org</a><br/> <strong>MinIO</strong>: <a href="https://min.io/?featured_on=talkpython" target="_blank" >min.io</a><br/> <strong>Amazon S3</strong>: <a href="https://aws.amazon.com/s3/?featured_on=talkpython" target="_blank" >aws.amazon.com/s3</a><br/> <strong>Azure Blob Storage</strong>: <a href="https://azure.microsoft.com/products/storage/?featured_on=talkpython" target="_blank" >azure.microsoft.com/products/storage</a><br/> <strong>Google Cloud Storage</strong>: <a href="https://cloud.google.com/storage?featured_on=talkpython" target="_blank" >cloud.google.com/storage</a><br/> <strong>DigitalOcean</strong>: <a href="https://www.digitalocean.com/?featured_on=talkpython" target="_blank" >www.digitalocean.com</a><br/> <strong>Linode</strong>: <a href="https://www.linode.com/?featured_on=talkpython" target="_blank" >www.linode.com</a><br/> <strong>Hetzner</strong>: <a href="https://www.hetzner.com/?featured_on=talkpython" target="_blank" >www.hetzner.com</a><br/> <strong>BigQuery</strong>: <a href="https://cloud.google.com/bigquery?featured_on=talkpython" target="_blank" >cloud.google.com/bigquery</a><br/> <strong>DBT (Data Build Tool)</strong>: <a href="https://docs.getdbt.com/?featured_on=talkpython" target="_blank" >docs.getdbt.com</a><br/> <strong>Mode</strong>: <a href="https://mode.com/?featured_on=talkpython" target="_blank" >mode.com</a><br/> <strong>Hex</strong>: <a href="https://hex.tech/?featured_on=talkpython" target="_blank" >hex.tech</a><br/> <strong>Python</strong>: <a href="https://www.python.org/?featured_on=talkpython" target="_blank" >www.python.org</a><br/> <strong>Node.js</strong>: <a href="https://nodejs.org/?featured_on=talkpython" target="_blank" >nodejs.org</a><br/> <strong>Rust</strong>: <a href="https://www.rust-lang.org/?featured_on=talkpython" target="_blank" >www.rust-lang.org</a><br/> <strong>Go</strong>: <a href="https://go.dev/?featured_on=talkpython" target="_blank" >go.dev</a><br/> <strong>.NET</strong>: <a href="https://dotnet.microsoft.com/?featured_on=talkpython" target="_blank" >dotnet.microsoft.com</a><br/> <strong>Watch this episode on YouTube</strong>: <a href="https://www.youtube.com/watch?v=3wGeadcKens" target="_blank" >youtube.com</a><br/> <strong>Episode transcripts</strong>: <a href="https://talkpython.fm/episodes/transcript/491/duckdb-and-python-ducks-and-snakes-living-together" target="_blank" >talkpython.fm</a><br/> <br/> <strong>--- Stay in touch with us ---</strong><br/> <strong>Subscribe to Talk Python on YouTube</strong>: <a href="https://talkpython.fm/youtube" target="_blank" >youtube.com</a><br/> <strong>Talk Python on Bluesky</strong>: <a href="https://bsky.app/profile/talkpython.fm" target="_blank" >@talkpython.fm at bsky.app</a><br/> <strong>Talk Python on Mastodon</strong>: <a href="https://fosstodon.org/web/@talkpython" target="_blank" ><i class="fa-brands fa-mastodon"></i>talkpython</a><br/> <strong>Michael on Bluesky</strong>: <a href="https://bsky.app/profile/mkennedy.codes?featured_on=talkpython" target="_blank" >@mkennedy.codes at bsky.app</a><br/> <strong>Michael on Mastodon</strong>: <a href="https://fosstodon.org/web/@mkennedy" target="_blank" ><i class="fa-brands fa-mastodon"></i>mkennedy</a><br/></div>
Matt Layman: Optimizing SQLite - Building SaaS #210 [Planet Python]
In this episode, when worked on the newly migrated JourneyInbox site and focused on the database. Since me moved from Postgres to SQLite, I needed to make sure that SQLite was ready for users. We examined common configuration to optimize the database and applied that config to JourneyInbox.
27-12-2024
17:47
2024 Recap: Linux & FOSS Ecosystem’s Highlights [Linux Today]
Discover the biggest Linux updates, top FOSS breakthroughs, and community-driven innovations shaping the open-source landscape in 2024.
The post 2024 Recap: Linux & FOSS Ecosystem’s Highlights appeared first on Linux Today.
How to Use awk to Perform Arithmetic Operations in Loops [Linux Today]
awk is a scripting language designed for text processing and data extraction, which reads input line by line, splits each line into fields, and allows you to perform operations on those fields. It’s commonly used for tasks like pattern matching, arithmetic calculations, and generating formatted reports.
The post How to Use awk to Perform Arithmetic Operations in Loops appeared first on Linux Today.
Armin Ronacher: Reflecting on Life [Planet Python]
Last year I decided that I want to share my most important learnings about engineering, teams and quite frankly personal mental health. My hope is that those who want to learn from me find it useful. This is a continuation to this.
Over the years, I've been asked countless times: “What advice would you give to young programmers or engineers?” For the longest time, I struggled to answer. I wasn't sure I had anything definitive or profound to offer. And truthfully, even now, I'm not convinced I have enough answers. But as I've reflected on my journey to here, I've formulated some ideas that I believe are worth sharing — if only to provide a bit of guidance to those just starting out. For better or worse, I think those things are applicable regardless of profession.
My core belief is that fulfillment and happiness comes from deliberate commitment to meaningful work, relationships, and personal growth and purpose. I don't claim that these things can be replicated, but they worked for me and some others, so maybe they can be of use for you.
Put Time In
Putting time into work and skills — and by that truly investing oneself — is always worth it.
Whether it's working on a project, solving a difficult problem, or even refining soft skills like communication, the act of showing up and putting in the hours is essential. Practice makes perfect, but more so it's all about progress rather than perfection. Each hour you spend iterating, refining, failing and retrying brings you closer to excellence. It doesn't always feel that way in the moment but when you look back at what you did before, you will see your progress. And that act of looking back, and seeing how you improved, is immensely rewarding and in turn makes you enjoy your work.
I did not start out enjoying programming, not at all. I had a friend in school who was just better than me at everything. It felt demotivating. Programming turned out to be a necessary tool that I had to build things and to share with others, and through that, I eventually ended up enjoying it.
There is a narrative that working hard is inherently bad for your health or that long hours lead to burnout. I disagree. It's not about how many hours you put in, but about the enjoyment and quality of the work you're doing. Still some of my most favorite memories were some all-nighters I did when I was younger working on something. It wasn't even necessarily on projects that ended up meaningful or successful, but it was the act in itself. When you find joy in what you're building in the moment, work does not feel like a burden. Instead it feels exciting and exhilarating. These memories, that some might describe as unhealthy are some of my most pleasant ones.
Work And The Man
The key isn't avoiding hard work but finding meaning in it. Practice and effort, when coupled with a sense of purpose, not only make you better at what you do but also make the journey itself fulfilling. There is one catch however, and that is that your payout should not just be your happiness in the moment, but it should be long lasting.
The best way to completely destroy your long term satisfaction is if the effort you are putting into something is not reciprocated or the nature of the work feels meaningless. It's an obvious privilege to recommend that one shall not work for exploitative employers but you owe yourself to get this right. With time you build trust in yourself, and the best way to put this trust to use, is to break out of exploitative relationships.
If you end up doing things you do not believe in, it will get to you. It will not just demotivate you and make you unhappy at work, it will eventually make every hour you spent miserable and eventually get to your health.
Other than sleeping, work is what you spent the most time with for a significant portion of your life. If that is not fulfilling a core pillar of what can provide happiness is not supporting you. I have seen people advocate for just not caring to fix the work aspect, instead to work less and spend more free time. I have not found that to work for me. Work needs to be fulfilling, even if work is just a few hours a day.
Dare To Commit
Life isn't about sampling everything; it’s about making deliberate choices and committing to the ones that matter. You don't need to date twenty people to find the right partner, nor do you need a network of hundred acquaintances to succeed. Similarly, you don't need to work at ten different companies to build a meaningful career. Those things can be hugely beneficial, don't get me wrong, but you can do more with less too. When you focus on taking one step at a time, choosing the best option available to you in that moment you can accomplish great things. Feel free to look to others for inspiration, but do not to compare what they have versus what you don't. Nothing good will come from that. Everyone's journey is unique, shaped by the opportunities they encounter and the paths they decide to follow. Value grows not with the breadth of options explored but with the depth of commitment to the path you've chosen.
Just as mastering a skill pays dividends, so does committing on your personal or professional journey. Even if the world around you shifts — like the rise of AI in software engineering — your experience and expertise aren't wasted. Your gained experience makes it much easier for you to adjust course and it will give you the necessary trust in yourself. It allows to leverage what you've learned in new ways. While it's true that choosing from limited options might not always lead to the “best” possible outcome, the time and effort you invest in your chosen path can often outweigh the hypothetical gains of a different choice. In many cases, mastery and fulfillment come not from chasing endless possibilities but from fully embracing the one path you're on and making it your own.
Date to Marry
To me this happened through a lucky accident but it's something I strongly believe in. I'm an agnostic, I don't hold strong religious beliefs but I do believe in the purpose of and benefits of a lasting marriage. When my wife and I met I did not think I was in a position in my life where I had interest, desire or necessity in a deep relationship, let alone to marry. We did not live in the same country when we met and we had a long distance relationship for almost a year. That kind of relationship (particularly when visa issues are involved) has one incredible benefit: you really have to commit to your relationship. It's expensive and you spend a lot of time talking and sharing intimate thoughts. It also forces you to make a concious decision if the two of you believe it's worth continuing. You don't have the option to just “test drive” it. It forces you to figure out all the hard things upfront. Career, values, ambitions, children, the whole thing. That's a very different experience to swiping right and see what comes from it.
That one year of intensive dating changed me. I started to recognize the benefits of committing to something on a much deeper level. It taught me that vulnerability and opening yourself up can be a beautiful thing. It showed me that there was a whole part to myself I did not look into. It showed me that really committing to something, opens up a whole new world of opportunity and it allowed us to really invest into our relationship.
When you commit to your partner fully you get a lot in the process. Yes, there are risks and while you're dating, you need to figure these things out. You need to know on a fundamental level that the person you're dating is going to be the one you want to be with for a lifetime. That's not easy, because no human is perfect. Yet if that is the goal, you can poke at the parts where dragons can be. Only in situations of stress and challenge will you truly find out how the other person works and if that works for you.
I have heard people talk about “going to IKEA” for a date. I think that's a brilliant idea. Imagining a life together and struggling a bit through conflict and resolution is exactly the right way to go about it.
Having Children
Very few things have so profoundly changed me as our first child.
Seeing children grow up is such a moving experience. I enjoy being with them in moments of achievements or sadness alike and I love when they surprise me in the morning with their newfound wisdom or after school with their proud achievements. It's fun to play with them, to help them learn new things and you can do things together you haven't done since your own childhood.
I'm lucky to have kids. I grew up in a society that has largely painted a pretty dark picture about having children but I do not share those views. We knew we wanted children and I'm glad we didn't wait. You can't cheat nature on this thing and at the present state of scientific development, things still are much harder if you try to have children late.
Nothing will ever be perfect. There were sleepless nights, there are the sicknesses that come in autumn with daycare and school. You need to arrange things in different ways than you were used to. You will hear a lot from parents and educators about what is is like to have children but the reality however is that I don't think it's possible to know how it is to have kids until you do. In a way you have to jump into the cold water and there is no going back.
There are some important prerequisites though, but I think differently about them now then I did before. I don't think that you need a lot of money or a stable career, but you need to have your marriage and house in order. The most important thing I learned about having children is that you first and foremost need to take care of yourself. Any stress you experience, you will pass on to your children and it will harm them in the process. This is really important. There are lots of dysfunctional households and bad parents and you should not have children if you can't take care of yourself.
Those are the important parts, but then there are superficial issues. I almost entirely opted out of reading parental advise books because I could feel how they stress me out. I found it easier to take on challenges as they arrive naturally. If you have a loving relationship with your spouse you can extend that to your children and learn how to deal with challenges calmly (or as calmly as you can). You need to be there for each other. Your children will not become more successful because you mastered breast feeding on day one or if you taught them sign language before they can talk. They will however be significantly better off if you can jump on a moment's notice to take care of your spouse or child when something goes wrong.
Our experience is unlikely to be your experience, but there are some things that are shared among parents. You grow above yourself when all the sudden become fully responsible for another human being and you can't opt out of it. It also invites you to reflect on yourself more and how you came to be the person that you are. I also don't think it makes you any less ambitious, but it changes how you define success for yourself. Your horizon opens up and it really makes you think more about the totality of your family rather than yourself.
My life isn't about perfection or constantly chasing what's next; it's about being present and committing to the things that matter. This is also what I'm passing on to my children. Whatever your journey may look like, I hope you find joy, purpose, and the courage to commit fully to it and that you found something useful in my writings.
25-12-2024
11:27
LibreOffice 24.8.1, the first minor release of the recently announced LibreOffice 24.8 family, is available for download [Press Releases Archives - The Document Foundation Blog]

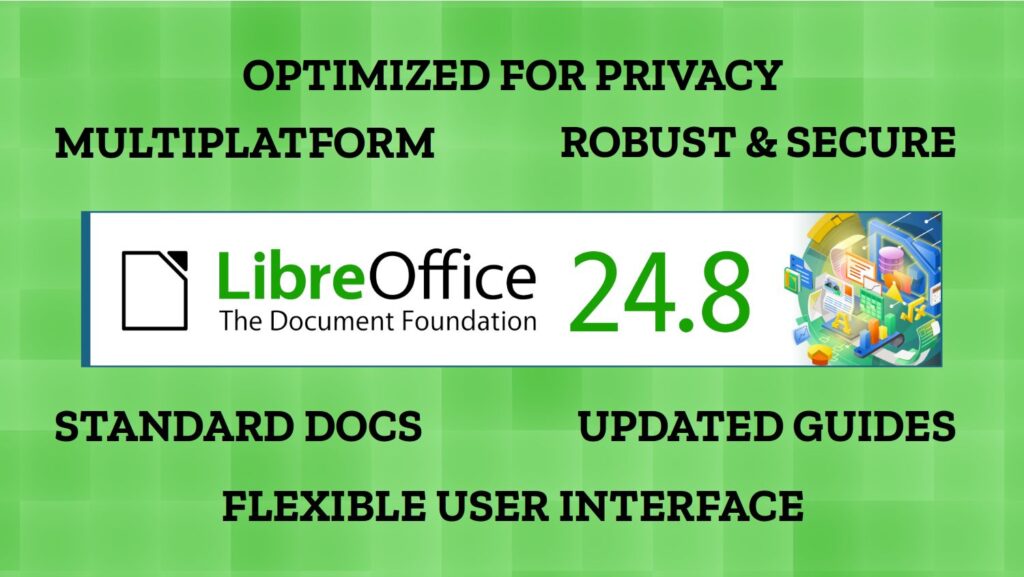
The LibreOffice 24.8 family is optimised for the privacy-conscious office suite user who wants full control over the information they share
Berlin, 12 September 2024 – LibreOffice 24.8.1, the first minor release of the LibreOffice 24.8 family of the free, volunteer-supported office suite for Windows (Intel, AMD and ARM), macOS (Apple and Intel) and Linux, is available at www.libreoffice.org/download. For users who don’t need the latest features and prefer a more tested version, TDF maintains the previous LibreOffice 24.2 family, with several months of back-ported fixes. The current version is LibreOffice 24.2.6.
LibreOffice is the only software for creating documents that contain personal or confidential information that respects the privacy of the user – ensuring that the user is able to decide if and with whom to share the content they create. As such, LibreOffice is the best option for the privacy-conscious office suite user, and offers a feature set comparable to the leading product on the market.
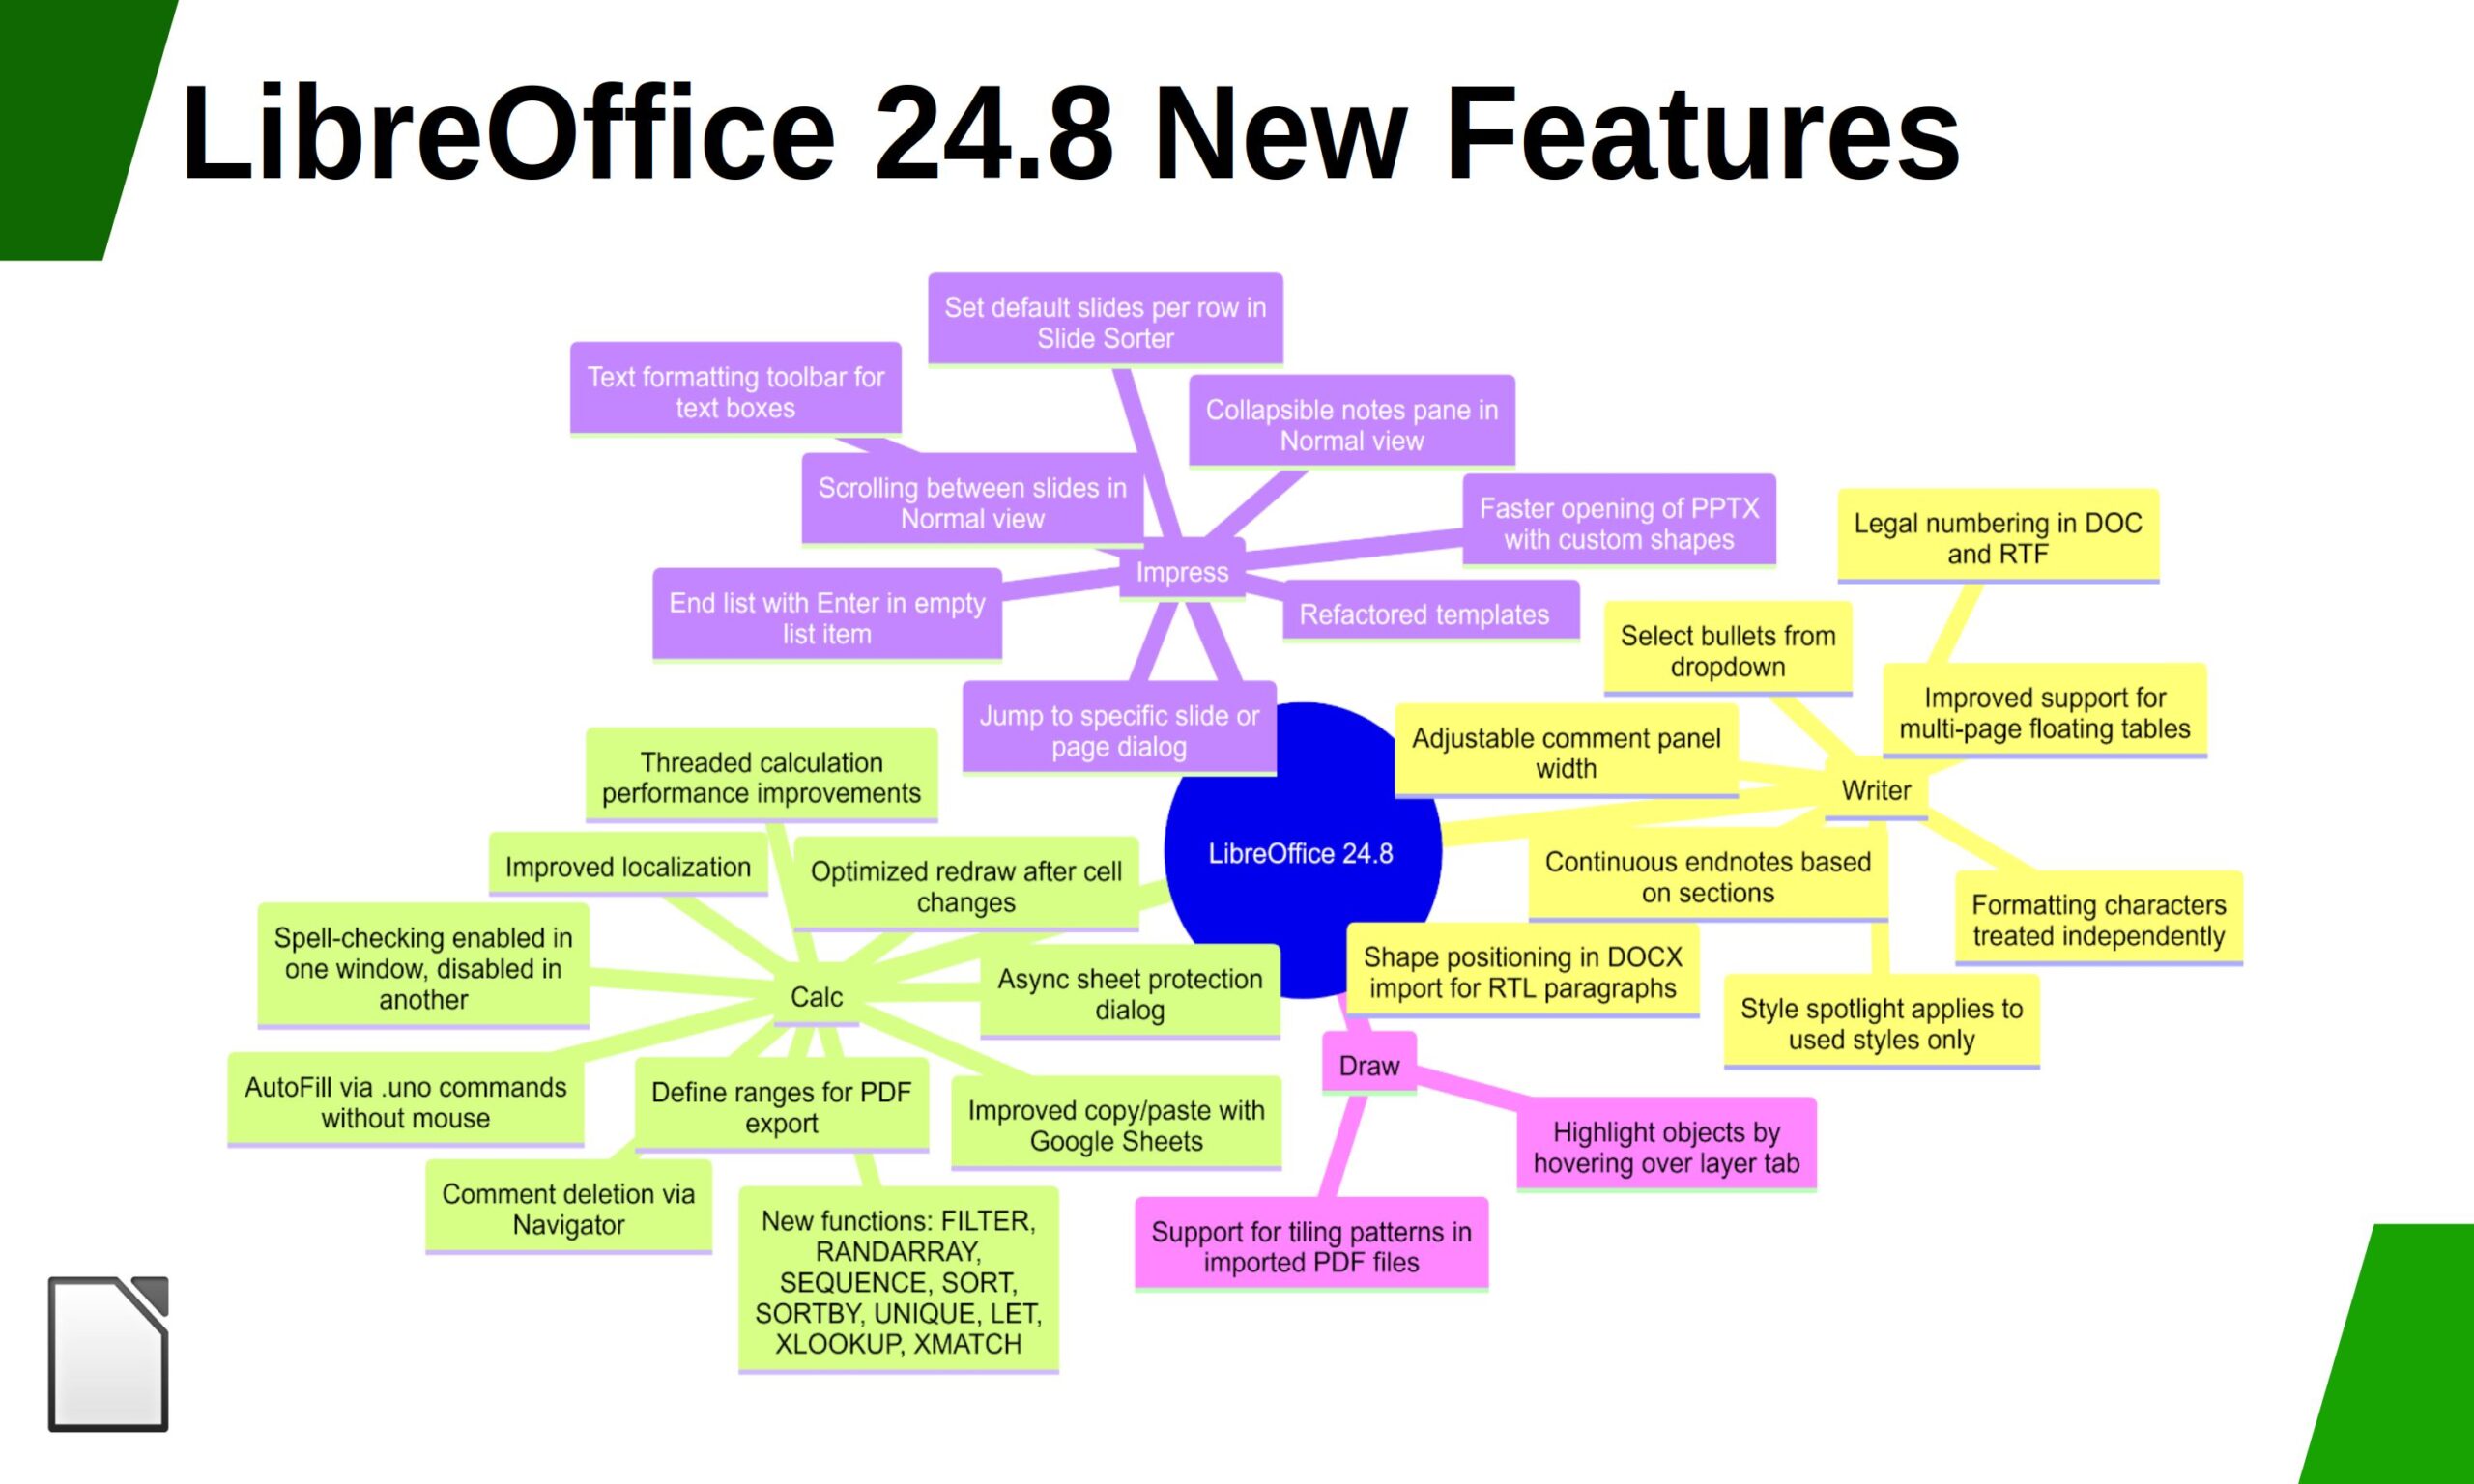
In addition, LibreOffice offers a range of interface options to suit different user habits, from traditional to modern, and makes the most of different screen sizes by optimising the space available on the desktop to put the maximum number of features just a click or two away.
The biggest advantage over competing products is the LibreOffice Technology Engine, the single software platform on which desktop, mobile and cloud versions of LibreOffice – including those from ecosystem companies – are based. This allows LibreOffice to provide a better user experience and to produce identical and fully interoperable documents based on the two available ISO standards: the Open Document Format (ODT, ODS and ODP) and the proprietary Microsoft OOXML (DOCX, XLSX and PPTX). The latter hides a great deal of artificial complexity, which can cause problems for users who are confident that they are using a true open standard.
End users looking for support will be helped by the immediate availability of the LibreOffice 24.8 Getting Started Guide, which can be downloaded from the following link: books.libreoffice.org. In addition, they will be able to get first-level technical support from volunteers on the user mailing lists and the Ask LibreOffice website: ask.libreoffice.org.
A short video highlighting the main new features is available on YouTube and PeerTube peertube.opencloud.lu/w/ibmZUeRgnx9bPXQeYUyXTV.
Please confirm that you want to play a YouTube video. By accepting, you will be accessing content from YouTube, a service provided by an external third party.
If you accept this notice, your choice will be saved and the page will refresh.
LibreOffice for Enterprise
For enterprise-class deployments, TDF strongly recommends the LibreOffice Enterprise family of applications from ecosystem partners – for desktop, mobile and cloud – with a wide range of dedicated value-added features and other benefits such as SLAs: www.libreoffice.org/download/libreoffice-in-business/.
Every line of code developed by ecosystem companies for enterprise customers is shared with the community on the master code repository and improves the LibreOffice technology platform. Products based on LibreOffice Technology are available for all major desktop operating systems (Windows, macOS, Linux and ChromeOS), mobile platforms (Android and iOS) and the cloud.
The Document Foundation has developed a migration protocol to help companies move from proprietary office suites to LibreOffice, based on the provision of an LTS (long-term support) enterprise-optimised version of LibreOffice, plus migration consulting and training provided by certified professionals who offer value-added solutions that are consistent with proprietary offerings. Reference: www.libreoffice.org/get-help/professional-support/.
In fact, LibreOffice’s mature code base, rich feature set, strong support for open standards, excellent compatibility and LTS options from certified partners make it the ideal solution for organisations looking to regain control of their data and break free from vendor lock-in.

LibreOffice 24.8.1 availability
LibreOffice 24.8.1 is available from www.libreoffice.org/download/. Minimum requirements for proprietary operating systems are Microsoft Windows 7 SP1 (no longer supported by Microsoft) and Apple macOS 10.15. Products based on LibreOffice technology for Android and iOS are listed at www.libreoffice.org/download/android-and-ios/.
LibreOffice users, free software advocates and community members can support The Document Foundation by making a donation at www.libreoffice.org/donate.
Ubuntu Users Get Easier Access to Cutting-Edge Intel Drivers [OMG! Ubuntu!]
 Canonical and Intel have announced they’re making it easier for Ubuntu users to get cutting-edge drivers for Intel’s newest discrete GPUs. The effort brings “ray tracing and improved machine learning performance” for Intel Arc B580 and B570 “Battlemage” discrete GPUs to users on Ubuntu 24.10, building on that releases’ preexisting support for Intel Core Ultra Xe2 iGPUs. “For the past decade, Ubuntu has been one of the first distributions to enable the latest Intel architectures. Building upon this strong collaboration, Intel and Canonical are excited to announce the availability of an Ubuntu graphics preview for [24.10]”, they say. Users with […]
You're reading Ubuntu Users Get Easier Access to Cutting-Edge Intel Drivers, a blog post from OMG! Ubuntu. Do not reproduce elsewhere without permission.
Daniel Roy Greenfeld: TIL: types.SimpleNamespace is a Bunch class [Planet Python]
Did you know that Python's types library has a bunch class implementation? How did I not see this before?!
PyCoder’s Weekly: Issue #661 (Dec. 24, 2024) [Planet Python]
#661 – DECEMBER 24, 2024
View in Browser »

Exploring Modern Sentiment Analysis Approaches in Python
What are the current approaches for analyzing emotions within a piece of text? Which tools and Python packages should you use for sentiment analysis? This week, Jodie Burchell, developer advocate for data science at JetBrains, returns to the show to discuss modern sentiment analysis in Python.
REAL PYTHON podcast
Topological Sort
A Directed Acyclic Graph (DAG) is a common data structure used to contain a series of related items that must have certain order or dependency. Topological sorting is used to help find where you might start processing to get in order handling of the items in a DAG.
REDOWAN DELOWAR
Essential Python Web Security
This series explores the critical security principles every Python web developer needs. The first post delves into fundamental security best practices, ranging from general principles to specific Python-related techniques.
MICHAEL FORD
Quiz: How to Remove Items From Lists in Python
In this quiz, you’ll test your understanding of removing items from lists in Python. This is a fundamental skill in Python programming, and mastering it will enable you to manipulate lists effectively.
REAL PYTHON
Articles & Tutorials
Programming Sockets in Python
In this in-depth video course, you’ll learn how to build a socket server and client with Python. By the end, you’ll understand how to use the main functions and methods in Python’s socket module to write your own networked client-server applications.
REAL PYTHON course
Python Decorators: A Super Useful Feature
Python decorators are one of Hashim’s favorite features. This post covers some examples he’s used in his projects. It includes the Prometheus Histogram Timing Decorators and OpenTelemetry (OTel) Manual Span Decorators.
HASHIM COLOMBOWALA
A Practical Example of the Pipeline Pattern in Python
“The pipeline design pattern (also known as Chain of Command pattern) is a flexible way to handle a sequence of actions, where each handler in the chain processes the input and passes it to the next handler.”
JUAN JOSÉ EXPÓSITO GONZÁLEZ
Best Shift-Left Testing Tools to Improve Your QA
The later in your development process that you discover the bug the more expensive it is. Shift-Left Testing is a collection of techniques to attempt to move bug discovery earlier in your process.
ANTONELLO ZANINI
Merging Dictionaries in Python
There are multiple ways of merging two or more dictionaries in Python. This post teaches you how to do it and how to deal with corner cases like duplicate keys.
TREY HUNNER
Django Quiz 2024
Adam runs a quiz on Django at his Django London meetup. He’s shared it so you can try it yourself. Test how much you know about your favorite web framework.
ADAM JOHNSON
Top Python Web Development Frameworks in 2025
This post compares many of the different web frameworks available for Python. It covers: Reflex, Django, Flask, Gradio, Streamlit, Dash, and FastAPI.
TOM GOTSMAN
My SQLAlchemy Cookbook
The post contains an embedded JupyterLite notebook containing a cookbook for SQLAlchemy. It focuses on the patterns you use in everyday ORM coding.
JAMIE CHANG
Django: Launch pdb When a Given SQL Query Runs
Here’s a technique for using pdb within Django through hooking specific SQL queries. This uses database instrumentation in the Django ORM.
ADAM JOHNSON
Projects & Code
Events
SPb Python Drinkup
December 26, 2024
MEETUP.COM
PyDelhi User Group Meetup
December 28, 2024
MEETUP.COM
PythOnRio Meetup
December 28, 2024
PYTHON.ORG.BR
Python Sheffield
December 31, 2024
GOOGLE.COM
STL Python
January 2, 2025
MEETUP.COM
Happy Pythoning!
This was PyCoder’s Weekly Issue #661.
View in Browser »
[ Subscribe to 🐍 PyCoder’s Weekly 💌 – Get the best Python news, articles, and tutorials delivered to your inbox once a week >> Click here to learn more ]
Django Weblog: Welcome to our new Django accessibility team members - Eli, Marijke, Saptak, Tushar [Planet Python]
Sarah Abderemane, Thibaud Colas and Tom Carrick are pleased to introduce four new members in the Django Accessibility team ❤️.


Marijke (pronounced Mah-Rye-Kuh) is a freelance web developer who creates human-friendly applications. She is based in Groningen, The Netherlands, specializing in Django, Python, HTML, SCSS, and vanilla JavaScript. She helps companies expand their existing projects, think about new features, train new developers, and improve developer team workflows. She is aDdjango contributor from the first session of Djangonaut Space program and she loves tea. You can learn more about Marijke on her website.
Eli is a full-stack developer from Uruguay who loves using Django and React. She is a Django contributor from the first session of the Djangonaut Space program
. She is passionate about good quality code, unit testing, and web accessibility. She enjoys drinking Maté (and talking about it!) and watching her football team play.Tushar is a software engineer at Canonical, based in India. He got involved on open source during his studies loving the the supportive community. Through fellowships like Major League Hacking, Tushar dove into Django and took part in Djangonaut Space. Learn more about Tushar on his personal website.
Saptak is a self-proclaimed Human Rights Centered Developer Web. He focuses on security, privacy, accessibility, localization, and other human rights associated with websites that makes websites more inclusive and usable by everyone. Learn more about Saptak on his personal website.
Listen to them talking about their work
Here are recent talks or podcasts from our new team members if you want to get to know them better.
 Marijke Luttekes - My path to becoming a Django contributor | pyGrunn 2024
 Eli Rosselli - My step-by-step guide to becoming a Django core contributor | DjangoCon Europe 2024
 Tushar Gupta - Djangonauts, Ready for Blast-Off | Talk Python to Me Ep.451
 Saptak S - Accessibility for the Django Community | DjangoCon Europe 2024
What’s next
In truth, our four new accessibility team members joined the team months ago – shortly after we published our 2023 accessibility team report. Up next, a lot of the team will be present at FOSDEM 2025, organizing, volunteering, or speaking at the Inclusive Web Devroom.
Talk Python to Me: #490: Django Ninja [Planet Python]
If you're a Django developer, I'm sure you've heard so many people raving about FastAPI and Pydantic. But you really love Django and don't want to switch. Then you might want to give Django Ninja a serious look. Django Ninja is highly inspired by FastAPI, but is also deeply integrated into Django itself. We have Vitaliy Kucheryaviy the creator of Django Ninja on this show to tell us all about it.<br/> <br/> <strong>Episode sponsors</strong><br/> <br/> <a href='https://talkpython.fm/sentry'>Sentry Error Monitoring, Code TALKPYTHON</a><br> <a href='https://talkpython.fm/bluehost'>Bluehost</a><br> <a href='https://talkpython.fm/training'>Talk Python Courses</a><br/> <br/> <h2>Links from the show</h2> <div><strong>Vitaly</strong>: <a href="https://github.com/vitalik?featured_on=talkpython" target="_blank" >github.com/vitalik</a><br/> <strong>Vitaly on X</strong>: <a href="https://x.com/vital1k?featured_on=talkpython" target="_blank" >@vital1k</a><br/> <br/> <strong>Top 5 Episodes of 2024</strong>: <a href="https://talkpython.fm/blog/posts/top-talk-python-podcast-episodes-of-2024/" target="_blank" >talkpython.fm/blog/posts/top-talk-python-podcast-episodes-of-2024</a><br/> <br/> <strong>Django Ninja</strong>: <a href="https://django-ninja.dev/?featured_on=talkpython" target="_blank" >django-ninja.dev</a><br/> <strong>Motivation section we talked through</strong>: <a href="https://django-ninja.dev/motivation/?featured_on=talkpython" target="_blank" >django-ninja.dev/motivation</a><br/> <strong>LLM for Django Ninja</strong>: <a href="https://llm.django-ninja.dev/?featured_on=talkpython" target="_blank" >llm.django-ninja.dev</a><br/> <strong>Nano Django</strong>: <a href="https://github.com/vitalik/nano-django?featured_on=talkpython" target="_blank" >github.com/vitalik/nano-django</a><br/> <strong>Episode transcripts</strong>: <a href="https://talkpython.fm/episodes/transcript/490/django-ninja" target="_blank" >talkpython.fm</a><br/> <br/> <strong>--- Stay in touch with us ---</strong><br/> <strong>Subscribe to Talk Python on YouTube</strong>: <a href="https://talkpython.fm/youtube" target="_blank" >youtube.com</a><br/> <strong>Talk Python on Bluesky</strong>: <a href="https://bsky.app/profile/talkpython.fm" target="_blank" >@talkpython.fm at bsky.app</a><br/> <strong>Talk Python on Mastodon</strong>: <a href="https://fosstodon.org/web/@talkpython" target="_blank" ><i class="fa-brands fa-mastodon"></i>talkpython</a><br/> <strong>Michael on Bluesky</strong>: <a href="https://bsky.app/profile/mkennedy.codes?featured_on=talkpython" target="_blank" >@mkennedy.codes at bsky.app</a><br/> <strong>Michael on Mastodon</strong>: <a href="https://fosstodon.org/web/@mkennedy" target="_blank" ><i class="fa-brands fa-mastodon"></i>mkennedy</a><br/></div>
24-12-2024
12:23
Kdenlive Update Adds New Subtitle Tools, Effects + More [OMG! Ubuntu!]
 A sizeable update to the free, open-source video editor Kdenlive is now available to download. Kdenlive 24.12 arrives stuffed like a seasonal bird with bug fixes, performance tweaks, and usability enhancements. Additionally, the editor’s developers have removed support for Qt5 so that, as of this release, it is entirely Qt6. Subtitling gets a big boost with the arrival of Advanced SubStation Alpha (ASS) subtitle support. The key benefit of these subtitles (I’ll swerve calling them ASS) is greater customisation, including things like text strokes, drop shadows, margins, and even effects like masking. A new Subtitle Manager makes editing, ordering, and […]
You're reading Kdenlive Update Adds New Subtitle Tools, Effects + More, a blog post from OMG! Ubuntu. Do not reproduce elsewhere without permission.
Daniel Roy Greenfeld: TIL: SequentialTaskSet for Locust [Planet Python]
SequentialTaskSet makes it so Locust tasks happen in a particular order, which ensures your simulated users are clicking around in a more human manner at a more human pace. Attribution goes to Audrey Roy Greenfeld.
You can see it in action in the now updated previous entry on the topic of Locust for load testing.
Daniel Roy Greenfeld: TIL: Making pytest use Ipython's PDB [Planet Python]
alias pdb='pytest --pdb --pdbcls=IPython.terminal.debugger:TerminalPdb'
Usage:
pdb tests/test_things::test_broken_thing
Daniel Roy Greenfeld: TIL: Fractional Indexing [Planet Python]
In the past when I've done this for web pages and various other interfaces it has been a mess. I've built ungainly sort order in numeric or alphanumeric batches. Inevitably there is a conflict, often sooner rather than later. So sorting a list of things often means updating all the elements to preserve the order in the datastore. I've learned to mark each element with a big value, but it's ugly and ungainly
Fortunately for me, going forward, I now know about Fractional Indexing.
References:
- https://www.figma.com/blog/realtime-editing-of-ordered-sequences/
- https://observablehq.com/@dgreensp/implementing-fractional-indexing
- https://github.com/httpie/fractional-indexing-python
Daniel Roy Greenfeld: TIL: Python Dictonary Merge Operator [Planet Python]
The function way
Until today I did this:
# Make first dict
num_map = {
    'one': '1', 'two': '2', 'three': '3', 'four': '4',
    'five': '5', 'six': '6', 'seven': '7', 'eight': '8',
    'nine': '9'
}
# Add second dict
num_map.update({str(x):str(x) for x in range(1,10)})
print(num_map)
The operator way
Now thanks to Audrey Roy Greenfeld now I know I can do this:
# Make first dict while adding second dict
num_map = {
    'one': '1', 'two': '2', 'three': '3', 'four': '4',
    'five': '5', 'six': '6', 'seven': '7', 'eight': '8',
    'nine': '9'
} | {str(x):str(x) for x in range(1,10)}
print(num_map)
Daniel Roy Greenfeld: TIL: Python's defaultdict takes a factory function [Planet Python]
I've never really paid attention to this object but maybe I should have. It takes a single argument of a callable function. If you put in Python types it sets the default value to those types. For example, if I use an int at the instantiating argument then it gives us a zero.
>>> from collections import defaultdict
>>>
>>> mydict = defaultdict(int)
>>> print(mydict['anykey'])
0
Note that defaultdict also act like regular dictionaries, in that you can set keys. So mydict['me'] = 'danny' will work as you expect it to with a standard dictionary.
It gets more interesting if we pass in a more dynamic function. In the exmaple below we use random.randint and a lambda to make the default value be a random number between 1 and 100.
>>> from random import randint
>>>
>>> random_values = defaultdict(lambda: randint(1,100))
Let's try it out!
>>> for i in range(5):
>>>     print(random_values[i])
>>> print(random_values)
29
90
56
42
70
defaultdict(<function <lambda> at 0x72d292bb6de0>, {0: 29, 1: 90, 2: 56, 3: 42, 4: 70})
Attribution goes to Laksman Prasad, who pointing this out and encouraging me to closer look at defaultdict.
Daniel Roy Greenfeld: TIL: How to reset Jupyter notebook passwords [Planet Python]
jupyter notebook password
Attribution for this goes to Johno Whitaker.
Daniel Roy Greenfeld: TIL: Arity [Planet Python]
I'm excited to have learned there's a word for the count of arguments to a function/method/class: arity. Throughout my career I would have called this any of the following:
number_of_argsparam_countnumargsintArgumentCount
Thanks to Simon Willison for using it in a library or two and making me look up the word.
Daniel Roy Greenfeld: TIL: Using hx-swap-oob with FastHTML [Planet Python]
Until now I didn't use this HTMX technique, but today Audrey Roy Greenfeld and I dove in together to figure it out. Note that we use language that may not match HTMX's description, sometimes it's better to put things into our own words so we understand it better.
from fasthtml.common import *

app,rt = fast_app()

def mk_row(name, email):
    return Tbody(
        # Only the Tr element and its children is being
        # injected, the Tbody isn't being injected
        Tr(Td(name), Td(email)),
        # This tells HTMX to inject this row at the end of
        # the #contacts-tbody DOM element
        hx_swap_oob="beforeend:#contacts-tbody",
    ),

@rt
def index():
    return Div(
            H2("Contacts"),
            Table(
                Thead(Tr(Th("Name"), Th("Email"))),
                Tbody(
                    Tr(Td("Audrey"), Td("mommy@example.com")),
                    Tr(Td("Uma"), Td("kid@example.com")),
                    Tr(Td("Daniel"), Td("daddy@example.com")),
                    # Identifies the contacts-tbody DOM element
                    id="contacts-tbody",
                ),
            ),
            H2("Add a Contact"),
            Form(
                Label("Name", Input(name="name", type="text")),
                Label("Email", Input(name="email", type="email")),
                Button("Save"),
                hx_post="/contacts",
                # Don't swap out the contact form
                hx_swap='none',
                # Reset the form and put focus onto the name field
                hx_on__after_request="this.reset();this.name.focus();"
            )
        )

@rt
def contacts(name:str,email:str):
    print(f"Adding {name} and {email} to table")
    return mk_row(name,email)

serve()
To verify the behavior, view the rendered elements in your browser of choice before, after, and during submitting the form.
Daniel Roy Greenfeld: TIL: Autoreload for Jupyter notebooks [Planet Python]
Add these commands to the top of a notebook within a Python cell. Thanks to Jeremy Howard for the tip.
%load_ext autoreload
%autoreload 2
Daniel Roy Greenfeld: TIL: run vs source [Planet Python]
Run
A run launches a child process in a new bash within bash, so variables last only the lifetime of the command. This is why launching Python environments doesn't use run.
./list-things.sh
Source
A source is the current bash, so variables last beyond the running of a script. This is why launching Python environments use source.
source ~/.venv/bin/activate
Daniel Roy Greenfeld: Using locust for load testing [Planet Python]
Locust is a Python library that makes it relatively straightforward to write Python tests. This heavily commented code example explains each section of code. To use locust:
- Install locust:
pip install locust - Copy the file below into the directory where you want to run locust
- In that directory, at the command-line, type:
locust - Open http://localhost:8089/
# locustfile.py
# For more options read the following
#   - https://docs.locust.io/en/stable/writing-a-locustfile.html
#   - https://docs.locust.io/en/stable/tasksets.html

# Import Locust basics
from locust import HttpUser, SequentialTaskSet, task, between

# Imports for generating content
from string import ascii_letters
from random import randint, shuffle

def namer():
    "Create a random string of letters under 10 characters long"
    ascii_list = list(ascii_letters)
    shuffle(ascii_list)
    return ''.join(ascii_list[:10])

class TaskSet(SequentialTaskSet):
    """
    A class for organizing tasks, inheriting from
    SequentialTaskSet means the tasks happen in order.
    """

    def on_start(self):
        # Methods with the on_start name will be called for each
        # simulated user when they start. Useful for logins and
        # other 'do before doing all other things'.
        pass

    def on_stop(self):
        # Methods with the on_stop name will be called for each
        # simulated user when they stop. Useful for logouts and
        # possibly data cleanup.
        pass

    # TASKS!
    # Methods marked with the `@task` decorator is an action
    # taken by a user This example focuses on changes to a
    # database, but provides a foundation for creating tests on
    # a more read-focused site

    @task
    def index(self):
        # User goes to the root of the project
        self.client.get('/')

    @task
    def create(self):
        # User posts a create form with the fields 'name'
        # and 'age'
        with self.client.post('/create', dict(name=namer(), age=randint(1,35))) as resp:
            self.pk =  resp.text

    @task
    def update(self):
        # User posts an update form with the fields 'name'
        # and 'age'"
        form_data = dict(id=self.pk, name=namer(), age=randint(1,35))
        self.client.post(f'/{self.pk}/update', form_data)

    @task
    def delete(self):
        # Represents the user getting a random ID and then
        # going to the delete page for it.
        self.client.get(f'/{self.pk}/delete')

class CatsiteUser(HttpUser):
    """
    This class represents simulated users interacting with
    a website.
    """
    # What tasks should be done
    tasks = [TaskSet]
    # how long between clicks a user should take
    wait_time = between(2, 5)
    # The default host of the target client. This can be changed
    # at any time
    host = 'http://localhost:5001/'
Sample test site
For reference, this is the test site used to create the above locustfile. I'll admit that the above test is incomplete, a lot more tasks could be added to hit web routes. To use it:
- Install FastHTML:
pip install python-fasthtml - Copy the file into the directory you want to run it
- In that directory, at the command-line, type:
python cats.py - Open http://localhost:5001/
# cats.py
from fasthtml.common import *

# Set up the database and table
db = database('cats.db')
class Cat: name:str; age:int; id:int
cats = db.create(Cat, pk='id', transform=True)

# Instantiate FastHTML app and route handler
app, rt = fast_app()

def mk_form(target: str):
    return Form(
            P(A('Home', href=index)),
            Fieldset(
                Input(name='name'),
                Input(name='age', type='number'),

            ),
            Input(type='submit', value='submit'),
            method='post'
        )

def cat_count():
    query = """select count(id) from cat;"""
    result = db.execute(query)
    return result.fetchone()[0]

@rt
def index():
    return Titled('Cats',
        P(A('Create cat', href='/create'), NotStr(' '), A('Random ID', href=random)),
        P(f'Number of cats: {cat_count()}'),
        Ol(
            *[Li(A(f'{d.name}:{d.age}', href=f'/{d.id}')) for d in cats()]
        )
    )

@rt
def random():
    # Small datasets so we can get away with using the RANDOM() function here
    query = """SELECT id FROM cat ORDER BY RANDOM() LIMIT 1;"""
    result = db.execute(query)
    return result.fetchone()[0]

@rt('/create')
def get():
    return Titled('Create Cat',
        mk_form('/create')
    )

@rt('/create')
def post(cat: Cat):
    while True:
        try:
            cat = cats.insert(Cat(name=cat.name, age=cat.age))
            break
        except Exception as e:
            print(e)
            raise
    return cat.id

@rt('/{id}')
def cat(id: int):
    cat = cats[id]
    return Titled(cat.name,
        P(cat.age),
        P(A('update', href=f'/{id}/update')),
        P(A('delete', href=f'/{id}/delete')),
    )


@rt('/{id}/update')
def get(id: int):
    cat = cats[id]
    return Titled('Edit Cat',
        fill_form(mk_form(f'/{cat.id}/update'), cat)
    )

@rt('/{id}/update')
def post(cat: Cat, id: int):
    if id not in cats:
        return RedirectResponse(url=index)
    cat.id = id
    db.begin()
    try:
        cats.update(cat)
        db.commit()
    except:
        db.rollback()
    return RedirectResponse(url=f'/{cat.id}')

@rt('/{id}/delete')
def cat(id: int):
    if id not in cats:
        RedirectResponse(url=index)
    # db.begin()
    cats.delete(id)
    # db.commit()
    return RedirectResponse(url=index)

serve()
Updates
- 2024-11-08 Use
SequentialTaskSetas recommended by Audrey Roy Greenfeld - 2024-11-08 Fixed a few bugs in cats.py
Daniel Roy Greenfeld: TIL: Using Python to removing prefixes and suffixes [Planet Python]
Starting in Python 3.9, s.removeprefix() and s.removesuffix() were added as str built-ins. Which easily covers all the versions of Python I currently support.
Usage for removeprefix():
>>> 'Spam, Spam'.removeprefix('Spam')
', Spam'
>>> 'Spam, Spam'.removeprefix('This is not in the prefix')
'Spam, Spam'
Usage for removesuffix():
>>> 'Spam, Spam'.removesuffix('Spam')
'Spam, '
>>> 'Spam, Spam'.removesuffix('This is not in the suffix')
'Spam, Spam'
Juri Pakaste: New Swift Package: tui-fuzzy-finder [Planet Python]
Speaking of new Swift libraries, I released another one: tui-fuzzy-finder is a terminal UI library for Swift that provides an incremental search and selection UI that imitates the core functionality of fzf very closely.
I have a ton of scripts that wrap fzf. Some of them try to provide some kind of command line interface with options. Most of them work with pipes where I fetch data from somewhere, parse it with jq, feed it fzf, use the selection again as a part of a parameter for something else, etc. It's all great, except that I really don't love shell scripting.
With tui-fuzzy-finder I want to be able to write tools like that in a language I do actually enjoy a great deal. The package provides both a command line tool and a library, but the purpose of the command line tool is just to allow me to test the library, as writing automatic tests for terminal control is difficult. Competing with fzf in the general purpose CLI tool space is a non-goal.
I haven't implemented the preview features of fzf, nor key binding configuration. I'm not ruling either of those out, but I have not needed them yet and don't plan to work on them before a need arises.
Documentation at Swift Package Index.
23-12-2024
11:43
Mozilla Revenue Jumped in 2023, But Search Deal Cash Fell [OMG! Ubuntu!]
![]() Mozilla’s overall revenue saw a sizeable boost in 2023, despite a drop in income from its lucrative search engine deals. According to its latest financial report, Mozilla’s revenue in 2023 hit ~$653 million (US), up from ~$593 million in 2022. The cause of the increase? Not any flashy new products, services, or deals – just ol’ fashioned interest and dividends (~$47 million) and returns on its investments (~$24 million). In fact, Mozilla’s income from search engine deals actually fell by ~$15 million in 2023. Revenue from ads, sponsored links, and its own product subscriptions (like Pocket) also dipped by ~$9 […]
Mozilla’s overall revenue saw a sizeable boost in 2023, despite a drop in income from its lucrative search engine deals. According to its latest financial report, Mozilla’s revenue in 2023 hit ~$653 million (US), up from ~$593 million in 2022. The cause of the increase? Not any flashy new products, services, or deals – just ol’ fashioned interest and dividends (~$47 million) and returns on its investments (~$24 million). In fact, Mozilla’s income from search engine deals actually fell by ~$15 million in 2023. Revenue from ads, sponsored links, and its own product subscriptions (like Pocket) also dipped by ~$9 […]
You're reading Mozilla Revenue Jumped in 2023, But Search Deal Cash Fell, a blog post from OMG! Ubuntu. Do not reproduce elsewhere without permission.
22-12-2024
10:17
T2 Linux SDE 24.12 'Sky's the Limit!' Released With 37 ISOs For 25 CPU ISAs [Slashdot: Linux]
Berlin-based T2 Linux developer René Rebe is also long-time Slashdot reader ReneR — and popped by with a special announcement for the holidays: The T2 Linux team has unveiled T2 Linux SDE 24.12, codenamed "Sky's the Limit!", delivering a massive update for this highly portable source-based Linux distribution... With 3,280 package updates, 206 new features, and the ability to boot on systems with as little as 512MB RAM, this release further strengthens T2 Linux's position as the ultimate tool for developers working across diverse hardware and embedded systems. Some highlights from Rene's announcement: "The release includes 37 pre-compiled ISOs with Glibc, Musl, and uClibc, supporting 25 CPU architectures like ARM(64), RISCV(64), Loongarch64, SPARC(64), and vintage retro computing platforms such as M68k, Alpha, and even initial Nintendo Wii U support added." " The Cosmic Desktop, a modern Rust-based environment, debuts alongside expanded application support for non-mainstream RISC architectures, now featuring LibreOffice, OpenJDK, and QEMU." And T2sde.org gives this glimpse of the future: "While initially created for the Linux kernel, T2 already has proof-of-concept support for building 'home-brew' pkg for Other OS, including: BSDs, macOS and Haiku. Work on alternative micro kernels, such as L4, Fuchsia, RedoxOS or integrating building 'AOSP' Android is being worked on as well."
Read more of this story at Slashdot.
21-12-2024
17:55
VMware Workstation Pro Update Brings Linux Fixes [OMG! Ubuntu!]
![]() Broadcom has released updates for VMware Workstation Pro for Windows and Linux, the first to arrive since the software became entirely free to use. Earlier this year, Broadcom made VMware Workstation Pro and its Mac equivalent Fusion Pro free for personal usage, and later for commercial usage. Anyone can download and install VMware’s desktop virtualisation software to use for whatever they want. — Assuming they have the patience to wade through rerouting links, portals, checkboxes, and dense documentation sites to locate the actual download. A blog post from a VMware team member walks through the 11 step (!) process. As […]
Broadcom has released updates for VMware Workstation Pro for Windows and Linux, the first to arrive since the software became entirely free to use. Earlier this year, Broadcom made VMware Workstation Pro and its Mac equivalent Fusion Pro free for personal usage, and later for commercial usage. Anyone can download and install VMware’s desktop virtualisation software to use for whatever they want. — Assuming they have the patience to wade through rerouting links, portals, checkboxes, and dense documentation sites to locate the actual download. A blog post from a VMware team member walks through the 11 step (!) process. As […]
You're reading VMware Workstation Pro Update Brings Linux Fixes, a blog post from OMG! Ubuntu. Do not reproduce elsewhere without permission.
5 Compelling Reasons to Choose Linux Over Windows [Linux Journal - The Original Magazine of the Linux Community]

Introduction
In the world of operating systems, Windows has long held the lion’s share of the market. Its user-friendly interface and wide compatibility have made it the default choice for many. However, in recent years, Linux has steadily gained traction, challenging the status quo with its unique offerings. What was once considered the domain of tech enthusiasts and developers is now being embraced by businesses, governments, and everyday users alike. But why should you consider switching to Linux? Let’s dive into five compelling reasons to embrace Linux over Windows.
Reason 1: Cost-Effectiveness
One of the most striking advantages of Linux is its cost-effectiveness. Linux is free and open-source, meaning you can download, install, and use it without paying a single penny. This stands in stark contrast to Windows, which requires users to purchase a license. Additionally, enterprise versions of Windows often come with recurring fees, further inflating the cost.
Linux doesn’t just save money on the operating system itself. There are no hidden costs for updates or essential tools. For example, most Linux distributions come pre-installed with a wealth of software—from office suites to development tools—that would otherwise cost extra on Windows. Businesses, in particular, stand to save significant amounts by switching their systems to Linux, eliminating licensing fees and reducing the need for expensive proprietary software.
Reason 2: Security and Privacy
In today’s digital age, security and privacy are paramount. Linux has a stellar reputation in both areas. Its architecture is inherently secure, designed to protect against malware and unauthorized access. Unlike Windows, which is frequently targeted by hackers due to its widespread use, Linux is far less susceptible to viruses and malware. In the rare event of a security breach, the open-source community quickly patches vulnerabilities, often faster than proprietary software vendors.
Privacy is another key area where Linux shines. Unlike Windows, which has faced criticism for data collection practices, Linux respects user privacy. Most Linux distributions collect little to no data, and because the source code is open, users can audit it to ensure there are no hidden backdoors or invasive tracking mechanisms.
Reason 3: Customizability
Linux is synonymous with freedom and flexibility. Unlike Windows, where customization options are limited to surface-level changes like themes and wallpapers, Linux offers deep customization. From choosing the desktop environment to tweaking system-level configurations, Linux allows users to mold their systems to suit their exact needs.
20-12-2024
10:39
Ubuntu Adds Support for Unicode’s Newest Emoji [OMG! Ubuntu!]
 A paint splatter, super-tired face, and a harp are among new emoji users of Ubuntu 22.04 and 24.04 LTS will be able to see and type after installing an update to the Noto Color Emoji font. Ubuntu, which has shipped the font by default since 2017, is preparing to release an updated version containing the 8 new emoji added as part of the Unicode 16.0 standard. Unicode 16.0 went live in September, introducing a total of 5,185 new characters, including 7 new emoji code points and 1 new emoji sequence to create the official flag of the Island of Sark. The new […]
You're reading Ubuntu Adds Support for Unicode’s Newest Emoji, a blog post from OMG! Ubuntu. Do not reproduce elsewhere without permission.
19-12-2024
21:05
LibreOffice 24.8.4, optimised for the privacy-conscious user, is available for download [Press Releases Archives - The Document Foundation Blog]
Berlin, 19 December 2024 – LibreOffice 24.8.4, the fourth minor release of the LibreOffice 24.8 family of the free open source, volunteer-supported office suite for Windows (Intel, AMD and ARM), MacOS (Apple and Intel) and Linux, is available at www.libreoffice.org/download.
The release includes over 55 bug and regression fixes over LibreOffice 24.8.3 [1] to improve the stability and robustness of the software, as well as interoperability with legacy and proprietary document formats.
LibreOffice is the only office suite that respects the privacy of the user, ensuring that the user is able to decide if and with whom to share the content they create. It even allows deleting user related info from documents. As such, LibreOffice is the best option for the privacy-conscious office suite user, while offering a feature set comparable to the leading product on the market.
Also, LibreOffice offers a range of interface options to suit different user habits, from traditional to modern, and makes the most of different screen sizes by using all the space available on the desktop to put the maximum number of features just a click or two away.
The biggest advantage over competing products is the LibreOffice Technology engine, the single software platform on which desktop, mobile and cloud versions of LibreOffice – including those from ecosystem companies – are based.
This allows LibreOffice to produce identical and fully interoperable documents based on two ISO standards: the open and neutral Open Document Format (ODT, ODS, ODP) and the closed and fully proprietary Microsoft OOXML (DOCX, XLSX, PPTX), which hides a large amount of artificial complexity, and can cause problems for users who are confident that they are using a true open standard.
End users looking for support can download the LibreOffice 24.8 Getting Started, Writer, Impress, Draw and Math guides from the following link: books.libreoffice.org/. In addition, they can get first-level technical support from volunteers on mailing lists and the Ask LibreOffice website: ask.libreoffice.org.
LibreOffice for Enterprise
For enterprise-class deployments, TDF strongly recommends the LibreOffice Enterprise family of applications from ecosystem partners, with three or five year backporting of security patches, other dedicated value-added features and Service Level Agreements: www.libreoffice.org/download/libreoffice-in-business/.
Every line of code developed by ecosystem companies for enterprise customers is shared with the community on the master code repository and improves the LibreOffice Technology platform. Products based on LibreOffice Technology are available for all major desktop operating systems (Windows, macOS, Linux and ChromeOS), mobile platforms (Android and iOS) and the cloud.
The Document Foundation’s migration protocol helps companies move from proprietary office suites to LibreOffice, by installing the LTS (long-term support) enterprise-optimised version of LibreOffice, plus consulting and training provided by certified professionals: www.libreoffice.org/get-help/professional-support/.
In fact, LibreOffice’s mature code base, rich feature set, strong support for open standards, excellent compatibility and LTS options make it the ideal solution for organisations looking to regain control of their data and break free from vendor lock-in.
LibreOffice 24.8.4 availability
 LibreOffice 24.8.4 is available from www.libreoffice.org/download/. Minimum requirements for proprietary operating systems are Microsoft Windows 7 SP1 (no longer supported by Microsoft) and Apple MacOS 10.15. Products for Android and iOS are at www.libreoffice.org/download/android-and-ios/.
Users of the LibreOffice 24.2 branch (the last update being 24.2.7), which has recently reached end-of-life, should consider upgrading to LibreOffice 24.8.4, as this is already the most tested version of the program. Early February will see the announcement of LibreOffice 25.2.
LibreOffice users, free software advocates and community members can support The Document Foundation by donating at www.libreoffice.org/donate.
Enterprise deploying LibreOffice can also donate, although the best solution for their needs would be to look for the enterprise optimized versions of the software (with Long Term Support for security and Service Level Agreements to protect their investment) at www.libreoffice.org/download/libreoffice-in-business/.
[1] Fixes in RC1: wiki.documentfoundation.org/Releases/24.8.4/RC1. Fixes in RC2: wiki.documentfoundation.org/Releases/24.8.4/RC2.
Announcement of LibreOffice 24.8.3, the office suite optimised for the privacy-conscious office suite user who wants full control over the information they share [Press Releases Archives - The Document Foundation Blog]
Berlin, 14 November 2024 – LibreOffice 24.8.3, the third minor release of the LibreOffice 24.8 family of the free open source, volunteer-supported office suite for Windows (Intel, AMD and ARM), MacOS (Apple and Intel) and Linux, is available at www.libreoffice.org/download.
The release includes over 80 bug and regression fixes over LibreOffice 24.8.2 [1] to improve the stability and robustness of the software, as well as interoperability with legacy and proprietary document formats. In addition, support for Visio template format VSTX has been added.
LibreOffice is the only office suite that respects the privacy of the user, ensuring that the user is able to decide if and with whom to share the content they create. It even allows deleting user related info from documents. As such, LibreOffice is the best option for the privacy-conscious office suite user, while offering a feature set comparable to the leading product on the market.
Also, LibreOffice offers a range of interface options to suit different user habits, from traditional to modern, and makes the most of different screen sizes by using all the space available on the desktop to put the maximum number of features just a click or two away.
The biggest advantage over competing products is the LibreOffice Technology engine, the single software platform on which desktop, mobile and cloud versions of LibreOffice – including those from ecosystem companies – are based.
This allows LibreOffice to produce identical and fully interoperable documents based on the two ISO standards: the Open Document Format (ODT, ODS, ODP) and the fully proprietary Microsoft OOXML (DOCX, XLSX, PPTX), which hides a large amount of artificial complexity, and can cause problems for users who are confident that they are using a true open standard.
End users looking for support can download the LibreOffice 24.8 Getting Started, Writer and Impress guides from the following link: /books.libreoffice.org/. In addition, they will be able to get first-level technical support from volunteers on mailing lists and the Ask LibreOffice website: ask.libreoffice.org.
LibreOffice for Enterprise
For enterprise-class deployments, TDF strongly recommends the LibreOffice Enterprise family of applications from ecosystem partners, with three or five year backporting of security patches, other dedicated value-added features and Service Level Agreements: www.libreoffice.org/download/libreoffice-in-business/.
Every line of code developed by ecosystem companies for enterprise customers is shared with the community on the master code repository and improves the LibreOffice Technology platform. Products based on LibreOffice Technology are available for all major desktop operating systems (Windows, macOS, Linux and ChromeOS), mobile platforms (Android and iOS) and the cloud.
The Document Foundation’s migration protocol helps companies move from proprietary office suites to LibreOffice, by installing the LTS (long-term support) enterprise-optimised version of LibreOffice, plus consulting and training provided by certified professionals: www.libreoffice.org/get-help/professional-support/.
In fact, LibreOffice’s mature code base, rich feature set, strong support for open standards, excellent compatibility and LTS options make it the ideal solution for organisations looking to regain control of their data and break free from vendor lock-in.
LibreOffice 24.8.3 availability
LibreOffice 24.8.3 is available from www.libreoffice.org/download/. Minimum requirements for proprietary operating systems are Microsoft Windows 7 SP1 (no longer supported by Microsoft) and Apple macOS 10.15. Products for Android and iOS are at www.libreoffice.org/download/android-and-ios/.
LibreOffice users, free software advocates and community members can support The Document Foundation by donating at www.libreoffice.org/donate.
Enterprise deploying LibreOffice can also donate, although the best solution for their needs would be to look for the enterprise optimized versions of the software (with Long Term Support for security and Service Level Agreements to protect their investment) at www.libreoffice.org/download/libreoffice-in-business/.
[1] Fixes in RC1: wiki.documentfoundation.org/Releases/24.8.3/RC1. Fixes in RC2: wiki.documentfoundation.org/Releases/24.8.3/RC2.
LibreOffice 24.2.7 is now available – the last release in the 24.2 branch [Press Releases Archives - The Document Foundation Blog]

Berlin, 31 October 2024 – LibreOffice 24.2.7, the seventh and final planned minor update to the LibreOffice 24.2 branch, is available on our download page for Windows, macOS and Linux.
The release includes over 50 bug and regression fixes over LibreOffice 24.2.6 [1] to improve the stability and robustness of the software, as well as interoperability with legacy and proprietary document formats. LibreOffice 24.2.7 is aimed at mainstream users and enterprise production environments.
LibreOffice is the only office suite with a feature set comparable to the market leader, and offers a range of user interface options to suit all users, from traditional to modern Microsoft Office-style. The UI has been developed to make the most of different screen form factors by optimizing the space available on the desktop to put the maximum number of features just a click or two away.
LibreOffice for Enterprises
For enterprise-class deployments, TDF strongly recommends the LibreOffice Enterprise family of applications from ecosystem partners – for desktop, mobile and cloud – with a range of dedicated value-added features, long term support and other benefits such as SLAs: LibreOffice in Business.
Every line of code developed by ecosystem companies for enterprise customers is shared with the community on the master code repository and contributes to the improvement of the LibreOffice Technology platform.
Availability of LibreOffice 24.2.7
LibreOffice 24.2.7 is available from our download page. Minimum requirements for proprietary operating systems are Windows 7 SP1 and macOS 10.15. Products based on LibreOffice Technology for Android and iOS are listed here: www.libreoffice.org/download/android-and-ios/.
This is planned to be the last minor update to the LibreOffice 24.2 branch, which reaches end-of-life in November. All users are then recommended to upgrade to the LibreOffice 24.8 stable branch.
LibreOffice users, free software advocates and community members can support The Document Foundation by making a donation on our donate page.
[1] Fixes in RC1: wiki.documentfoundation.org/Releases/24.2.7/RC1. Fixes in RC2: wiki.documentfoundation.org/Releases/24.2.7/RC2.
The Document Foundation announces the LibreOffice and Open Source Conference 2024 [Press Releases Archives - The Document Foundation Blog]
![]() Berlin, 25 September 2024 – The LibreOffice and Open Source Conference 2024 will take place in Luxembourg from the 10 to the 12 October 2024. It will be hosted by the Digital Learning Hub and the local campus of 42 Luxembourg at the Terres Rouges buildings in Belval, Esch-sur-Alzette.
Berlin, 25 September 2024 – The LibreOffice and Open Source Conference 2024 will take place in Luxembourg from the 10 to the 12 October 2024. It will be hosted by the Digital Learning Hub and the local campus of 42 Luxembourg at the Terres Rouges buildings in Belval, Esch-sur-Alzette.
This is a key event that brings together the LibreOffice community – supporting the leading FOSS office suite – with a large number of stakeholders: large open source projects, international organizations and representatives from EU institutions and European government departments.
Organized in partnership with the Luxembourg Media & Digital Design Centre (LMDDC), which will host the EdTech track, the event is sponsored by allotropia and Collabora, the two companies contributing more actively to the development of LibreOffice; Passbolt, the Luxembourg made open source password manager for teams; and the Interdisciplinary Centre for Security, Reliability and Trust (SnT) of the University of Luxembourg.
In addition, local partners such as Luxembourg Convention Bureau, LIST, LU-CIX and Luxembourg House of Cybersecurity are supporting the organization of various aspects of the conference.
After the opening session in the morning of the 10 October, which includes institutional presentations from the Minister for Digitalisation, the Ministry of the Economy and the European Commission’s OSPO, there will be tracks about LibreOffice covering development, quality, security, documentation, localization, marketing and enterprise deployments, and tracks about open source covering technologies in education, OSS applications and cybersecurity. Another session will focus on OSPOs (Open Source Programme Officers).
The LibreOffice and Open Source Conference Luxembourg 2024 provides a platform to discuss the latest technical developments, community contributions, and the challenges facing open source software and communities of which TDF, LibreOffice and its community are important components. Professionals, developers, volunteers and users from various fields will share their experiences and collaborate on the future direction of the leading office suite.
Policy and decision makers will find counterparts from all over Europe with which they will be able to exchange ideas and experiences that will help them to promote and implement open source software in public, education and private sector organizations.
On 11 and 12 October, there will also be workshops focusing on different aspects of LibreOffice development, targeted to undergraduate Computer Science students or anyone who knows programming, and wants to become familiar with a large scale real world open source software project. To be able to better support the participants we limited the number of seats to 20 so register for the workshops as soon as possible to reserve your place.
Everyone is encouraged to register and participate in the conference to engage with the open source community, learn from different experts and contribute to meaningful discussions. Please note that, to avoid waste, we will plan for food, drinks and other free items for registered attendees so help us to cater for your needs by registering in time.
11:54
Linux Mastodon App Tuba Adds Post Scheduling, Drafts + More [OMG! Ubuntu!]
 A new version of Tuba, the open-source Mastodon client for Linux desktops, is out – and it’s a whopper! Tuba 0.9.0 delivers a wide array of new features, enhancements, and general finesse touching nearly every aspect of the client’s top-tier Fediverse experience. Chief among the highlights for is the addition of support for scheduled and draft posts. Posts can be scheduled from the composer, and a list of scheduled (not yet shared) posts can be accessed from a new sidebar entry, where scheduled posts and be edited/amended. With no official draft posts API to use, Tuba instead uses scheduled posts […]
You're reading Linux Mastodon App Tuba Adds Post Scheduling, Drafts + More, a blog post from OMG! Ubuntu. Do not reproduce elsewhere without permission.
18-12-2024
19:25
Xfce 4.20 Released with New Features, Settings + More [OMG! Ubuntu!]
 Christmas has arrived early for fans of the Xfce desktop environment, with the release of a major new version. Two years in development, Xfce 4.20 serves as the latest stable release of the revered lightweight desktop environment. New features, visual changes, and a sizeable set of foundational prep work furthering support for Wayland are included. Add in a slate of bug fixes, code cleanups, and performance tweaks, and Xfce 4.20 is a solid upgrade over the Xfce 4.18 release from 2022 – not revolutionary, but that’s not really Xfce’s USP: familiarity, reliability, and sticking with what works is. Note: some of the […]
You're reading Xfce 4.20 Released with New Features, Settings + More, a blog post from OMG! Ubuntu. Do not reproduce elsewhere without permission.
New Version of Mir-Based Tiling Window Manager Miracle-WM Out [OMG! Ubuntu!]
 A new version of Miracle-wm, a Mir-based tiling window manager, is out. Miracle-wm 0.4 continues to make inroads in fleshing out its support for i3 IPC, vital work needed to make sure popular tools like waybar, nwg-shell, etc work well as well here as they do in Sway, i3, hyprland, et al. Workspace improvements aplenty make it in, also. Workspaces can be assigned names and those names relayed to shell components, while new commands make it easier for users to change workspaces and/or move containers to workspaces. And there’s been a big focus on addressing ‘issues around stability and performance’ […]
You're reading New Version of Mir-Based Tiling Window Manager Miracle-WM Out, a blog post from OMG! Ubuntu. Do not reproduce elsewhere without permission.
17-12-2024
10:23
Linux Mint 22.1 Beta is Now Available to Download [OMG! Ubuntu!]
 A beta version of Linux Mint 22.1 “Xia” is now officially available to download, ahead of an anticipated stable release at the end of December. Linux Mint 22.1 is an in-series update to Linux Mint 22, released earlier back in July. As such, it continues to be based on Ubuntu 24.04.1 LTS and powered by the Linux 6.8 kernel (although new kernel versions are coming as part of Ubuntu’s HWE, which Mint 22.x now tracks by default). But there are substantive changes elsewhere, not least to the default Cinnamon desktop environment, underlying package management tools, and burgeoning compatibility with the […]
You're reading Linux Mint 22.1 Beta is Now Available to Download, a blog post from OMG! Ubuntu. Do not reproduce elsewhere without permission.
Advanced Weather Companion GNOME Shell Extension [OMG! Ubuntu!]
 macOS 15.2 is rolling out today (December 11), and my tech feeds are hyped with its highlights. Among the (non-AI) changes I spotted: the option to display weather info in the menu bar – native, built-in, ready to go. Seeing a “news peg” (as they’re called), I figured I’d use that as motivation to get around to writing about Advanced Weather Companion. It’s yet-another GNOME Shell weather extension to display temperature and current conditions in the top bar. Advanced Weather Companion doesn’t technically do anything existing weather add-ons don’t, it just surfaces information in a slightly different way. If you […]
You're reading Advanced Weather Companion GNOME Shell Extension, a blog post from OMG! Ubuntu. Do not reproduce elsewhere without permission.
14-12-2024
17:52
Linux Predictions For 2025 [Slashdot: Linux]
BrianFagioli shares a report from BetaNews: As we close out 2024, we Linux enthusiasts are once again looking ahead to what the future holds. While Linux has long been the unsung hero of technology, powering servers, supercomputers, and the cloud, it's also a dominant force in the consumer space, even if many don't realize it. With Android leading the way as the most widely used Linux-based operating system, 2025 is shaping up to be another landmark year for the open source world Here are the predictions mentioned in the article: - Linux will continue to dominate the enterprise sector - Linux will further solidify its role in powering cloud infrastructure, with major providers like AWS and Google Cloud relying on it. - Gaming on Linux is set to grow in 2025 - Linux will play a major role in AI development - Linux's appeal to developers and tech enthusiasts will remain strong - The open source movement will grow stronger What additional predictions do you have for Linux in 2025?
Read more of this story at Slashdot.
10:18
Mastering OpenSSH for Remote Access on Debian Like a Pro [Linux Journal - The Original Magazine of the Linux Community]

Introduction
Remote access is a cornerstone of modern IT infrastructure, enabling administrators and users to manage systems, applications, and data from virtually anywhere. However, with great power comes great responsibility—ensuring that remote access remains secure is paramount. This is where OpenSSH steps in, providing robust, encrypted communication for secure remote management. In this article, we’ll explore the depths of configuring and optimizing OpenSSH for secure remote access on Debian, one of the most stable and reliable Linux distributions.
What is OpenSSH?
OpenSSH (Open Secure Shell) is a suite of tools designed to provide secure remote access over an encrypted connection. It replaces older, insecure protocols like Telnet and rsh, which transmit data, including passwords, in plain text. OpenSSH is widely regarded as the gold standard for remote management due to its powerful features, flexibility, and emphasis on security.
Key Features of OpenSSH-
Secure Authentication: Support for password-based, key-based, and multi-factor authentication.
-
Encrypted Communication: Ensures that all data transmitted over the connection is encrypted.
-
Port Forwarding: Allows secure tunneling of network connections.
-
File Transfer: Built-in tools like
scpandsftpfor secure file transfers.
Setting Up OpenSSH on Debian
PrerequisitesBefore diving into the installation and configuration, ensure the following:
-
You have a Debian system with root or sudo privileges.
-
Your system is updated:
sudo apt update && sudo apt upgrade -y -
Network connectivity is established for accessing remote systems.
Installing OpenSSH on Debian is straightforward. Use the following command:
sudo apt install openssh-server -y
Once installed, confirm that the OpenSSH service is active:
sudo systemctl status ssh
To ensure the service starts on boot:
sudo systemctl enable ssh
Basic Configuration
OpenSSH’s behavior is controlled by the sshd_config file, typically located at /etc/ssh/sshd_config. Let’s make some initial configurations:
-
Open the configuration file for editing:
sudo nano /etc/ssh/sshd_config -
Key parameters to adjust:
Unlocking the Full Potential of Linux's Most Versatile Search Tool [Linux Journal - The Original Magazine of the Linux Community]

Introduction
The grep command, short for "global regular expression print," is one of the most powerful and frequently used tools in Unix and Linux environments. From sifting through log files to finding patterns in text, grep is a Swiss Army knife for system administrators, developers, and data analysts alike. However, many users limit themselves to its basic functionality, unaware of the myriad options that can make it even more effective. In this article, we will delve into the wide range of grep options and demonstrate how to leverage them to handle complex search tasks efficiently.
What is grep?
grep is a command-line utility for searching plain-text data sets for lines that match a regular expression. Created in the early days of Unix, it has become a cornerstone of text processing in Linux systems.
Basic usage:
grep "pattern" file
This command searches for "pattern" in the specified file and outputs all matching lines. While this simplicity is powerful, grep truly shines when combined with its many options.
The Basics: Commonly Used Options
Case-Insensitive Searches (-i)
By default, grep is case-sensitive. To perform a case-insensitive search, use the -i option:
grep -i "error" logfile.txt
This will match lines containing "error," "Error," or any other case variation.
Display Line Numbers (-n)
Including line numbers in the output makes it easier to locate matches in large files:
grep -n "error" logfile.txt
Example output:
42:This is an error message
73:Another error found here
Invert Matches (-v)
The -v option outputs lines that do not match the specified pattern:
grep -v "debug" logfile.txt
This is particularly useful for filtering out noise in log files.
Count Matching Lines (-c)
To count how many lines match the pattern, use -c:
grep -c "error" logfile.txt
This outputs the number of matching lines instead of the lines themselves.
13-12-2024
11:40
Tiling Shell Extension Gains Smart Border Radius Detection [OMG! Ubuntu!]
 Fresh off of adding support for automatic window snapping, the developers behind GNOME Shell’s most configurable and feature-packed window tiling extension are back with another update. Tiling Shell v15.1 introduces support for smart border radius. This is one a small sounding feature but it has a big impact on the way borders (which are an optional feature) are drawn around focused application windows, either in tiled mode or when free-floating on he desktop: Domenico Ferraro, the chief developer of the extension, explains the impetus in tackling this: “In GNOME, different windows may have different border radius. Drawing a border around […]
You're reading Tiling Shell Extension Gains Smart Border Radius Detection, a blog post from OMG! Ubuntu. Do not reproduce elsewhere without permission.
12-12-2024
22:43
PlayStation 3 Emulator Adds Support for Raspberry Pi 5 [OMG! Ubuntu!]
 RPCS3 is an open-source emulator (and debugger) for the Sony PlayStation 3, making it possible for users to play and debug PlayStation 3 games on non-PS3 hardware, like Intel/AMD desktop PCs and laptops running Windows, macOS, or Linux. Now, RPCS3 is available for the Raspberry Pi 5 too. A major new version of of RPCS3 was released this week adding native ARM64 support for Linux, macOS (Apple Silicon) (although not ready yet) Windows too. As no architecture ‘translation’ tools are involved, gaming performance is better. “How far can we challenge the limits of emulating the console known for being the […]
You're reading PlayStation 3 Emulator Adds Support for Raspberry Pi 5, a blog post from OMG! Ubuntu. Do not reproduce elsewhere without permission.
11-12-2024
17:19
Linux Mint Dethrones MX Linux As the Most Popular Distro On DistroWatch [Slashdot: Linux]
BrianFagioli writes: Linux Mint has reclaimed its position as the top-ranked Linux distribution on DistroWatch, dethroning MX Linux. The latest page hit rankings, which reflect the popularity of distributions among DistroWatch users, place Linux Mint in first place with 2,412 hits per day. MX Linux, previously the reigning champ, now sits in second with 2,280 hits.
Read more of this story at Slashdot.
09-12-2024
10:27
Linux Kernel 6.12 Confirmed As LTS, Will Be Supported For 'Multiple Years' [Slashdot: Linux]
Slashdot reader prisoninmate shared this report from the blog 9to5Linux Renowned Linux kernel developer Greg Kroah-Hartman announced Thursday that the Linux 6.12 kernel series has been officially marked as LTS (Long Term Support) on the kernel.org website with a predicted life expectancy of at least two years. Linux kernel 6.12 was released on November 17th, 2024, and introduces new features like real-time "PREEMPT_RT" support, a new scheduler called sched_ext, and DRM panic messages as QR codes, as well as numerous new and updated drivers for better hardware support... Linux kernel 6.12 joins the many other long-term support kernel branches, namely Linux 6.6 LTS, Linux 6.1 LTS, Linux 5.15 LTS, Linux 5.10 LTS, and Linux 5.4 LTS. Apart from the latter, the rest of them, including Linux kernel 6.12, will be officially supported until the end of December 2026. Hopefully, Linux kernel 6.12 will be supported for more than two years as the kernel maintainers usually aim for four years of support for a new LTS kernel, especially if there's demand from hardware manufacturers and other companies that aim to use a long-term supported kernel in their devices.
Read more of this story at Slashdot.
08-12-2024
11:32
Linux 4.19, the Last Supported Kernel of the Linux 4.x Series, Finally Reaches EOL [Slashdot: Linux]
Slashdot reader prisoninmate shared this report from 9to5Linux: Linux kernel 4.19, the last of the Linux 4.x kernel series, has now reached the end of its supported life as announced earlier on the Linux kernel mailing list by kernel developer Greg Kroah-Hartman. The Linux 4.19 kernel branch was released more than six years ago, on October 22nd, 2018, and it received no less than 325 maintenance updates, the last one being Linux 4.19.325. The biggest highlights of Linux kernel 4.19 were initial Wi-Fi 6 support, the EROFS file system, and a union mount filesystem implementation. Kroah-Hartman said on the mailing list. "This one is finished, it is end-of-life as of right now... It had a good life..." As a "fun" proof that this one is finished (and that any company saying they care about it really should have their statements validated with facts), I looked at the "unfixed" CVEs from this kernel release. Currently it is a list 983 CVEs long, too long to list here.... Note, this does NOT count the hardware CVEs which kernel.org does not track, and many are sill unfixed in this kernel branch. Yes, CVE counts don't mean much these days, but hey, it's a signal of something, right? I take it to mean that no one is caring enough to backport the needed fixes to this branch, which means that you shouldn't be using it anymore. Anyway, please move off to a more modern kernel if you were using this one for some reason. Like 6.12.y, the next LTS kernel we will be supporting for multiple years.
Read more of this story at Slashdot.
07-12-2024
11:04
Linux Preps for Kunpeng ARM Server SoC With High Bandwidth Memory [Slashdot: Linux]
An anonymous reader shared this report from Phoronix: New Linux patches from Huawei engineers are preparing new driver support for controlling High Bandwidth Memory (HBM) with the ARM-based Kunpeng high performance SoC... [I]t would appear there is a new Kunpeng SoC coming that will feature integrated High Bandwidth Memory (HBM).Unless I missed something, this Kunpeng SoC with HBM memory hasn't been formally announced yet and I haven't been able to find any other references short of pointing to prior kernel patches working on this HBM integration... It will be interesting to see what comes of Huawei Kunpeng SoCs with HBM memory and ultimately how well they perform against other AArch64 server processors as well as the Intel Xeon and AMD EPYC competition.
Read more of this story at Slashdot.
06-12-2024
17:01
Robotic Vision in Debian: Mastering Image Processing and Object Recognition for Intelligent Robots [Linux Journal - The Original Magazine of the Linux Community]

Robotic vision, a cornerstone of modern robotics, enables machines to interpret and respond to their surroundings effectively. This capability is achieved through image processing and object recognition, which empower robots to perform tasks such as navigation, obstacle avoidance, and even interaction with humans. Debian, with its robust ecosystem and open source philosophy, offers a powerful platform for developing robotic vision applications.
This article dives deep into the realm of robotic vision, focusing on image processing and object recognition using Debian. From setting up the development environment to integrating vision into intelligent robots, we’ll explore every facet of this fascinating field.
Introduction
What is Robotic Vision?Robotic vision refers to the ability of robots to interpret visual data from the environment. It involves acquiring images via cameras, processing these images to extract meaningful features, and recognizing objects to make informed decisions.
Why Debian for Robotic Vision?Debian stands out as a versatile and stable operating system for robotics development due to:
- Extensive repository: Debian provides a wealth of libraries and tools for image processing and machine learning.
- Community support: A large and active community ensures continuous updates and troubleshooting.
- Stability and security: Its rigorous testing processes make Debian a reliable choice for critical systems.
We’ll cover:
- Setting up a Debian-based development environment.
- Fundamentals of image processing.
- Advanced object recognition techniques.
- Integrating these capabilities into robotic systems.
Setting Up the Development Environment
Required Hardware- Cameras and sensors: USB webcams, depth cameras (e.g., Intel RealSense), or stereo cameras.
- Computing hardware: Devices like Raspberry Pi, NVIDIA Jetson Nano, or standard desktops with a GPU.
- Optional accelerators: Tensor Processing Units (TPUs) for enhanced performance.
-
Install Debian:
- Download the latest Debian ISO from debian.org.
- Use a tool like Etcher to create a bootable USB stick.
- Follow the installation instructions to set up Debian on your system.
-
Install Dependencies:
Linux Voice Assistants: Revolutionizing Human-Computer Interaction with Natural Language Processing [Linux Journal - The Original Magazine of the Linux Community]

Introduction
In an era dominated by voice-controlled devices, voice assistants have transformed how we interact with technology. These AI-driven systems, which leverage natural language processing (NLP), allow users to communicate with machines in a natural, intuitive manner. While mainstream voice assistants like Siri, Alexa, and Google Assistant have captured the limelight, Linux-based alternatives are quietly reshaping the landscape with their focus on openness, privacy, and customizability.
This article delves into the world of Linux voice assistants, examining their underlying technologies, the open source projects driving innovation, and their potential to revolutionize human-computer interaction.
The Foundations of Voice Assistants
Voice assistants combine multiple technologies to interpret human speech and respond effectively. Their design typically involves the following core components:
- Speech-to-Text (STT): Converts spoken words into text using automatic speech recognition (ASR) technologies. Tools like CMU Sphinx and Mozilla’s DeepSpeech enable this functionality.
- Natural Language Understanding (NLU): Interprets the meaning behind the transcribed text by identifying intent and extracting relevant information.
- Dialogue Management: Determines the appropriate response or action based on user intent and context.
- Text-to-Speech (TTS): Synthesizes natural-sounding speech to deliver responses back to the user.
While these components are straightforward in concept, building an efficient voice assistant involves addressing challenges such as:
- Ambiguity: Interpreting user commands with multiple meanings.
- Context Awareness: Maintaining an understanding of past interactions for coherent conversations.
- Personalization: Adapting responses based on individual user preferences.
Open Source Voice Assistants on Linux
Linux’s open source ecosystem provides a fertile ground for developing voice assistants that prioritize customization and privacy. Let’s explore some standout projects:
-
Mycroft AI:
- Known as "the open source voice assistant," Mycroft is designed for adaptability.
- Features: Wake word detection, modular skill development, and cross-platform support.
- Installation and Usage: Mycroft can run on devices ranging from Raspberry Pi to full-fledged Linux desktops.
-
Rhasspy:
02-12-2024
10:26
Greg Kroah-Hartman Sees 'Tipping Point' for Rust Drivers in Linux Kernel [Slashdot: Linux]
Greg Kroah-Hartman noted some coming changes in Linux 6.13 will make it possible to create "way more" Rust-based kernel drivers. "The veteran kernel developer believes we're at a tipping point of seeing more upstream Rust drivers ahead," reports Phoronix: These Rust char/misc changes are on top of the main Rust pull for Linux 6.13 that brought 3k lines of code for providing more Rust infrastructure. Linux 6.13 separately is also bringing Rust file abstractions. "Sorry for doing this at the end of the merge window," Greg Kroah-Hartman wrote in the pull request, explaining that "conference and holiday travel got in the way on my side (hence the 5am pull request emails...)" Loads of things in here... — Rust misc driver bindings and other rust changes to make misc drivers actually possible. I think this is the tipping point, expect to see way more rust drivers going forward now that these bindings are present. Next merge window hopefully we will have pci and platform drivers working, which will fully enable almost all driver subsystems to start accepting (or at least getting) rust drivers. This is the end result of a lot of work from a lot of people, congrats to all of them for getting this far, you've proved many of us wrong in the best way possible, working code :)
Read more of this story at Slashdot.
30-11-2024
09:58
Fortifying Linux Web Applications: Mastering OWASP ZAP and ModSecurity for Optimal Security [Linux Journal - The Original Magazine of the Linux Community]

Introduction
In an increasingly interconnected digital world, web applications are the backbone of online services. With this ubiquity comes a significant risk: web applications are prime targets for cyberattacks. Ensuring their security is not just an option but a necessity. Linux, known for its robustness and adaptability, offers a perfect platform for deploying secure web applications. However, even the most secure platforms need tools and strategies to safeguard against vulnerabilities.
This article explores two powerful tools—OWASP ZAP and ModSecurity—that work together to detect and mitigate web application vulnerabilities. OWASP ZAP serves as a vulnerability scanner and penetration testing tool, while ModSecurity acts as a Web Application Firewall (WAF) to block malicious requests in real time.
Understanding Web Application Threats
Web applications face a multitude of security challenges. From injection attacks to cross-site scripting (XSS), the OWASP Top 10 catalogues the most critical security risks. These vulnerabilities, if exploited, can lead to data breaches, service disruptions, or worse.
Key threats include:
- SQL Injection: Malicious SQL queries that manipulate backend databases.
- Cross-Site Scripting (XSS): Injecting scripts into web pages viewed by other users.
- Broken Authentication: Flaws in session management leading to unauthorized access.
Proactively identifying and mitigating these vulnerabilities is crucial. This is where OWASP ZAP and ModSecurity come into play.
OWASP ZAP: A Comprehensive Vulnerability Scanner
What is OWASP ZAP?OWASP ZAP (Zed Attack Proxy) is an open-source tool designed for finding vulnerabilities in web applications. It supports automated and manual testing, making it suitable for beginners and seasoned security professionals alike.
Installing OWASP ZAP on Linux- Update System Packages:
sudo apt update && sudo apt upgrade -y - Install Java Runtime Environment (JRE): OWASP ZAP requires Java. Install it if it's not already present:
sudo apt install openjdk-11-jre -y - Download and Install OWASP ZAP: Download the latest version from the official website:
Extract and run:wget https://github.com/zaproxy/zaproxy/releases/download//ZAP__Linux.tar.gztar -xvf ZAP__Linux.tar.gz cd ZAP__Linux ./zap.sh
28-11-2024
15:19
The World's First Unkillable UEFI Bootkit For Linux [Slashdot: Linux]
An anonymous reader quotes a report from Ars Technica: Over the past decade, a new class of infections has threatened Windows users. By infecting the firmware that runs immediately before the operating system loads, these UEFI bootkits continue to run even when the hard drive is replaced or reformatted. Now the same type of chip-dwelling malware has been found in the wild for backdooring Linux machines. Researchers at security firm ESET said Wednesday that Bootkitty -- the name unknown threat actors gave to their Linux bootkit -- was uploaded to VirusTotal earlier this month. Compared to its Windows cousins, Bootkitty is still relatively rudimentary, containing imperfections in key under-the-hood functionality and lacking the means to infect all Linux distributions other than Ubuntu. That has led the company researchers to suspect the new bootkit is likely a proof-of-concept release. To date, ESET has found no evidence of actual infections in the wild. Still, Bootkitty suggests threat actors may be actively developing a Linux version of the same sort of unkillable bootkit that previously was found only targeting Windows machines. "Whether a proof of concept or not, Bootkitty marks an interesting move forward in the UEFI threat landscape, breaking the belief about modern UEFI bootkits being Windows-exclusive threats," ESET researchers wrote. "Even though the current version from VirusTotal does not, at the moment, represent a real threat to the majority of Linux systems, it emphasizes the necessity of being prepared for potential future threats." [...] As ESET notes, the discovery is nonetheless significant because it demonstrates someone -- most likely a malicious threat actor -- is pouring resources and considerable know-how into creating working UEFI bootkits for Linux. Currently, there are few simple ways for people to check the integrity of the UEFI running on either Windows or Linux devices. The demand for these sorts of defenses will likely grow in the coming years.
Read more of this story at Slashdot.
27-11-2024
20:58
Harnessing Quantum Potential: Quantum Computing and Qiskit on Ubuntu [Linux Journal - The Original Magazine of the Linux Community]

Introduction
Quantum computing, a revolutionary paradigm, promises to solve problems that are computationally infeasible for classical systems. By leveraging the peculiar principles of quantum mechanics—superposition, entanglement, and quantum interference—quantum computing has emerged as a transformative force across industries. From cryptography and drug discovery to optimization and artificial intelligence, its potential is vast.
Ubuntu, a leading open source operating system, provides an ideal environment for quantum computing development due to its robust community support, extensive software repositories, and seamless integration with tools like Qiskit. Qiskit, an open source quantum computing framework by IBM, is a gateway for developers, researchers, and enthusiasts to dive into the quantum world. This article explores how to set up and explore quantum computing with Qiskit on Ubuntu, guiding you from the basics to practical applications.
Understanding Quantum Computing
What Is Quantum Computing?Quantum computing is a field that redefines computation. While classical computers use binary bits (0s and 1s), quantum computers utilize quantum bits or qubits, which can exist in a state of 0, 1, or a combination of both, thanks to superposition. This unique property allows quantum computers to perform parallel computations, drastically enhancing their processing power for specific tasks.
Key Concepts- Superposition: The ability of a qubit to exist in multiple states simultaneously.
- Entanglement: A phenomenon where qubits become interconnected, and the state of one directly affects the other, regardless of distance.
- Quantum Gates: Analogous to logical gates in classical computing, these manipulate qubits to perform operations.
Quantum computing is not just theoretical; it is already impacting fields like:
- Cryptography: Breaking traditional encryption and enabling quantum-safe cryptographic protocols.
- Optimization: Solving complex logistical problems more efficiently.
- Machine Learning: Enhancing algorithms with quantum speed-ups.
Setting Up the Environment on Ubuntu
Installing Prerequisites- Install Python: Qiskit is Python-based. On Ubuntu, install Python via:
sudo apt update sudo apt install python3 python3-pip - Update Pip:
pip3 install --upgrade pip
26-11-2024
10:05
SUSE Unveils Major Rebranding, New Data-Protecting AI Platform [Slashdot: Linux]
An anonymous reader quotes a report from ZDNet, written by Steven Vaughan-Nichols: At KubeCon North America, SUSE announced a significant rebranding effort, several new product offerings, and the launch of SUSE AI, a secure platform for deploying and running generative AI (gen AI) applications. SUSE has renamed its entire portfolio to make product names more descriptive and customer-friendly. Notable changes include: - Rancher, SUSE's Kubernetes offering, is now SUSE Rancher. - Liberty Linux, the company's Red Hat Enterprise Linux (RHEL)/CentOS clone and support offering, becomes SUSE Multi Linux Support. - Harvester is rebranded as SUSE Virtualization - Longhorn is now SUSE Storage. [...] Also, like everyone else, SUSE now has an AI offering: SUSE AI. This isn't an AI chatbot, like Red Hat's Lightspeed AI tool. No, it's a secure platform for deploying and running gen AI applications. This new offering addresses key challenges faced by enterprises as they move from AI experimentation to deployment, particularly in areas of security and compliance. These are SUSE AI's top features, as highlighted by Vaughan-Nichols: 1. Security by Design: SUSE AI provides security and certifications at the software infrastructure level, along with zero-trust security tools, templates, and compliance playbooks. 2. Multifaceted Trust: The platform ensures that generated data is correct and private customer and IP data remain secure. It supports deployment across various environments, including on-premise, hybrid, cloud, and air-gapped setups. 3. Choice and Flexibility: SUSE AI allows customers to select and deploy their preferred AI components and LLMs. 4. Simplified Operations: The platform provides simplified cluster operations, persistent storage, and easy access to pre-configured shared tools and services.
Read more of this story at Slashdot.
25-11-2024
17:49
Flamewar Leads to Declining of Bcachefs Pull Requests During Linux 6.13 Kernel Development Cycle [Slashdot: Linux]
"Get your head examined. And get the fuck out of here with this shit." That's how Bcachefs developer Kent Overstreet ended a post on the Linux kernel mailing list. This was followed by "insufficient action to restore the community's faith in having otherwise productive technical discussions without the fear of personal attacks," according to an official ruling by committee enforcing the kernel community's code of conduct. After formalizing an updated enforcement process for unacceptable behaviors, it then recommended that during the Linux 6.13 kernel development cycle, Overstreet's participation should be restricted (with his pull requests declined). Phoronix covered their ruling, and ItsFOSS and The Register offer some of the backstory. Overstreet had already acknowledged that "Things really went off the rails (and I lost my cool, and earned the ire of the CoC committee)" in a 6,200-word blog post on his Patreon page. But he also emphasized that "I'm going to keep writing code no matter what. Things may turn into more of a hassle to actually get the code, but people who want to keep running bcachefs will always be able to (that's the beauty of open source, we can always fork), and I will keep supporting my users..." More excerpts from Overstreet's blog post: I got an emails from multiple people, including from Linus, to the effect of "trust me, you don't want to be known as an asshole — you should probably send him an apology"... Linus is a genuinely good guy: I know a lot of people reading this will have also seen our pull request arguments, so I specifically wanted to say that here: I think he and I do get under each other's skin, but those arguments are the kind of arguments you get between people who care deeply about their work and simply have different perspectives on the situation... [M]y response was to say "no" to a public apology, for a variety of reasons: because this was the result of an ongoing situation that had now impacted two different teams and projects, and I think that issue needs attention — and I think there's broader issues at stake here, regarding the CoC board. But mostly, because that kind of thing feels like it ought to be kept personal... I'd like a better process that isn't so heavy handed for dealing with situations where tensions rise and communications break down. As for that process: just talk to people... [W]e're a community. We're not interchangeable cogs to be kicked out and replaced when someone is "causing a problem", we should be watching out for each other... Another note that I was raising with the CoC is that a culture of dismissiveness, of finding ways to avoid the technical discussions we're supposed to be having, really is toxic, and moreso than mere flamewars... we really do need to be engaging properly with each other in order to do our work well. After the official response from the committee, Overstreet responded on the kernel mailing list. "I do want to apologize for things getting this heated the other day, but I need to also tell you why I reacted the way I did... I do take correctness issues very seriously, and I will get frosty or genuinely angry if they're being ignored or brushed aside."
Read more of this story at Slashdot.
24-11-2024
16:52
Red Hat is Becoming an Official Microsoft 'Windows Subsystem for Linux' Distro [Slashdot: Linux]
"You can use any Linux distribution inside of the Windows Subsystem for Linux" Microsoft recently reminded Windows users, "even if it is not available in the Microsoft Store, by importing it with a tar file." But being an official distro "makes it easier for Windows Subsystem for Linux users to install and discover it with actions like wsl --list --online and wsl --install," Microsoft pointed out this week. And "We're excited to announce that Red Hat will soon be delivering a Red Hat Enterprise Linux WSL distro image in the coming months..." Thank you to the Red Hat team as their feedback has been invaluable as we built out this new architecture, and we're looking forwards to the release...! Ron Pacheco, senior director, Red Hat Enterprise Linux Ecosystem, Red Hat says: "Developers have their preferred platforms for developing applications for multiple operating systems, and WSL is an important platform for many of them. Red Hat is committed to driving greater choice and flexibility for developers, which is why we're working closely with the Microsoft team to bring Red Hat Enterprise Linux, the largest commercially available open source Linux distribution, to all WSL users." Read Pacheco's own blog post here. But in addition Microsoft is also releasing "a new way to make WSL distros," they announced this week, "with a new architecture that backs how WSL distros are packaged and installed." Up until now, you could make a WSL distro by either creating an appx package and distributing it via the Microsoft Store, or by importing a .tar file with wsl -import. We wanted to improve this by making it possible to create a WSL distro without needing to write Windows code, and for users to more easily install their distros from a file or network share which is common in enterprise scenarios... With the tar based architecture, you can start with the same .tar file (which can be an exported Linux container!) and just edit it to add details to make it a WSL distro... These options will describe key distro attributes, like the name of the distro, its icon in Windows, and its out of box experience (OOBE) which is what happens when you run WSL for the first time. You'll notice that the oobe_command option points to a file which is a Linux executable, meaning you can set up your full experience just in Linux if you wish.
Read more of this story at Slashdot.
22-11-2024
16:05
Jim Zemlin, 'Head Janitor of Open Source,' Marks 20 Years At Linux Foundation [Slashdot: Linux]
ZDNet's Steven Vaughan-Nichols interviews Jim Zemlin, Executive Director of The Linux Foundation and "head janitor of open source." An anonymous Slashdot reader shares an excerpt from the article: When I first met Zemlin, he was the head of the Free Standards Group (FSG). The FSG's main project was the Linux Standard Base (LSB) project. The LSB's goal was to get everyone in the Linux desktop world to agree on standards to ensure compatibility among distributions and their applications. Oh well, some struggles are never-ending. Another group, the Open Source Development Labs (OSDL), was simultaneously working on standardizing enterprise Linux. The two non-profits had the same goal of making Linux more useful and popular, so they agreed to merge. Zemlin was the natural pick to head this new group, which would be called The Linux Foundation. At the time, he told me: "The combination of the two groups really enables the Linux platform and all the members of the Linux Foundation to work really effectively. I clearly understand what the organization's charter needs to be: We need to provide services that are useful to the community and industry, as well as protect, promote, and continue to standardize the platform." While initially focused on Linux, the Foundation's scope expanded significantly around 2010. Until then, the organization had hosted about a dozen projects related to the Linux operating system. However, as Linux gained dominance in various sectors, including high-performance computing, automotive, embedded systems, mobile devices, and cloud computing, the Linux Foundation started to broaden its horizons. Zemlin says there are three words that sum up the Linux Foundation's effort to keep open source safe and open to a new generation of developers: helpful, hopeful, and humble. "You must be genuinely helpful to developers. We're the janitors of open source. The Linux Foundation takes care of all the boring but important stuff necessary to support software development so developers can focus on code. This work includes events, project marketing, project infrastructure, finances for projects, training and education, legal assistance, standards, facilitation, open source evangelism, and much, much more." He continued: "The hopeful part is really the optimistic part. When in 2007, people were saying that this would never work. When leaders of huge companies tell everyone that you know all that you're doing is a cancer or terrible, you have to have a sense of optimism that there are better days ahead. You have to always be thinking, 'No, we can do it and stick with it.'" However, Zemlin concluded that the number one trait that's "important in working in open source is this idea of humility. I work with hundreds of people every day, and none of them work at the Linux Foundation. We must lead through influence, and that really has been the secret for 20 years of working here without going totally insane. If you can check your ego and take criticism, open source actually turns out to be a really fun community to work with."
Read more of this story at Slashdot.
Using MAXQDA for Qualitative Data Analysis on Linux [Linux Journal - The Original Magazine of the Linux Community]

Introduction
Qualitative data analysis (QDA) is a cornerstone of research across various fields, from social sciences to marketing. It involves uncovering patterns, themes, and meanings within non-numerical data such as interviews, focus groups, and textual narratives. In this era of digital tools, MAXQDA stands out as a premier software solution for QDA, empowering researchers to organize and analyze complex datasets effectively.
Despite its strengths, MAXQDA lacks native Linux support, a limitation for researchers who prefer or rely on Linux environments. This article explores how Linux users can overcome these challenges, leverage MAXQDA for qualitative research, and integrate it seamlessly into their workflows.
Understanding MAXQDA
What is MAXQDA?MAXQDA, developed by VERBI Software, has long been a trusted tool for qualitative and mixed-methods research. Known for its user-friendly interface and robust features, MAXQDA allows researchers to work with diverse data types, including text, audio, video, and images.
Key Features of MAXQDA-
Data Importation
- Supports multiple formats such as Word documents, PDFs, spreadsheets, and even social media data.
- Allows seamless transcription and analysis of audio/video files.
-
Coding and Categorization
- Enables researchers to code textual and multimedia data with color-coded systems.
- Offers hierarchical code systems for detailed organization.
-
Visualization Tools
- Provides visual tools like mind maps, word clouds, and matrix analyses.
- Facilitates understanding of data relationships and patterns.
-
Mixed-Methods Integration
- Combines qualitative and quantitative data for comprehensive analysis.
MAXQDA offers unmatched versatility for researchers handling complex qualitative datasets, providing tools for in-depth analysis, reporting, and visualization—all essential for producing meaningful insights.
Setting Up MAXQDA on Linux
While MAXQDA officially supports Windows and macOS, Linux users can employ workarounds to run the software. Below are practical methods to use MAXQDA on Linux.
Running MAXQDA with Wine or PlayOnLinuxWine is a compatibility layer that allows Windows applications to run on Linux. PlayOnLinux, built on Wine, provides a more user-friendly interface for installing and managing Windows applications.
HAProxy on Ubuntu: Load Balancing and Failover for Resilient Infrastructure [Linux Journal - The Original Magazine of the Linux Community]

Introduction
In today’s fast-paced digital landscape, ensuring the availability and performance of applications is paramount. Modern infrastructures require robust solutions to distribute traffic efficiently and maintain service availability even in the face of server failures. Enter HAProxy, the de facto standard for high-performance load balancing and failover.
This article explores the synergy between HAProxy and Ubuntu, one of the most popular Linux distributions. From installation to advanced configuration, we’ll dive into how HAProxy can transform your infrastructure with load balancing and failover capabilities.
Understanding Load Balancing
Load balancing is the process of distributing incoming network traffic across multiple servers. By balancing the load, it ensures no single server becomes overwhelmed, leading to better performance, reliability, and fault tolerance.
Key benefits- Scalability: Ability to handle increasing traffic by adding more servers.
- Reliability: Mitigating server failures by routing traffic to healthy servers.
- Performance: Reducing latency by spreading the workload evenly.
- Layer 4 (Transport Layer): Distributes traffic based on IP and port information.
- Layer 7 (Application Layer): Makes routing decisions based on application-level data such as HTTP headers.
Failover Concepts
Failover ensures continuity by automatically redirecting traffic to backup resources if the primary ones fail. It’s a cornerstone of High Availability (HA) setups.
With HAProxy, failover is seamless:
- If a backend server becomes unavailable, HAProxy detects it via health checks.
- Traffic is rerouted to other available servers, maintaining uninterrupted service.
Setting Up HAProxy on Ubuntu
Let’s begin by installing and configuring HAProxy on Ubuntu.
Prerequisites- An Ubuntu server (20.04 or later recommended).
- Multiple backend servers for testing load balancing.
- Basic Linux command-line skills.
- Update your system:
sudo apt update && sudo apt upgrade -y - Install HAProxy:
sudo apt install haproxy -y - Verify installation:
haproxy -v
21-11-2024
18:13
Ubuntu Linux Impacted By Decade-Old 'needrestart' Flaw That Gives Root [Slashdot: Linux]
Five local privilege escalation (LPE) vulnerabilities in the Linux utility "needrestart" -- widely used on Ubuntu to manage service updates -- allow attackers with local access to escalate privileges to root. The flaws were discovered by Qualys in needrestart version 0.8, and fixed in version 3.8. BleepingComputer reports: Complete information about the flaws was made available in a separate text file, but a summary can be found below: - CVE-2024-48990: Needrestart executes the Python interpreter with a PYTHONPATH environment variable extracted from running processes. If a local attacker controls this variable, they can execute arbitrary code as root during Python initialization by planting a malicious shared library. - CVE-2024-48992: The Ruby interpreter used by needrestart is vulnerable when processing an attacker-controlled RUBYLIB environment variable. This allows local attackers to execute arbitrary Ruby code as root by injecting malicious libraries into the process. - CVE-2024-48991: A race condition in needrestart allows a local attacker to replace the Python interpreter binary being validated with a malicious executable. By timing the replacement carefully, they can trick needrestart into running their code as root. - CVE-2024-10224: Perl's ScanDeps module, used by needrestart, improperly handles filenames provided by the attacker. An attacker can craft filenames resembling shell commands (e.g., command|) to execute arbitrary commands as root when the file is opened. - CVE-2024-11003: Needrestart's reliance on Perl's ScanDeps module exposes it to vulnerabilities in ScanDeps itself, where insecure use of eval() functions can lead to arbitrary code execution when processing attacker-controlled input. The report notes that attackers would need to have local access to the operation system through malware or a compromised account in order to exploit these flaws. "Apart from upgrading to version 3.8 or later, which includes patches for all the identified vulnerabilities, it is recommended to modify the needrestart.conf file to disable the interpreter scanning feature, which prevents the vulnerabilities from being exploited," adds BleepingComputer.
Read more of this story at Slashdot.
20-11-2024
17:05
FLTK 1.4 Released [Slashdot: Linux]
Longtime Slashdot reader slack_justyb writes: The Fast Light Toolkit released version 1.4.0 of the venerable, though sometimes looking a bit dated, toolkit from the '90s. New in this version are better CMake support, HiDPI support, and initial support for Wayland on Linux and Wayland on FreeBSD. Programs compiled and linked to this library launch using Wayland if it is available at runtime and fall back to X11 if not. FLTK 1.4.0 can be downloaded here. Documentation is also available.
Read more of this story at Slashdot.
19-11-2024
20:22
Linux Binary Analysis for Reverse Engineering and Vulnerability Discovery [Linux Journal - The Original Magazine of the Linux Community]

Introduction
In the world of cybersecurity and software development, binary analysis holds a unique place. It is the art of examining compiled programs to understand their functionality, identify vulnerabilities, or debug issues—without access to the original source code. For Linux, which dominates servers, embedded systems, and even personal computing, the skill of binary analysis is invaluable.
This article takes you on a journey into the world of Linux binary analysis, reverse engineering, and vulnerability discovery. Whether you're a seasoned cybersecurity professional or an aspiring reverse engineer, you’ll gain insights into the tools, techniques, and ethical considerations that define this fascinating discipline.
Understanding Linux Binaries
To analyze binaries, it’s essential to first understand their structure and behavior.
What Are Linux Binaries?Linux binaries are compiled machine code files that the operating system executes. These files typically conform to the Executable and Linkable Format (ELF), a versatile standard used across Unix-like systems.
Components of an ELF FileAn ELF binary is divided into several critical sections, each serving a distinct purpose:
- Header: Contains metadata, including the architecture, entry point, and type (executable, shared library, etc.).
- Sections: Include the code (
.text), initialized data (.data), uninitialized data (.bss), and others. - Segments: Memory-mapped parts of the binary used during execution.
- Symbol Table: Maps function names and variables to addresses (in unstripped binaries).
Some standard tools to start with:
readelf: Displays detailed information about the ELF file structure.objdump: Disassembles binaries and provides insights into the machine code.strings: Extracts printable strings from binaries, often revealing configuration data or error messages.
Introduction to Reverse Engineering
What Is Reverse Engineering?Reverse engineering involves dissecting a program to understand its inner workings. It’s crucial for scenarios like debugging proprietary software, analyzing malware, and performing security audits.
18-11-2024
13:13
Linux Kernel 6.12 Has Been Released [Slashdot: Linux]
Slashdot unixbhaskar writes: Linus has released a fresh Linux kernel for public consumption. Please give it a try and report any glitches to the maintainers for improvement. Also, please do not forget to express your appreciation to those tireless folks who did all the hard work for you. The blog OMG Ubuntu calls it "one of the most biggest kernel releases for a while," joking that it's a "really real-time kernel." The headline feature in Linux 6.12 is mainline support for PREEMPT_RT. This patch set dramatically improves the performance of real-time applications by making kernel processes pre-emptible — effectively enabled proper real-time computing... Meanwhile, Linus Torvalds himself contributes a new method for user-space address masking designed to claw back some of the performance lost due to Spectre-v1 mitigations. You might have heard that kernel devs have been working to add QR error codes to Linux's kernel panic BSOD screen (as a waterfall of error text is often cut off and not easily copied for ad-hoc debugging). Well, Linux 6.12 adds support for those during Direct Rendering Manager panics... A slew of new RISC-V CPU ISA extensions are supported in Linux 6.12; hybrid CPU scaling in the Intel P-State driver lands ahead of upcoming Intel Core Ultra 2000 chips; and AMD P-State driver improves AMD Boost and AMD Preferred Core features. More coverage from the blog 9to5Linux highlights a new scheduler called sched_ext, Clang support (including LTO) for nolibc, support for NVIDIA's virtual command queue implementation for SMMUv3, and "an updated cpuidle tool that now displays the residency value of cpuidle states for a clearer and more detailed view of idle state information when using cpuidle-info." Linux kernel 6.12 also introduces SWIG bindings for libcpupower to make it easier for developers to write scripts that use and extend the functionality of libcpupower, support for translating normalized error addresses reported by an AMD memory controller into system physical addresses using a UEFI mechanism called platform runtime mechanism (PRM), as well as simplified loading of microcode patches on AMD Zen and newer CPUs by using the family, model, and stepping encoded in the patch revision number... Moreover, Linux 6.12 adds support for running as a protected guest on Android as well as perf and support for a bunch of new interconnect PMUs. It also adds the final conversions to the new Intel VFM CPU model matching macros, rewrites the PCM buffer allocation handling and locking optimizations, and improves the USB audio driver...
Read more of this story at Slashdot.
12-09-2024
17:41
LibreOffice 24.2.6 available for download, for the privacy-conscious user [Press Releases Archives - The Document Foundation Blog]

Berlin, 5 September 2024 – LibreOffice 24.2.6, the sixth minor release of the free, volunteer-supported office productivity suite for office environments and individuals, the best choice for privacy-conscious users and digital sovereignty, is available at https://www.libreoffice.org/download for Windows, macOS and Linux.
The release includes over 40 bug and regression fixes over LibreOffice 24.2.5 [1] to improve the stability and robustness of the software, as well as interoperability with legacy and proprietary document formats. LibreOffice 24.2.6 is aimed at mainstream users and enterprise production environments.
LibreOffice is the only office suite with a feature set comparable to the market leader, and offers a range of user interface options to suit all users, from traditional to modern Microsoft Office-style. The UI has been developed to make the most of different screen form factors by optimizing the space available on the desktop to put the maximum number of features just a click or two away.
LibreOffice for Enterprises
For enterprise-class deployments, TDF strongly recommends the LibreOffice Enterprise family of applications from ecosystem partners – for desktop, mobile and cloud – with a range of dedicated value-added features, long term support and other benefits such as SLAs: https://www.libreoffice.org/download/libreoffice-in-business/.
Every line of code developed by ecosystem companies for enterprise customers is shared with the community on the master code repository and contributes to the improvement of the LibreOffice Technology platform.
Availability of LibreOffice 24.2.6
LibreOffice 24.2.6 is available at https://www.libreoffice.org/download/. Minimum requirements for proprietary operating systems are Windows 7 SP1 and macOS 10.15. Products based on LibreOffice Technology for Android and iOS are listed here: https://www.libreoffice.org/download/android-and-ios/.
Next week, power users and technology enthusiasts will be able to download LibreOffice 24.8.1, the first minor release of the recently announced new version with many bug and regression fixes. A summary of the new features of the LibreOffice 24.8 ifamily s available on this blog post: https://blog.documentfoundation.org/blog/2024/08/22/libreoffice-248/.
End users looking for support will be helped by the immediate availability of the LibreOffice 24.8 Getting Started Guide, which is available for download from the following link: https://books.libreoffice.org/. In addition, they will be able to get first-level technical support from volunteers on user mailing lists and the Ask LibreOffice website: https://ask.libreoffice.org.
LibreOffice users, free software advocates and community members can support the Document Foundation by making a donation at https://www.libreoffice.org/donate.
[1] Fixes in RC1: https://wiki.documentfoundation.org/Releases/24.2.6/RC1. Fixes in RC2: https://wiki.documentfoundation.org/Releases/24.2.6/RC2.
LibreOffice 24.8, for the privacy-conscious office suite user [Press Releases Archives - The Document Foundation Blog]
The new major release provides a wealth of new features, plus a large number of interoperability improvements
Berlin, 22 August 2024 – LibreOffice 24.8, the new major release of the free, volunteer-supported office suite for Windows (Intel, AMD and ARM), macOS (Apple and Intel) and Linux is available from our download page. This is the second major release to use the new calendar-based numbering scheme (YY.M), and the first to provide an official package for Windows PCs based on ARM processors.
LibreOffice is the only office suite, or if you prefer, the only software for creating documents that may contain personal or confidential information, that respects the privacy of the user – thus ensuring that the user is able to decide if and with whom to share the content they have created. As such, LibreOffice is the best option for the privacy-conscious office suite user, and provides a feature set comparable to the leading product on the market. It also offers a range of interface options to suit different user habits, from traditional to contemporary, and makes the most of different screen sizes by optimising the space available on the desktop to put the maximum number of features just a click or two away.
The biggest advantage over competing products is the LibreOffice Technology engine, the single software platform on which desktop, mobile and cloud versions of LibreOffice – including those provided by ecosystem companies – are based. This allows LibreOffice to offer a better user experience and to produce identical and perfectly interoperable documents based on the two available ISO standards: the Open Document Format (ODT, ODS and ODP), and the proprietary Microsoft OOXML (DOCX, XLSX and PPTX). The latter hides a large amount of artificial complexity, which may create problems for users who are confident that they are using a true open standard.
End users looking for support will be helped by the immediate availability of the LibreOffice 24.8 Getting Started Guide, which is available for download from the Bookshelf. In addition, they will be able to get first-level technical support from volunteers on user mailing lists and the Ask LibreOffice website.
New Features of LibreOffice 24.8
PRIVACY
- If the option Tools ▸ Options ▸ LibreOffice ▸ Security ▸ Options ▸ Remove personal information on saving is enabled, then personal information will not be exported (author names and timestamps, editing duration, printer name and config, document template, author and date for comments and tracked changes)
WRITER
- UI: handling of formatting characters, width of comments panel, selection of bullets, new dialog for hyperlinks, new Find deck in the sidebar
- Navigator: adding cross-references by drag-and-drop items, deleting footnotes and endnotes, indicating images with broken links
- Hyphenation: exclude words from hyphenation with new contextual menu and visualization, new hyphenation across columns, pages or spreads, hyphenation between constituents of a compound word
CALC
- Addition of FILTER, LET, RANDARRAY, SEQUENCE, SORT, SORTBY, UNIQUE, XLOOKUP and XMATCH functions
- Improvement of threaded calculation performance, optimization of redraw after a cell change by minimizing the area that needs to be refreshed
- Cell focus rectangle moved apart from cell content
- Comments can be edited and deleted from the Navigator’s right-click menu
IMPRESS & DRAW
- In Normal view, it is now possible to scroll between slides, and the Notes are available as a collapsible pane under the slide
- By default, the running Slideshow is now immediately updated when applying changes in EditView or in PresenterConsole, even on different Screens
CHART
- New chart types “Pie-of-Pie” and “Bar-of-Pie” break down a slice of a pie as a pie or bar sub-chart respectively (this also enables import of such charts from OOXML files created with Microsoft Office)
- Text inside chart’s titles, text boxes and shapes (and parts thereof) can now be formatted using the Character dialog
ACCESSIBILITY
- Several improvements to the management of formatting options, which can be now announced properly by screen readers
SECURITY
- New mode of password-based ODF encryption
INTEROPERABILITY
- Support importing and exporting OOXML pivot table (cell) format definitions
- PPTX files with heavy use of custom shapes now open faster
A video showcasing the most significant new features is available on YouTube and PeerTube.
Contributors to LibreOffice 24.8
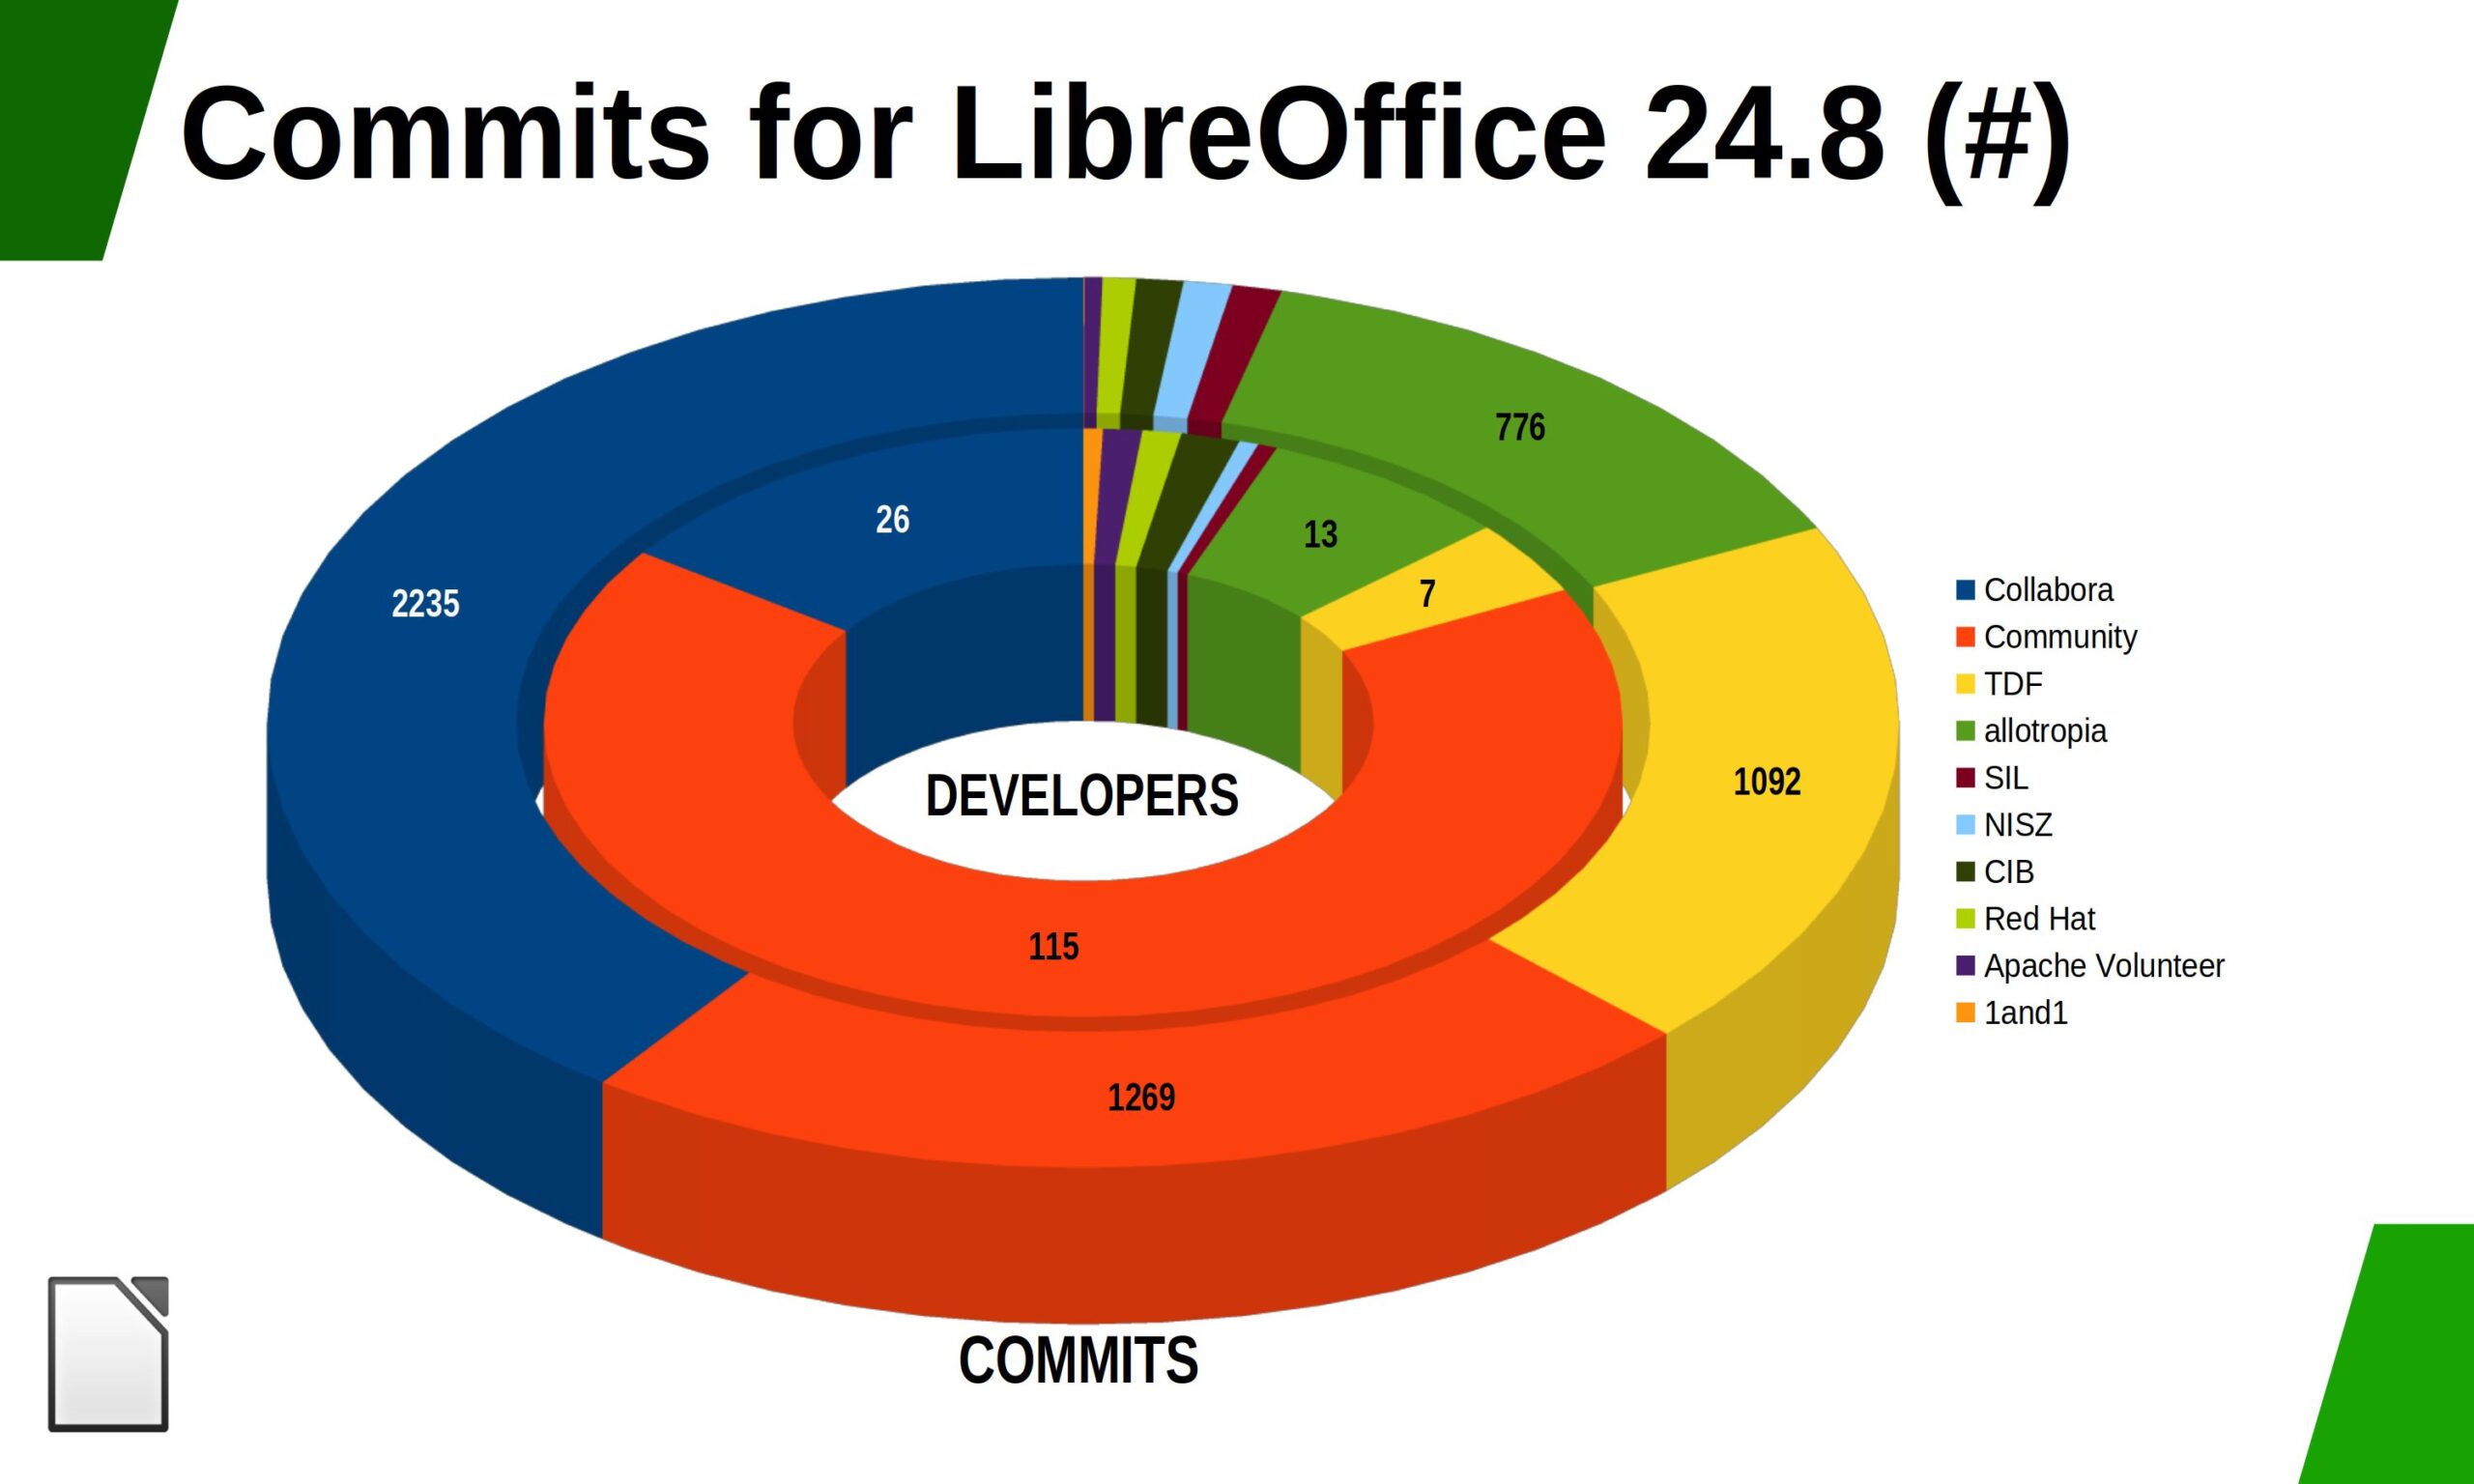
There are 171 contributors to the new features of LibreOffice 24.8: 57% of code commits come from the 49 developers employed by companies on TDF’s Advisory Board – Collabora, allotropia and Red Hat – and other organisations, another 20% from seven developers at The Document Foundation, and the remaining 23% from 115 individual volunteer developers.
An additional 188 volunteers have committed localized strings in 160 languages, representing hundreds of people actually providing translations. LibreOffice 24.8 is available in 120 languages, more than any other desktop software, making it available to over 5.5 billion people in their native language. In addition, over 2.4 billion people speak one of these 120 languages as a second language (L2).
LibreOffice for Enterprises
For enterprise-class deployments, TDF strongly recommends the LibreOffice Enterprise family of applications from ecosystem partners – for desktop, mobile and cloud – with a wide range of dedicated value-added features and other benefits such as SLAs: LibreOffice in Business.
Every line of code developed by ecosystem companies for enterprise customers is shared with the community on the master code repository and improves the LibreOffice Technology platform. Products based on LibreOffice Technology are available for all major desktop operating systems (Windows, macOS, Linux and ChromeOS), mobile platforms (Android and iOS) and the cloud.
Migrations to LibreOffice
The Document Foundation has developed a migration protocol to help companies move from proprietary office suites to LibreOffice, based on the deployment of an LTS (long-term support) enterprise-optimised version of LibreOffice plus migration consulting and training provided by certified professionals who offer value-added solutions consistent with proprietary offerings. Reference: professional support page.
In fact, LibreOffice’s mature code base, rich feature set, strong support for open standards, excellent compatibility and LTS options from certified partners make it the ideal solution for organisations looking to regain control of their data and break free from vendor lock-in.
Availability of LibreOffice 24.8
LibreOffice 24.8 is available on our download page. Minimum requirements for proprietary operating systems are Microsoft Windows 7 SP1 [1] and Apple MacOS 10.15. LibreOffice Technology-based products for Android and iOS are listed on this page.
For users who don’t need the latest features and prefer a version that has undergone more testing and bug fixing, The Document Foundation maintains the LibreOffice 24.2 family, which includes several months of back-ported fixes. The current release is LibreOffice 24.2.5.
LibreOffice users, free software advocates and community members can support The Document Foundation with a donation on our donate page.
[1] This does not mean that The Document Foundation suggests the use of this operating system, which is no longer supported by Microsoft itself, and as such should not be used for security reasons.
Release Notes: wiki.documentfoundation.org/ReleaseNotes/24.8
Press Kit with Images: nextcloud.documentfoundation.org/s/JEe8MkDZWMmAGmS
22-08-2024
17:51
Announcement of LibreOffice 24.2.5 Community, optimized for the privacy-conscious user [Press Releases Archives - The Document Foundation Blog]
Berlin, 11 July 2024 – LibreOffice 24.2.5 Community, the fifth minor release of the free, volunteer-supported office productivity suite for office environments and individuals, the best choice for privacy-conscious users and digital sovereignty, is available at www.libreoffice.org/download for Windows, macOS and Linux.
The release includes more than 70 bug and regression fixes over LibreOffice 24.2.4 [1] to improve the stability and robustness of the software, as well as interoperability with legacy and proprietary document formats. LibreOffice 24.2.5 Community is the most advanced version of the office suite and is aimed at power users but can be used safely in other environments.
LibreOffice is the only office suite with a feature set comparable to the market leader. It also offers a range of interface options to suit all users, from traditional to modern Microsoft Office-style, and makes the most of different screen form factors by optimising the space available on the desktop to put the maximum number of features just a click or two away.
LibreOffice for Enterprises
For enterprise-class deployments, TDF strongly recommends the LibreOffice Enterprise family of applications from ecosystem partners – for desktop, mobile and cloud – with a range of dedicated value-added features, long term support and other benefits such as SLAs: www.libreoffice.org/download/libreoffice-in-business/
Every line of code developed by ecosystem companies for enterprise customers is shared with the community on the master code repository and contributes to the improvement of the LibreOffice Technology platform. All products based on that platform share the same approach, optimised for the privacy-conscious user.
Availability of LibreOffice 24.2.5 Community
LibreOffice 24.2.5 Community is available at www.libreoffice.org/download/. Minimum requirements for proprietary operating systems are Microsoft Windows 7 SP1 and Apple macOS 10.15. Products based on LibreOffice Technology for Android and iOS are listed here: www.libreoffice.org/download/android-and-ios/
For users who don’t need the latest features and prefer a version that has undergone more testing and bug fixing, The Document Foundation maintains a version with some months of back-ported fixes. The current release has reached the end of life, so users should update to LibreOffice 24.2.5 when the new major release LibreOffice 24.8 becomes available in August.
The Document Foundation does not provide technical support for users, although they can get it from volunteers on user mailing lists and the Ask LibreOffice website: ask.libreoffice.org
LibreOffice users, free software advocates and community members can support the Document Foundation by making a donation at www.libreoffice.org/donate
[1] Fixes in RC1: wiki.documentfoundation.org/Releases/24.2.5/RC1. Fixes in RC2: wiki.documentfoundation.org/Releases/24.2.5/RC2.
LibreOffice 24.2.4 Community available for download [Press Releases Archives - The Document Foundation Blog]
Berlin, 6 June 2024 – LibreOffice 24.2.4 Community, the fourth minor release of the free, volunteer-supported office suite for personal productivity in office environments, is now available at https://www.libreoffice.org/download for Windows, MacOS and Linux.
The release includes over 70 bug and regression fixes over LibreOffice 24.2.3 [1] to improve the stability and robustness of the software. LibreOffice 24.2.4 Community is the most advanced version of the office suite, offering the best features and interoperability with Microsoft Office proprietary formats.
LibreOffice is the only office suite with a feature set comparable to the market leader. It also offers a range of interface options to suit all user habits, from traditional to modern, and makes the most of different screen form factors by optimising the space available on the desktop to put the maximum number of features just a click or two away.
LibreOffice for Enterprises
For enterprise-class deployments, TDF strongly recommends the LibreOffice Enterprise family of applications from ecosystem partners – for desktop, mobile and cloud – with a wide range of dedicated value-added features and other benefits such as SLAs: https://www.libreoffice.org/download/libreoffice-in-business/
Every line of code developed by ecosystem companies for enterprise customers is shared with the community on the master code repository and contributes to the improvement of the LibreOffice Technology platform.
Availability of LibreOffice 24.2.4 Community
LibreOffice 24.2.4 Community is available at https://www.libreoffice.org/download/. Minimum requirements for proprietary operating systems are Microsoft Windows 7 SP1 and Apple MacOS 10.15. Products based on LibreOffice Technology for Android and iOS are listed here: https://www.libreoffice.org/download/android-and-ios/
For users who don’t need the latest features and prefer a version that has undergone more testing and bug fixing, The Document Foundation maintains the LibreOffice 7.6 family, which includes several months of back-ported fixes. The current release is LibreOffice 7.6.7 Community, but it will soon be replaced exactly by LibreOffice 24.2.4 when the new major release LibreOffice 24.8 becomes available.
The Document Foundation does not provide technical support for users, although they can get it from volunteers on user mailing lists and the Ask LibreOffice website: https://ask.libreoffice.org
LibreOffice users, free software advocates and community members can support the Document Foundation by making a donation at https://www.libreoffice.org/donate.
[1] Fixes in RC1: https://wiki.documentfoundation.org/Releases/24.2.4/RC1. Fixes in RC2: https://wiki.documentfoundation.org/Releases/24.2.4/RC2.
LibreOffice 7.6.7 for productivity environments [Press Releases Archives - The Document Foundation Blog]
Berlin, May 10, 2024 – LibreOffice 7.6.7 Community, the last minor release of the 7.6 line, is available from https://www.libreoffice.org/download for Windows, macOS, and Linux. This is the most thoroughly tested version, for deployments by individuals, small and medium businesses, and other organizations in productivity environments. This new minor release fixes bugs and regressions which can be looked up in the changelog [1].
For enterprise-class deployments, TDF strongly recommends the LibreOffice Enterprise family of applications from ecosystem partners – for desktop, mobile and cloud – with many dedicated value-added features and other benefits such as SLA (Service Level Agreements): https://www.libreoffice.org/download/libreoffice-in-business/
Users can download LibreOffice 7.6.7 Community from the office suite website: https://www.libreoffice.org/download/. Minimum requirements are Microsoft Windows 7 SP1 and Apple macOS 10.14. LibreOffice Technology-based products for Android and iOS are listed here: https://www.libreoffice.org/download/android-and-ios/
The Document Foundation does not provide technical support for users, although they can be helped by volunteers on user mailing lists and on the Ask LibreOffice website: https://ask.libreoffice.org
LibreOffice users, free software advocates and community members can support The Document Foundation with a donation at https://www.libreoffice.org/donate
[1] Change log pages: https://wiki.documentfoundation.org/Releases/7.6.7/RC1 and https://wiki.documentfoundation.org/Releases/7.6.7/RC2
21-03-2024
19:41
LVM Logische volumen [linux blogs franz ulenaers]
LVM = Logical Volume Manager
Een
partitie van het type = "Linux LVM" kan gebruikt worden
voor logische volumen maar ook als "snapshot"
!
Een snapshot kan een exact kopie zijn van een logische
volume dat bevrozen is op een bepaald ogenblik : dit maakt het
mogelijk om consistente backups te maken van logische
volumen
terwijl de logische volumen in gebruik zijn !
Hoe installeren ?
sudo apt-get install lvm2
Cre�er een fysisch volume voor een partitie
commando = �pvcreate� partitie
voorbeeld :
partitie moet van het type = "Linux LVM" zijn !
pvcreate /dev/sda5
cre�er een fysisch volume groep
vgcreate vg_storage partitie
voorbeeld
vgcreate mijnvg /dev/sda5
voeg een logische volume toe in een volume groep
lvcreate -L grootte_in_M/G -n logische_volume_naam volume_groep
voorbeeld :
lvcreate -L 30G -n mijnhome mijnvg
activeer een volume groep
vgchange -a y naam_volume_groep
voorbeeld :
vgchange -a y mijnvg
Mijn fysische en logische volumen
fysische volume
pvcreate /dev/sda1
fysische volume groep
vgcreate mydell /dev/sda1
logische volumen
lvcreate -L 1G -n boot mydell
lvcreate -L 100G -n data mydell
lvcreate -L 50G -n home mydell
lvcreate -L 50G -n root mydell
lvcreate -L 1G swap mydell
Logische volume vergroten/verkleinen
mijn home logische volume vergroten met 1 G
lvextend -L +1G /dev/mapper/mydell-home
let op een logische volume verkleinen kan leiden tot gegevens verlies indien er te weinig plaats is .... !
lvreduce -L -1G /dev/mapper/mydell-home
toon fysische volume
sudo pvs
worden getoond : PV fysische volume , VG volume groep , Fmt formaat (normaal = lvm2) , Attr attribuut, Psize groote PV, PFree vtije plaats
PV VG Fmt Attr PSize PFree
/dev/sda6 mydell lvm2 a-- 920,68g 500,63g
sudo pvs -a
sudo pvs /dev/sda6
Backup instellingen Logische volumen
zie bijgeleverde script LVM_bkup
toon volume groep
sudo vgs
VG #PV #LV #SN Attr VSize VFree
mydell 1 6 0 wz--n- 920,68g 500,63g
toon logische volume(n)
sudo lvs
LV VG Attr LSize Pool Origin Data% Meta% Move Log Cpy%Sync Convert
boot mydell -wi-ao---- 952,00m
data mydell -wi-ao---- 100,00g
home mydell -wi-ao---- 93,13g
mintroot mydell -wi-a----- 101,00g
root mydell -wi-ao---- 94,06g
swap mydell -wi-ao---- 30,93g
hoe een logische volume wegdoen ?
een logische volume wegdoen kan enkel maar als de fysische volume niet actief is
dit kan met het vgchange commando
vgchange -a n mydell
lvremove /dev//mijn_volumegroup/naam_logische-volume
voorbeeld :
lvremove /dev/mydell/data
hoe een fysische volume wegdoen ?
vgreduce mydell /dev/sda1
Bijlagen: LVM_bkup (0.8 KLB)
hoe een stick mounten en umounten zonder root te zijn en met je eigen rwx rechten ! [linux blogs franz ulenaers]
Stick mounten zonder root
hoe usb stick mounten en umounten zonder root te
zijn en met rwx rechten
?
---------------------------------------------------------------------------------------------------------
(hernoem
iedere ulefr01 naar je eigen gebruikersnaam!)
label stick
-
gebruik het 'fatlabel' commando om een volumenaam of label toe te kennen dit als je een vfat bestandensysteem gebruikt op je usb-stick
-
gebruik het commando 'tune2fs' voor een ext2,3,4
-
om een volumenaam stick32GB te maken op je usb_stick doe je met het commando :
-
sudo tune2fs -L stick32GB /dev/sdc1
noot : gebruik voor /dev/sdc1 hier het juiste device !
maak het filesysteem op je stick clean
-
mogelijk na het mounten zie dmesg messages : Volume was not properly unmounted. Some data may be corrupt. Please run fsck.
-
gebruik de file system consistency check commando fsck om dit recht te zetten
-
doe een umount voordat je het commando fsck uitvoer ! (gebruik het juiste device !)
-
fsck /dev/sdc1
-
-
-
noot: gebruik voor /dev/sdc1 hier je device !
rechten zetten op mappen en bestanden van je stick
-
Steek je stick in een usb poort en umount je stick
sudo chown ulefr01:ulefr01 /media/ulefr01/ -R
-
zet acl op je ext2,3,4 stick (werkt niet op een vfat !)
setfacl -m u:ulefr01:rwx /media/ulefr01
-
met getfact kun je acl zien
getfacl /media/ulefr01
-
met het ls commando kun je het resultaat zien
ls /media/ulefr01 -dla
drwxrwx--- 5 ulefr01 ulefr01 4096 okt 1 18:40 /media/ulefr01
noot: indien de �+� aanwezig is dan is acl reeds aanwezig, zoals op volgende lijn :
drwxrwx---+ 5 ulefr01 ulefr01 4096 okt 1 18:40 /media/ulefr01
Mount stick
-
Steek je stick in een usb poort en kijk of mounten automatisch gebeurd
-
check rechten van bestaande bestanden en mappen op je stick
ls * -la
-
indien root of andere rechten reeds aanwezig , herzetten met volgend commando
sudo chown ulefr01:ulefr01 /media/ulefr01/stick32GB -R
Maak map voor ieder stick
-
cd /media/ulefr01
-
mkdir mmcblk16G stick32GB stick16gb
aanpassen /etc/fstab
-
voeg een lijn toe voor iedere stick
-
voorbeelden
-
LABEL=mmcblk16G /media/ulefr01/mmcblk16G ext4 user,exec,defaults,noatime,acl,noauto 0 0
LABEL=stick32GB /media/ulefr01/stick32GB ext4 user,exec,defaults,noatime,acl,noauto 0 0
LABEL=stick16gb /media/ulefr01/stick16gb vfat user,defaults,noauto 0 0
Check het volgende
-
het volgende moet nu mogelijk zijn :
-
mount en umount zonder root te zijn
-
noot : je kunt de umount niet doen als de mount gedaan is door root ! Indien dat het geval is dan moet je eerst de umount met root ; daarna de mount als gebruiker dan kun je ook de umount doen .
-
-
zet een nieuw bestand op je stick zonder root te zijn
-
zet een nieuw map op je stick zonder root te zijn
-
check of je nieuwe bestanden kunt aanmaken zonder root te zijn
-
touch test
-
ls test -la
-
rm test
Zet acl list [linux blogs franz ulenaers]
setfacl
noot: meestal mogelijk op linux bestandsystemen : btrfs, ext2, ext3, ext4 en Reiserfs !
-
Hoe
een acl zetten voor ��n gebruiker ?
setfacl
-m
u:ulefr01:rwx /home/ulefr01
Hoe een acl zetten voor ��n gebruiker ?
noot: kies ipv ulefr01 hier je eigen gebruikersnaam
-
Hoe een acl afzetten ?
setfacl -x u:ulefr01 /home/ulefr01
-
Hoe een acl zetten voor twee of meer gebruikers ?
setfacl -m u:ulefr01:rwx /home/ulefr01
setfacl -m u:myriam:r-x /home/ulefr01
noot: kies ipv myriam je tweede gebruikersnaam; hier heeft myriam geen w write toegang maar wel r read en x exec !
-
Hoe een lijst opvragen van de ingestelde acl ?
getfacl home/ulefr01
getfacl: Voorafgaande '/' in absolute padnamen worden verwijderd
# file: home/ulefr01
# owner: ulefr01
# group: ulefr01
user::rwx
user:ulefr01:rwx
user:myriam:r-x
group::---
mask::rwx
other::---
-
Hoe het resultaat nakijken ?
getfacl home/ulefr01
zie hierboven
ls /home/ulefr01 -dla
drwxrwx---+ ulefr01 ulefr01 4096 okt 1 18:40 /home/ulefr01
zie + sign !
Het beste bestandensysteem (meest performant) op een USB stick , hoe opzetten ? [linux blogs franz ulenaers]
het beste bestandensysteem op een USB stick, hoe opzetten ?
het beste bestandensysteem (meest performant) is ext4
-
hoe opzetten ?
mkfs.ext4 $device
-
zet eerst journal af
tune2fs -O ^has_journal $device
-
doe journaling alleen met data_writeback
tune2fs -o journal_data_writeback $device
-
gebruik geen reserved spaces en zet het op nul.
tune2fs -m 0 $device
-
voor bovenstaande 3 acties kan bijgeleverde bash script gebruikt worden :
bestand USBperf
# USBperfext4
echo 'USBperf'
echo '--------'
echo 'ext4 device ?'
read device
echo "device= $device"
echo 'ok ?'
read ok
if [ $ok == ' ' ] || [ $ok == 'n' ] || [ $ok == 'N' ]
then
echo 'nok - dus stoppen'
exit 1
fi
echo "doe : no journaling ! tune2fs -O ^has_journal $device"
tune2fs -O ^has_journal $device
echo "use data mode for filesystem as writeback doe : tune2fs -o journal_data $device"
tune2fs -o journal_data_writeback $device
echo "disable reserved space "
tune2fs -m 0 $device
echo 'gedaan !'
read ok
echo "device= $device"
exit 0
-
pas bestand /etc/fstab aan voor je USB
-
gebruik optie �noatime�
-
Encryptie [linux blogs franz ulenaers]
Met encryptie kan men de gegevens op je computer beveiligen, door de gegevens onleesbaar maken voor de buitenwereld !
Hoe kan men een bestandssysteem encrypteren ?
installeer de volgende open source pakketten :
loop-aes-utils en cryptsetup
apt-get install loop-aes-utils
apt-get install cryptsetup
modprobe cryptoloop
voeg de volgende modules toe in je /etc/modules :
aesdm_mod
dm_crypt
cryptoloop
Hoe een beveiligd
bestandsysteem aanmaken ?
- dd if=/dev/zero of=/home/cryptfile bs=1M count=650
- losetup -e aes /dev/loop0 /home/cryptfile
- mkfs.ext3 /dev/loop0
- mkdir /mnt/crypt
- mount /dev/loop0 /mnt/crypt -t ext3
....
Je kunt automatisch je bestandssysteem beschikbaar maken door een volgende entry in je /etc/fstab :
/home/cryptfile /mnt/crypt ext3 auto,encryption=aes,user,exec 0 0
....
Je kunt je encryptie afzetten dmv./home/cryptfile /mnt/crypt ext3 auto,encryption=aes,exec 0 0
Manueel mounten kun je met :
- losetup -e aes /dev/loop0 /home/cryptfile
indien het paswoord verkeerd is dan krijg je de volgende melding :
mount: wrong fs type, bad option, bad superblock on /dev/loop0,
or too many mounted file systems
..
- mount /dev/loop0 /mnt/crypt -t ext3
14-03-2024
19:45
App Launchers for Ubuntu 19.04 [Tech Drive-in]
During the transition period, when GNOME Shell and Unity were pretty rough around the edges and slow to respond, 3rd party app launchers were a big deal. Overtime the newer desktop environments improved and became fast, reliable and predictable, reducing the need for a alternate app launchers.
As a result, many third-party app launchers have either slowed down development or simply seized to exist. Ulauncher seems to be the only one to have bucked the trend so far. Synpase and Kupfer on the other hand, though old and not as actively developed anymore, still pack a punch. Since Kupfer is too old school, we'll only be discussing Synapse and Ulauncher here.
Synapse
I still remember the excitement when I first reviewed Synapse more than 8 years ago. Back then, Synapse was something very unique to Linux and Ubuntu, and it still is in many ways. Though Synapse is not an active project that it used to be, the launcher still works great even in brand new Ubuntu 19.04.
No need to meddle with PPAs and DEBs, Synapse is available in Ubuntu Software Center.

CLICK HERE to directly find and install Synapse from Ubuntu Software Center, or simply search 'Synapse' in USC. Launch the app afterwards. Once launched, you can trigger Synapse with Ctrl+Space keyboard shortcut.
Ulauncher
The new kid in the block apparently. But new doesn't mean it is lacking in any way. What makes Ulauncher quite unique are its extensions. And there is plenty to choose from.
From an extension that lets you control your Spotify desktop app, to generic unit converters or simply timers, Ulauncher extesions has got you covered.
Let's install the app first. Download the DEB file for Debian/Ubuntu users and double-click the downloaded file to install it. To complete the installation via Terminal instead, do this:
OR
sudo dpkg -i ~/Downloads/ulauncher_4.3.2.r8_all.deb
Change filename/location if they are different in your case. And if the command reports dependency errors, make a force install using the command below.
sudo apt-get install -f
Done. Post install, launch the app from your app-list and you're good to go. Once started, Ulauncher will sit in your system tray by default. And just like Synapse, Ctrl+Space will trigger Ulauncher.
Installing extensions in Ulauncher is pretty straight forward too.
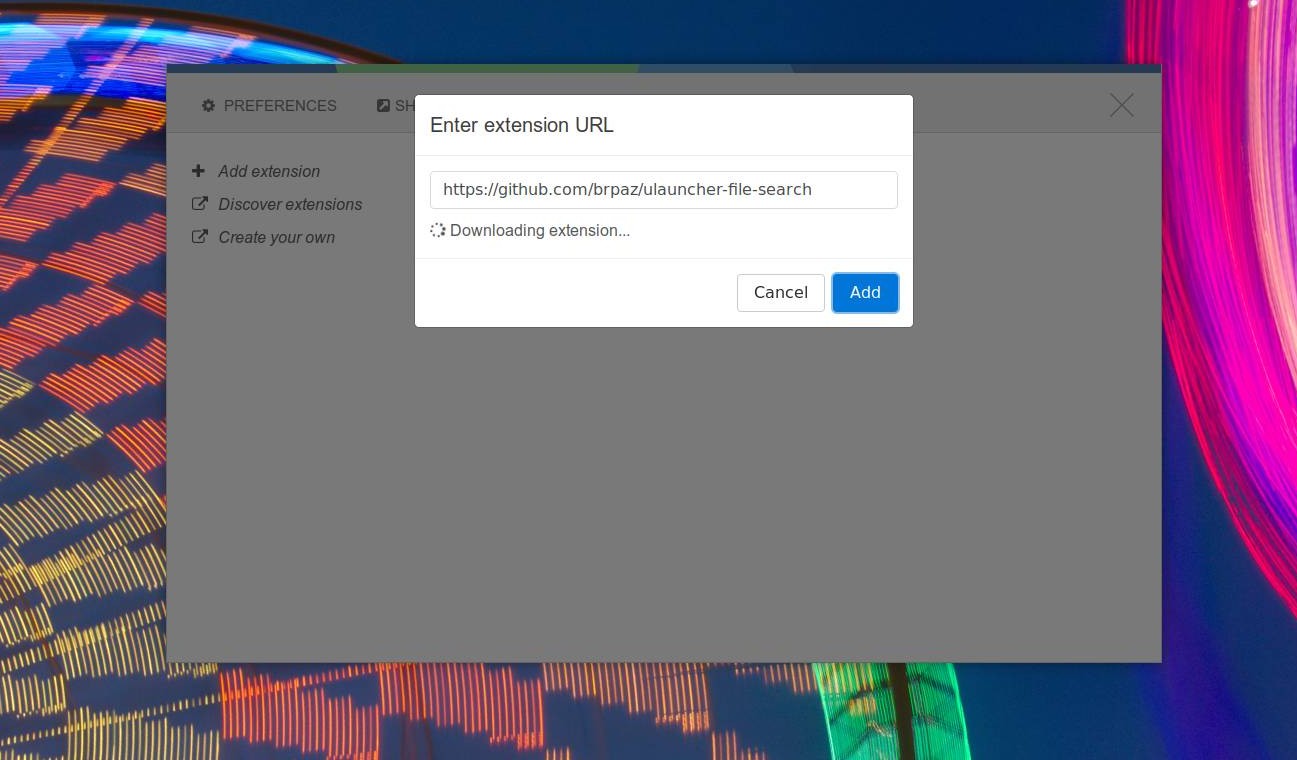
Find the extensions you want from Ulauncher Extensions page. Trigger a Ulauncher instance with Ctrl+Space and go to Settings > Extensions > Add extension. Provide the URL from the extension page and let the app do the rest.
A Standalone Video Player for Netflix, YouTube, Twitch on Ubuntu 19.04 [Tech Drive-in]
Snap apps are a godsend. ElectronPlayer is an Electron based app available on Snapstore that doubles up as a standalone media player for video streaming services such as Netflix, YouTube, Twitch, Floatplane etc.
And it works great on Ubuntu 19.04 "disco dingo". From what we've tested, Netflix works like a charm, so does YouTube. ElectronPlayer also has a picture-in-picture mode that let it run above desktop and full screen applications.

For me, this is great because I can free-up tabs on my Firefox window which are almost never clutter-free.
Use the command below to install ElectronPlayer directly from Snapstore. Open Terminal (Ctrl+Alt+t) and copy:
sudo snap install electronplayer
Press ENTER and give password when asked.
After the process is complete, search for ElectronPlayer in you App list. Sign in to your favorite video streaming services and you are good to go. Let us know your feedback in the comments.
Howto Upgrade to Ubuntu 19.04 from Ubuntu 18.10, Ubuntu 18.04 LTS [Tech Drive-in]
As most of you should know already, Ubuntu 19.04 "disco dingo" has been released. A lot of things have changed, see our comprehensive list of improvements in Ubuntu 19.04. Though it is not really necessary to make the jump, I'm sure many here would prefer to have the latest and greatest from Ubuntu. Here's how you upgrade to Ubuntu 19.04 from Ubuntu 18.10 and Ubuntu 18.04.
Upgrading to Ubuntu 19.04 from Ubuntu 18.04 LTS is tricky. There is no way you can make the jump from Ubuntu 18.04 LTS directly to Ubuntu 19.04. For that, you need to upgrade to Ubuntu 18.10 first. Pretty disappointing, I know. But when upgrading an entire OS, you can't be too careful.
And the process itself is not as tedious or time consuming à la Windows. And also unlike Windows, the upgrades are not forced upon you while you're in middle of something.

If you wonder how the dock in the above screenshot rest at the bottom of Ubuntu desktop, it's called dash-to-dock GNOME Shell extension. That and more Ubuntu 19.04 tips and tricks here.
Upgrade to Ubuntu 19.04 from Ubuntu 18.10
Let's start with the assumption that you're on Ubuntu 18.04 LTS.
After running the upgrade from Ubuntu 18.04 LTS from Ubuntu 18.10, the prompt will ask for a full system reboot. Please do that, and make sure everything is running smoothly afterwards. Now you have clean new Ubuntu 18.10 up and running. Let's begin the Ubuntu 19.04 upgrade process.
- Make sure your laptop is plugged-in, this is going to take time. Stable Internet connection is a must too.
- Run your Software Updater app, and install all the updates available.

- Post the update, you should be prompted with an "Ubuntu 19.04 is available" window. It will guide you through the required steps without much hassle.
- If not, fire up Software & Updates app and check for updates.
- If both these didn't work in your case, there's always the commandline option to make the force upgarde. Open Terminal app (keyboard shortcut: CTRL+ALT+T), and run the command below.
sudo do-release-upgrade -d
- Type the password when prompted. Don't let the simplicity of the command fool you, this is just the start of a long and complicated process. do-release command will check for available upgrades and then give you an estimated time and bandwidth required to complete the process.
- Read the instructions carefully and proceed. The process only takes about an hour or less for me. It entirely depends on your internet speed and system resources.
15 Things I Did Post Ubuntu 19.04 Installation [Tech Drive-in]
Ubuntu 19.04, codenamed "Disco Dingo", has been released (and upgrading is easier than you think). I've been on Ubuntu 19.04 since its first Alpha, and this has been a rock solid release as far I'm concerned. Changes in Ubuntu 19.04 are more evolutionary though, but availability of the latest Linux Kernel version 5.0 is significant.

Unity is long gone and Ubuntu 19.04 is indistinguishably GNOME 3.x now, which is not necessarily a bad thing. Yes, I know, there are many who still swear by the simplicity of Unity desktop. But I'm an outlier here, I liked both Unity and GNOME 3.x even in their very early avatars. When I wrote this review of GNOME Shell desktop almost 8 years ago, I knew it was destined for greatness. Ubuntu 19.04 "Disco Dingo" runs GNOME 3.32.0.
We'll discuss more about GNOME 3.x and Ubuntu 19.04 in the official review. Let's get down to brass tacks. A step-by-step guide into things I did after installing Ubuntu 19.04 "Disco Dingo".
1. Make sure your system is up-to-date
Do a full system update. Fire up your Software Updater and check for updates.sudo apt update && sudo apt dist-upgrade
Enter password when prompted and let the system do the rest.
2. Install GNOME Tweaks

GNOME Tweaks is an app the lets you tweak little things in GNOME based OSes that are otherwise hidden behind menus. If you are on Ubuntu 19.04, Tweaks is a must. Honestly, I don't remember if it was installed as a default. But here you install it anyway, Apt-URL will prompt you if the app already exists.
Search for Gnome Tweaks in Ubuntu Software Center. OR simply CLICK HERE to go straight to the app in Software Center. OR even better, copy-paste this command in Terminal (keyboard shortcut: CTRL+ALT+T).
sudo apt install gnome-tweaks
3. Enable MP3/MP4/AVI Playback, Adobe Flash etc.
You do have an option to install most of the 'restricted-extras' while installing the OS itself now, but if you are not-sure you've ticked all the right boxes, just run the following command in Terminal.sudo apt install ubuntu-restricted-extras
You can install it straight from the Ubuntu Software Center by CLICKING HERE.
4. Display Date/Battery Percentage on Top Panel

If you have GNOME Tweaks installed, this is easily done. Open GNOME tweaks, goto 'Top Bar' sidemenu and enable/disable what you need.
5. Enable 'Click to Minimize' on Ubuntu Dock
Honestly, I don't have a clue why this is disabled by default. You intuitively expect the apps shortcuts on Ubuntu dock to 'minimize' when you click on it (at least I do).In fact, the feature is already there, all you need to do is to switch it ON. Do this is Terminal.
gsettings set org.gnome.shell.extensions.dash-to-dock click-action 'minimize'
That's it. Now if you didn't find the 'click to minimize' feature useful, you can always revert Dock settings back to its original state, by copy-pasting the following command in Terminal app.
gsettings reset org.gnome.shell.extensions.dash-to-dock click-action
6. Pin/Unpin Apps from Launcher

For example, I almost never use the 'Help' app or the 'Amazon' shortcut preloaded on launcher. But I would prefer a shortcut to Terminal app instead. Right-click on your preferred app on the launcher, and add-to/remove-from favorites as you please.
7. Enable GNOME Shell Exetensions Support
Extensions are an integral part of GNOME desktop.
- If you are on Firefox, Install GNOME Shell integration Add-on.
- For Google Chrome/Chromium users, Install GNOME Shell integration plugin.
- Download and Install Chrome GNOME Shell from Software Center
- OR you can do the same via Terminal. Just copy-paste this command to Terminal.
sudo apt install chrome-gnome-shell
- Done. Don't mind the "chrome" in 'chrome-gnome-shell', it works with all major browsers, provided you've the correct browser add-on installed.
- You can now visit GNOME Extensions page and install extensions as you wish with ease. (if it didn't work immediately, a system restart will clear things up).
8. My Favourite 5 GNOME Shell Extensions for Ubuntu 19.04
- OpenWeather: Weather information.
- Dash to Dock: Transforms the default launcher into a configurable dock.
- Places Status Indicator: Adds a menu on your top panel for quickly navigating places.
- Status Area Horizontal Spacing: Correct the uneven spacing between icons on top-right panel area.
- Extensions: Enable/disable gnome shell extensions from a menu in the top panel. A must-have.
9. Remove Trash Icon from Desktop
Annoyed by the permanent presence of Home and Trash icons in the desktop? You are not alone. Luckily, there's an extension for that!- Desktop Icons: lets you add/remove icons from desktop.

Extension settings can be accessed directly from the extension home page (notice the small wrench icon near the ON/OFF toggle). OR you can use the Extensions addon like in the screenshot above.
10. Enable/Disable Two Finger Scrolling

One of my laptops act strangely when two-finger scrolling is on. You can easily disable two-finger scrolling and enable old school edge-scrolling in 'Settings'. Settings > Mouse and Touchpad
Quicktip: You can go straight to submenus by simply searching for it in GNOME's universal search bar.

Take for example the screenshot above, where I triggered the GNOME menu by hitting Super(Windows) key, and simply searched for 'mouse' settings. The first result will take me directly to the 'Settings' submenu for 'Mouse and Touchpad' that we saw earlier. Easy right? More examples will follow.
11. Nightlight Mode ON
When you're glued to your laptop/PC screen for a large amount of time everyday, it is advisable that you enable the automatic nightlight mode for the sake of your eyes. Be it the laptop or my phone, this has become an essential feature. The sight of a LED display without nightlight ON during lowlight conditions immediately gives me a headache these days. Easily one of my favourite in-built features on GNOME.Settings > Devices > Display > Night Light ON/OFF

OR as before, Hit superkey > search for 'night light'. It will take you straight to the submenu under Devices > Display. Guess you wouldn't need anymore examples on that.

12. Privacy on Ubuntu 19.04

Ubuntu remembers your usage & history to recommend you frequently used apps and such. And this is never shared over the network. But if you're not comfortable with this, you can always disable and delete your usage history on Ubuntu. Settings > Privacy > Usage & History
13. Perhaps a New Look & Feel?
As you might have noticed, I'm not using the default Ubuntu theme here.
sudo add-apt-repository ppa:system76/pop
sudo apt-get update
sudo apt install pop-icon-theme pop-gtk-theme pop-gnome-shell-theme
sudo apt install pop-wallpapers
14. Disable Error Reporting
If you find the "application closed unexpectedly" popups annoying, and would like to disable error reporting altogether, this is what you need to do.
Settings > Privacy > Problem Reporting and switch it off.
15. Liberate vertical space on Firefox by disabling Title Bar
This is not an Ubuntu specific tweak.
Firefox > Settings > Customize. Notice the "Title Bar" at the bottom left? Untick to disable.
Follow us on Facebook, and Twitter.
Ubuntu 19.04 Gets Newer and Better Wallpapers [Tech Drive-in]
A "Disco Dingo" themed wallpaper was already there. But the latest update bring a bunch of new wallpapers as system defaults on Ubuntu 19.04.

Pretty right? Here's the older one for comparison.

The newer wallpaper is definitely cleaner, more professional looking with better colors. I won't bother tinkering with wallpapers anymore, the new default on Ubuntu 19.04 is just perfect.

Too funky for my taste. But I'm sure there will be many who will prefer this darker, edgier, wallpaper over the others. As we said earlier, the new "disco dingo" mascot calls for infinite wallpaper variations.
Apart from theme and artwork updates, Ubuntu 19.04 has the latest Linux Kernel version 5.0 (5.0.0.8 to be precise). You can read more about Ubuntu 19.04 features and updates here.
Ubuntu 19.04 hit beta a few days ago. Though it is a pretty stable release already for a beta, I'd recommend to wait for another 15 days or so until the final release. If all you care are the wallpapers, you can download the new Ubuntu 19.04 wallpapers here. It's a DEB file, just do a double click post download.
LinuxBoot: A Linux Foundation Project to replace UEFI Components [Tech Drive-in]
UEFI has a pretty bad reputation among many in the Linux community. UEFI unnecessarily complicated Linux installation and distro-hopping in Windows pre-installed machines, for example. Linux Boot project by Linux Foundation aims to replace some firmware functionality like the UEFI DXE phase with Linux components.
What is UEFI?
UEFI is a standard or a specification that replaced legacy BIOS firmware, which was the industry standard for decades. Essentially, UEFI defines the software components between operating system and platform firmware.
UEFI boot has three phases: SEC, PEI and DXE. Driver eXecution Environment or DXE Phase in short: this is where UEFI system loads drivers for configured devices. LinuxBoot will replaces specific firmware functionality like the UEFI DXE phase with a Linux kernel and runtime.
LinuxBoot and the Future of System Startup
"Firmware has always had a simple purpose: to boot the OS. Achieving that has become much more difficult due to increasing complexity of both hardware and deployment. Firmware often must set up many components in the system, interface with more varieties of boot media, including high-speed storage and networking interfaces, and support advanced protocols and security features." writes Linux Foundation.

LinuxBoot will replace this slow and often error-prone code with a Linux Kernel. This alone should significantly improve system startup performance.
On top of that, LinuxBoot intends to achieve increased boot reliability and boot-time performance by removing unnecessary code and by using reliable Linux drivers instead of lightly tested firmware drivers. LinuxBoot claims that these improvements could potentially help make the system startup process as much as 20 times faster.
In fact, this "Linux to boot Linux" technique has been fairly common place in supercomputers, consumer electronics, and military applications, for decades. LinuxBoot looks to take this proven technique and improve on it so that it can be deployed and used more widely by individual users and companies.
Current Status
LinuxBoot is not as obscure or far-fetched as, say, lowRISC (open-source, Linux capable, SoC) or even OpenPilot. At FOSDEM 2019 summit, Facebook engineers revealed that their company is actively integrating and finetuning LinuxBoot to their needs for freeing hardware down to the lowest levels.
Facebook and Google are deeply involved in LinuxBoot project. Being large data companies, where even small improvements in system startup speed and reliability can bring major advantages, their involvement is not a surprise. To put this in perspective, a large data center run by Google or Facebook can have tens of thousands of servers. Other companies involved include Horizon Computing, Two Sigma and 9elements Cyber Security.
Look up Uber Time, Price Estimates on Terminal with Uber CLI [Tech Drive-in]
The worldwide phenomenon that is Uber needs no introduction. Uber is an immensely popular ride sharing, ride hailing, company that is valued in billions. Uber is so disruptive and controversial that many cities and even countries are putting up barriers to protect the interests of local taxi drivers.
Enough about Uber as a company. To those among you who regularly use Uber app for booking a cab, Uber CLI could be a useful companion.

Uber CLI can be a great tool for the easily distracted. This unique command line application allows you to look up Uber cab's time and price estimates without ever taking your eyes off the laptop screen.
Install Uber-CLI using NPM
You need to have NPM first to install Uber-CLI on Ubuntu. npm, short for Node.js package manager, is a package manager for the JavaScript programming language. It is the default package manager for the JavaScript runtime environment Node.js. npm has a command line based client and its own repository of packages.This is how to install npm on Ubuntu 19.04, and Ubuntu 18.10. And thereafter, using npm, install Uber-CLI. Fire up the Terminal and run the following.
sudo apt update
sudo apt install nodejs npm
npm install uber-cli -g
And you're done. Uber CLI is a command line based application, here are a few examples of how it works in Terminal. Also, since Uber is not available where I live, I couldn't vouch for its accuracy.

Uber-CLI has just two use cases.
uber time 'pickup address here'Easy right? I did some testing with places and addresses I'm familiar with, where Uber cabs are fairly common. And I found the results to be fairly accurate. Do test and leave feedback. Uber CLI github page for more info.
uber price -s 'start address' -e 'end address'
UBports Installer for Ubuntu Touch is just too good! [Tech Drive-in]
Even as someone who bought into the Ubuntu Touch hype very early, I was not expecting much from UBports to be honest. But to my pleasent surprise, UBports Installer turned my 4 year old BQ Aquaris E4.5 Ubuntu Edition hardware into a slick, clean, and usable phone again.


As many of you know already, Ubuntu Touch was Canonical's failed attempt to deliver a competent mobile operating system based on its desktop version. The first Ubuntu Touch installed smartphone was released in 2015 by BQ, a Spanish smartphone manufacturer. And in April 2016, the world's first Ubuntu Touch based tablet, the BQ Aquaris M10 Ubuntu Edition, was released.
Though initial response was quite promising, Ubuntu Touch failed to make a significant enough splash in the smartphone space. In fact, Ubuntu Touch was not alone, many other mobile OS projects like Firefox OS or even Samsung owned Tizen OS for that matter failed to capture a sizable market-share from Android/iOS duopoly.
To the disappointment of Ubuntu enthusiasts, Mark Shuttleworth announced the termination of Ubuntu Touch development in April, 2017.
Rise of UBports and revival of Ubuntu Touch Project
 For all its inadequacies, Ubuntu Touch was one unique OS. It looked and felt different from most other mobile operating systems. And Ubuntu Touch enthusiasts was not ready to give up on it so easily. Enter UBports.
UBports turned Ubuntu Touch into a community-driven project. Passionate people from around the world now contribute to the development of Ubuntu Touch. In August 2018, UBPorts released its OTA-4, upgrading the Ubuntu Touch's base from the Canonical's starting Ubuntu 15.04 (Vivid Vervet) to the nearest, current long-term support version Ubuntu 16.04 LTS.
They actively test the OS on a number of legacy smartphone hardware and help people install Ubuntu Touch on their smartphones using an incredibly capable, cross-platform, installer.
Ubuntu Touch Installer on Ubuntu 19.04
Though I knew about UBports project before, I was never motivated enough to try the new OS on my Aquaris E4.5, until yesterday. By sheer stroke of luck, I stumbled upon UBports Installer in Ubuntu Software Center. I was curious to find out if it really worked as it claimed on the page.

I fired up the app on my Ubuntu 19.04 and plugged in my Aquaris E4.5. Voila! the installer detected my phone in a jiffy. Since there wasn't much data on my BQ, I proceeded with Ubuntu Touch installation.

The instructions were pretty straight forward and it took probably 15 minutes to download, restart, and install, 16.04 LTS based Ubuntu Touch on my 4 year old hardware.

In my experience, even flashing an Android was never this easy! My Ubuntu phone is usable again without all the unnecessary bloat that made it clunky. This post is a tribute to the UBports community for the amazing work they've been doing with Ubuntu Touch. Here's also a list of smartphone hardware that can run Ubuntu Touch.
Retro Terminal that Emulates Old CRT Display (Ubuntu 18.10, 18.04 PPA) [Tech Drive-in]
We've featured cool-retro-term before. It is a wonderful little terminal emulator app on Ubuntu (and Linux) that adorns this cool retro look of the old CRT displays.
Let the pictures speak for themselves.

Pretty cool right? Not only does it look cool, it functions just like a normal Terminal app. You don't lose out on any features normally associated with a regular Terminal emulator. cool-retro-term comes with a bunch of themes and customisations that takes its retro cool appeal a few notches higher.

Enough now, let's find out how you install this retro looking Terminal emulator on Ubuntu 18.04 LTS, and Ubuntu 18.10. Fire up your Terminal app, and run these commands one after the other.
sudo add-apt-repository ppa:vantuz/cool-retro-term
sudo apt update
sudo apt install cool-retro-term
Done. The above PPA supports Ubuntu Artful, Bionic and Cosmic releases (Ubuntu 17.10, 18.04 LTS, 18.10). cool-retro-term is now installed and ready to go.
Since I don't have Artful or Bionic installations in any of my computers, I couldn't test the PPA on those releases. Do let me know if you faced any issues while installing the app.
And as some of you might have noticed, I'm running cool-retro-term from an AppImage. This is because I'm on Ubuntu 19.04 "disco dingo", and obviously the app doesn't support an unreleased OS (well, duh!).

This is how it looks on fullscreen mode. If you are a non-Ubuntu user, you can find various download options here. If you are on Fedora or distros based on it, cool-retro-term is available in the official repositories.
Google's Stadia Cloud Gaming Service, Powered by Linux [Tech Drive-in]
Unless you live under a rock, you must've been inundated with nonstop news about Google's high-octane launch ceremony yesterday where they unveiled the much hyped game streaming platform called Stadia.
Stadia, or Project Stream as it was earlier called, is a cloud gaming service where the games themselves are hosted on Google's servers, while the visual feedback from the game is streamed to the player's device through Google Chrome. If this technology catches on, and if it works just as good as showed in the demos, Stadia could be what the future of gaming might look like.
Stadia, Powered by Linux
It is a fairly common knowledge that Google data centers use Linux rather extensively. So it is not really surprising that Google would use Linux to power its cloud based Stadia gaming service.
Stadia's architecture is built on Google data center network which has extensive presence across the planet. With Google Stadia, Google is offering a virtual platform where processing resources can be scaled up to match your gaming needs without the end user ever spending a dime more on hardware.
And since Google data centers mostly runs on Linux, the games on Stadia will run on Linux too, through the Vulkan API. This is great news for gaming on Linux. Even if Stadia doesn't directly result in more games on Linux, it could potentially make gaming a platform agnostic cloud based service, like Netflix.
With Stadia, "the data center is your platform," claims Majd Bakar, head of engineering at Stadia. Stadia is not constrained by limitations of traditional console systems, he adds. Stadia is a "truly flexible, scalable, and modern platform" that takes into account the future requirements of the gaming ecosystem. When launched later this year, Stadia will be able to stream at 4K HDR and 60fps with surround sound.
Watch the full presentation here. Tell us what you think about Stadia in the comments.
Ubuntu 19.04 Updates - 7 Things to Know [Tech Drive-in]
Ubuntu 19.04 is scheduled to arrive in another 30 days has been released. I've been using it for the past week or so, and even as a pre-beta, the OS is pretty stable and not buggy at all. Here are a bunch of things you should know about the yet to be officially released Ubuntu 19.04.

1. Codename: "Disco Dingo"
How about that! As most of you know already, Canonical names its semiannual Ubuntu releases using an adjective and an animal with the same first letter (Intrepid Ibex, Feisty Fawn, or Maverick Meerkat, for example, were some of my favourites). And the upcoming Ubuntu 19.04 is codenamed "Disco Dingo", has to be one of the coolest codenames ever for an OS.2. Ubuntu 19.04 Theme Updates
A new cleaner, crisper looking Ubuntu is coming your way. Can you notice the subtle changes to the default Ubuntu theme in screenshot below? Like the new deep-black top panel and launcher? Very tastefully done.
To be sure, this is now looking more and more like vanilla GNOME and less like Unity, which is not a bad thing.

There are changes to the icons too. That hideous blue Trash icon is gone. Others include a new Update Manager icon, Ubuntu Software Center icon and Settings Icon.
3. Ubuntu 19.04 Official Mascot
GIFs speaks louder that words. Meet the official "Disco Dingo" mascot.
Pretty awesome, right? "Disco Dingo" mascot calls for infinite wallpaper variations.
4. The New Default Wallpaper
The new "Disco Dingo" themed wallpaper is so sweet: very Ubuntu-ish yet unique. A gray scale version of the same wallpaper is a system default too.
UPDATE: There's a entire suit of newer and better wallpapers on Ubuntu 19.04!
5. Linux Kernel 5.0 Support
Ubuntu 19.04 "Disco Dingo" will officially support the recently released Linux Kernel version 5.0. Among other things, Linux Kernel 5.0 comes with AMD FreeSync display support which is awesome news to users of high-end AMD Radeon graphics cards.
Also important to note is the added support for Adiantum Data Encryption and Raspberry Pi touchscreens. Apart from that, Kernel 5.0 has regular CPU performance improvements and improved hardware support.
6. Livepatch is ON
Ubuntu 19.04's 'Software and Updates' app has a new default tab called Livepatch. This new feature should ideally help you to apply critical kernel patches without rebooting.Livepatch may not mean much to a normal user who regularly powerdowns his or her computer, but can be very useful for enterprise users where any downtime is simply not acceptable.

Canonical introduced this feature in Ubuntu 18.04 LTS, but was later removed when Ubuntu 18.10 was released. The Livepatch feature is disabled on my Ubuntu 19.04 installation though, with a "Livepatch is not available for this system" warning. Not exactly sure what that means. Will update.
7. Ubuntu 19.04 Release Schedule
The beta freeze is scheduled to happen on March 28th and final release on April 18th.
My biggest disappointment though is the supposed Ubuntu Software Center revamp which is now confirmed to not make it to this release. Subscribe us on Twitter and Facebook for more Ubuntu 19.04 release updates.

Recommended read: Top things to do after installing Ubuntu 19.04
Purism: A Linux OS is talking Convergence again [Tech Drive-in]
The hype around "convergence" just won't die it seems. We have heard it from Ubuntu a lot, KDE, even from Google and Apple in fact. But the dream of true convergence, a uniform OS experience across platforms, never really materialised. Even behemoths like Apple and Googled failed to pull it off with their Android/iOS duopoly. Purism's Debian based PureOS wants to change all that for good.

Purism, PureOS, and the future of Convergence
Purism, a computer technology company based out of California, shot to fame for its Librem series of privacy and security focused laptops and smartphones. Purism raised over half a million dollars through a Crowd Supply crowdfunding campaign for its laptop hardware back in 2015. And unlike many crowdfunding megahits which later turned out to be duds, Purism delivered on its promises big time.Later in 2017, Purism surprised everyone again with their successful crowdfunding campaign for its Linux based opensource smartphone, dubbed Librem 5. The campaign raised over $2.6 million and surpassed its 1.5 million crowdfunding goal in just in two weeks. Purism's Librem 5 smartphones will start shipping late 2019.
Librem, which loosely refers to free and opensource software, was the brand name chosen by Purism for its laptops/smartphones. One of the biggest USPs of Purism devices is the hardware kill switches that it comes loaded with, which physically disconnects phone's camera, WiFi, Bluetooth, and mobile broadband modem.
Meet PureOS, Purism's Debian Based Linux OS

"Purism is beating the duopoly to that dream, with PureOS: we are now announcing that Purism’s PureOS is convergent, and has laid the foundation for all future applications to run on both the Librem 5 phone and Librem laptops, from the same PureOS release", announced Jeremiah Foster, the PureOS director at Purism (by duopoly, he was referring to Android/iOS platforms that dominate smartphone OS ecosystem).
"it turns out that this is really hard to do unless you have complete control of software source code and access to hardware itself. Even then, there is a catch; you need to compile software for both the phone’s CPU and the laptop CPU which are usually different architectures. This is a complex process that often reveals assumptions made in software development but it shows that to build a truly convergent device you need to design for convergence from the beginning."
How PureOS is achieving convergence?

"By basing PureOS on a solid, foundational operating system – one that has been solving this performance and run-everywhere problem for years – means there is a large set of packaged software that 'just works' on many different types of CPUs."
The second big factor is "adaptive design", software apps that can adapt for desktop or mobile easily, just like a modern website with responsive deisgn.
"Purism is hard at work on creating adaptive GNOME apps – and the community is joining this effort as well – apps that look great, and work great, both on a phone and on a laptop".
Purism has also developed an adaptive presentation library for GTK+ and GNOME, called libhandy, which the third party app developers can use to contribute to Purism's convergence ecosystem. Still under active development, libhandy is already packaged into PureOS and Debian.
Komorebi Wallpapers display Live Time & Date, Stunning Parallax Effect on Ubuntu [Tech Drive-in]
Live wallpapers are not a new thing. In fact we have had a lot of live wallpapers to choose from on Linux 10 years ago. Today? Not so much. In fact, be it GNOME or KDE, most desktops today are far less customizable than it used to be. Komorebi wallpaper manager for Ubuntu is kind of a way back machine in that sense.

Install Gorgeous Live Wallpapers in Ubuntu 18.10/18.04 using Komorebi
- Download Komorebi 64-bit DEB for Ubuntu, Mint (direct download)
- Click-open the 'komorebi-2.1-64-bit.deb' package and hit the install button (enter password when prompted).


sudo apt remove komorebi
Komorebi works great on Ubuntu 18.10, and 18.04 LTS. A few more screenshots.


A video wallpaper example. To see them in action, watch this demo.
Snap Install Mario Platformer on Ubuntu 18.10, Ubuntu 18.04 LTS [Tech Drive-in]
Nintendo's Mario needs no introduction. This game defined our childhoods. Now you can install and have fun with an unofficial version of the famed Mario platformer in Ubuntu 18.10 via this Snap package.

Play Nintendo's Mario Unofficially on Ubuntu 18.10
"Mari0 is a Mario + Portal platformer game." It is not an official release and hence the slight name change (Mari0 instead of Mario). Mari0 is still in testing, and might not work as intended. It doesn't work fullscreen for example, but everything else seems to be working great in my PC.But please be aware that this app is still in testing, and a lot of things can go wrong. Mari0 also comes with joystick support. Here's how you install unofficial Mari0 snap package. Do this in Terminal (CTRL+ALT+T)
sudo snap install mari0
To enable joystick support:
sudo snap connect mari0:joystick

Please find time to provide valuable feedback to the developer post testing, especially if something went wrong. You can also leave your feedback in the comments below.
Florida based Startup Builds Ubuntu Powered Aerial Robotics [Tech Drive-in]
Apellix is a Florida based startup that specialises in aerial robotics. They intend to create safer work environments by replacing workers with its task-specific drones to complete high-risk jobs at dangerous/elevated work sites.

Robotics with an Ubuntu Twist


Openpilot: An Opensource Alternative to Tesla Autopilot, GM Super Cruise [Tech Drive-in]
Openpilot is an opensource driving agent which at the moment can perform industry-standard functions such as Adaptive Cruise Control and Lane Keeping Assist System for a select few auto manufacturers.

Meet Project Openpilot

If Tesla's Autopilot was iOS, Openpilot developers would like their product to become the "Android for cars", the ubiquitous software of choice when autonomous systems on cars goes universal.
Even a lower variant of Tesla Model S which came without Tesla Autopilot system was upgraded with comma.ai's Openpilot solution which then mimicked a number of features from Tesla Autopilot, including automatic steering in highways according to this article. (comma.ai is the startup behind Openpilot)
Related read: Udacity's attempts to build a fully opensource self-driving car, and Linux Foundation's Automotive Grade Linux (AGL) infotainment system project which Toyota intends to use in its future cars.
Oranchelo - The icon theme to beat on Ubuntu 18.10 [Tech Drive-in]
OK, that might be an overstatement. But Oranchelo is good, really good.
Oranchelo Icons Theme for Ubuntu 18.10
Here's how you install Oranchelo icons theme on Ubuntu 18.10 using Oranchelo PPA. Just copy-paste the following three commands to Terminal (CTRL+ALT+T).
sudo add-apt-repository ppa:oranchelo/oranchelo-icon-theme
sudo apt update
sudo apt install oranchelo-icon-theme
Now run GNOME Tweaks, Appearance > Icons > Oranchelo.

Meet the artist behind Oranchelo icons theme at his deviantart page. So, how do you like the new icons? Let us know your opinion in the comments below.
11 Things I did After Installing Ubuntu 18.10 Cosmic Cuttlefish [Tech Drive-in]
Have been using "Cosmic Cuttlefish" since its first beta. It is perhaps one of the most visually pleasing Ubuntu releases ever. But more on that later. Now let's discuss what can be done to improve the overall user-experience by diving deep into the nitty gritties of Canonical's brand new flagship OS.
1. Enable MP3/MP4/AVI Playback, Adobe Flash etc.
This has been perhaps the standard 'first-thing-to-do' ever since the Ubuntu age dawned on us. You do have an option to install most of the 'restricted-extras' while installing the OS itself now, but if you are not-sure you've ticked all the right boxes, just run the following command in Terminal.sudo apt install ubuntu-restricted-extras
You can install it straight from the Ubuntu Software Center by CLICKING HERE.
2. Get GNOME Tweaks
GNOME Tweaks is an app the lets you tweak little things in GNOME based OSes that are otherwise hidden behind menus. If you are on Ubuntu 18.10, Tweaks is a must. Honestly, I don't remember if it was installed as a default. But here you install it anyway, Apt-URL will prompt you if the app already exists.
Search for Gnome Tweaks in Ubuntu Software Center. OR simply CLICK HERE to go straight to the app in Software Center. OR even better, copy-paste this command in Terminal (keyboard shortcut: CTRL+ALT+T).
sudo apt install gnome-tweaks
3. Displaying Date/Battery Percentage on Top Panel
If you have GNOME Tweaks installed, this is easily done. Open GNOME tweaks, goto 'Top Bar' sidemenu and enable/disable what you need.
4. Enable 'Click to Minimize' on Ubuntu Dock
Honestly, I don't have a clue why this is disabled by default. You intuitively expect the apps shortcuts on Ubuntu dock to 'minimize' when you click on it (at least I do).In fact, the feature is already there, all you need to do is to switch it ON. Do this is Terminal.
gsettings set org.gnome.shell.extensions.dash-to-dock click-action 'minimize'
That's it. Now if you didn't find the 'click to minimize' feature useful, you can always revert Dock settings back to its original state, by copy-pasting the following command in Terminal app.
gsettings reset org.gnome.shell.extensions.dash-to-dock click-action
5. Pin/Unpin Useful Stuff from Launcher
For example, I almost never use the 'Help' app or the 'Amazon' shortcut preloaded on launcher. But I would prefer a shortcut to Terminal app instead. Right-click on your preferred app on the launcher, and add-to/remove-from favorites as you please.
6. Enable/Disable Two Finger Scrolling
One of my laptops act strangely when two-finger scrolling is on. You can easily disable two-finger scrolling and enable old school edge-scrolling in 'Settings'. Settings > Mouse and Touchpad
Quicktip: You can go straight to submenus by simply searching for it in GNOME's universal search bar.
Take for example the screenshot above, where I triggered the GNOME menu by hitting Super(Windows) key, and simply searched for 'mouse' settings. The first result will take me directly to the 'Settings' submenu for 'Mouse and Touchpad' that we saw earlier. Easy right? More examples will follow.
7. Nightlight Mode ON
When you're glued to your laptop/PC screen for a large amount of time everyday, it is advisable that you enable the automatic nightlight mode for the sake of your eyes. Be it the laptop or my phone, this has become an essential feature. The sight of a LED display without nightlight ON during lowlight conditions immediately gives me a headache these days. Easily one of my favourite in-built features on GNOME.Settings > Devices > Display > Night Light ON/OFF
OR as before, Hit superkey > search for 'night light'. It will take you straight to the submenu under Devices > Display. Guess you wouldn't need anymore examples on that.
8. Safe Eyes App for Ubuntu


Installation is pretty straight forward. Just these 3 commands on your Terminal.
sudo add-apt-repository ppa:slgobinath/safeeyes
sudo apt update
sudo apt install safeeyes
9. Privacy on Ubuntu 18.10
Ubuntu remembers your usage & history to recommend you frequently used apps and such. And this is never shared over the network. But if you're not comfortable with this, you can always disable and delete your usage history on Ubuntu. Settings > Privacy > Usage & History
10. Perhaps a New Look & Feel?
As you might have noticed, I'm not using the default Ubuntu theme here.sudo add-apt-repository ppa:system76/pop sudo apt-get update sudo apt install pop-icon-theme pop-gtk-theme pop-gnome-shell-theme sudo apt install pop-wallpapers
11. Disable Error Reporting
If you find the "application closed unexpectedly" popups annoying, and would like to disable error reporting altogether, this is what you need to do.sudo gedit /etc/default/apport
This will open up a text editor window which has only one entry: "enabled=1". Change the value to '0' (zero) and you have Apport error reporting completely disabled.
Follow us on Facebook, and Twitter.
RIOT OS: A tiny Opensource OS for the 'Internet of Things' (IoT) [Tech Drive-in]
"RIOT powers the Internet of Things like Linux powers the Internet." RIOT is a small, free and opensource operating system for the memory constrained, low power wireless IoT devices.

RIOT OS: A tiny OS for embedded systems
Initially developed by Freie Universität Berlin (FU Berlin), INRIA institute and HAW Hamburg, Riot OS has evolved over the years into a very competent alternative to TinyOS, Contiki etc. and now supports application programming with programming languages such as C and C++, and provides full multithreading and real-time capabilities. RIOT can run on 8-bit, 16-bit and 32-bit ARM Cortex processors.RIOT is opensource, has its source code published on GitHub, and is based on a microkernel architecture (the bare minimum software required to implement an operating system). RIOT OS vs competition:

More information on RIOT OS can be found here. RIOT summits are held annually in major cities of Europe, if you are interested pin this up. Thank you for reading.
IBM, the 6th biggest contributor to Linux Kernel, acquires RedHat for $34 Billion [Tech Drive-in]
The $34 billion all cash deal to purchase opensource pioneer Red Hat is IBM's biggest ever acquisition by far. The deal will give IBM a major foothold in fast-growing cloud computing market and the combined entity could give stiff competition to Amazon's cloud computing platform, AWS. But what about Red Hat and its future?

Another Oracle - Sun Micorsystems deal in the making?
The alarmists among us might be quick to compare the IBM - Red Hat deal with the decade old deal between Oracle Corporation and Sun Microsystems, which was then a major player in opensource software scene.
But fear not. Unlike Oracle (which killed off Sun's OpenSolaris OS almost immediately after acquisition and even started a patent war against Android using Sun's Java patents), IBM is already a major contributor to opensource software including the mighty Linux Kernel. In fact, IBM was the 6th biggest contributor to Linux kernel in 2017.
What's in it for IBM?
With the acquisition of Red Hat, IBM becomes the world's #1 hybrid cloud provider, "offering companies the only open cloud solution that will unlock the full value of the cloud for their businesses", according to Ginni Rometty, IBM Chairman, President and CEO. She adds:
“Most companies today are only 20 percent along their cloud journey, renting compute power to cut costs. The next 80 percent is about unlocking real business value and driving growth. This is the next chapter of the cloud. It requires shifting business applications to hybrid cloud, extracting more data and optimizing every part of the business, from supply chains to sales.”
The Future of Red Hat
The Red Hat story is almost as old as Linux itself. Founded in 1993, RedHat's growth was phenomenal. Over the next two decades Red Hat went on to establish itself as the premier Linux company, and Red Hat OS was the enterprise Linux operating system of choice. It set the benchmark for others like Ubuntu, openSUSE and CentOS to follow. Red Hat is currently the second largest corporate contributor to the Linux kernel after Intel (Intel really stepped-up its Linux Kernel contributions post-2013).
Regular users might be more familiar with Fedora Project, a more user-friendly operating system maintained by Red Hat that competes with mainstream, non-enterprise operating systems like Ubuntu, elementary OS, Linux Mint or even Windows 10 for that matter. Will Red Hat be able to stay independent post acquisition?
According to the official press release, "IBM will remain committed to Red Hat’s open governance, open source contributions, participation in the open source community and development model, and fostering its widespread developer ecosystem. In addition, IBM and Red Hat will remain committed to the continued freedom of open source, via such efforts as Patent Promise, GPL Cooperation Commitment, the Open Invention Network and the LOT Network." Well, that's a huge relief.
In fact, IBM and Red Hat has been partnering each other for over 20 years, with IBM serving as an early supporter of Linux, collaborating with Red Hat to help develop and grow enterprise-grade Linux. And as IBM CEO mentioned, the acquisition is more of an evolution of the long-standing partnership between the two companies.
"Open source is the default choice for modern IT solutions, and I’m incredibly proud of the role Red Hat has played in making that a reality in the enterprise,” said Jim Whitehurst, President and CEO, Red Hat. “Joining forces with IBM will provide us with a greater level of scale, resources and capabilities to accelerate the impact of open source as the basis for digital transformation and bring Red Hat to an even wider audience – all while preserving our unique culture and unwavering commitment to open source innovation."Predicting the future can be tricky. A lot of things can go wrong. But one thing is sure, the acquisition of Red Hat by IBM is nothing like the Oracle - Sun deal. Between them, IBM and Red Hat must have contributed more to the open source community than any other organization.
How to Upgrade from Ubuntu 18.04 LTS to 18.10 'Cosmic Cuttlefish' [Tech Drive-in]
One day left before the final release of Ubuntu 18.10 codenamed "Cosmic Cuttlefish". This is how you make the upgrade from Ubuntu 18.04 to 18.10.

Ubuntu 18.10 has a brand new look!
As you can see from the screenshot, a lot has changed. Ubuntu 18.10 arrives with a major theme overhaul. After almost a decade, the default Ubuntu GTK theme ("Ambiance") is being replaced with a brand new one called "Yaru". The new theme is based heavily on GNOME's default "Adwaita" GTK theme. More on that later.
Upgrade from Ubuntu 18.04 LTS to 18.10
- An up-to-date Ubuntu 18.04 LTS is the first step. Do the following in Terminal.
$ sudo apt update && sudo apt dist-upgrade
$ sudo apt autoremove
- The first command will check for updates and then proceed with upgrading your Ubuntu 18.04 LTS with the latest updates. The "autoremove" command will clean up any and all dependencies that were installed with applications, and are no longer required.
- Now the slightly tricky part. You need to edit the /etc/update-manager/release-upgrades file and change the Prompt=never entry to Prompt=normal or else it will give a "no release found" error message.
- I used Vim to make the edit. But for the sake of simplicity, let's use gedit.
$ sudo gedit /etc/update-manager/release-upgrades
- Make the edit and save the changes. Now you are ready to go ahead with the upgrade. Make sure your laptop is plugged-in, this will take time.
- To be on the safer side, please make sure that there's at least 5GB of disk space left in your home partition (it will prompt you and exit if you don't have enough space required for the upgrade).
$ sudo do-release-upgrade -d
- That's it. Wait for a few hours and let it do its magic.
Meet 'Project Fusion': An Attempt to Integrate Tor into Firefox [Tech Drive-in]
A real private mode in Firefox? A Tor integrated Firefox could just be that. Tor Project is currently working with Mozilla to integrate Tor into Firefox.

Firefox with Tor Integration
For starters, Tor is a free software and an open network for anonymous communication over the web. "Tor protects you by bouncing your communications around a distributed network of relays run by volunteers all around the world: it prevents somebody watching your Internet connection from learning what sites you visit, and it prevents the sites you visit from learning your physical location."
And don't confuse this project with Tor Browser, which is web browser with Tor's elements built on top of Firefox stable builds. Tor Browser in its current form has many limitations. Since it is based on Firefox ESR, it takes a lot of time and effort to rebase the browser with new features from Firefox's stable builds every year or so.
Enter 'Project Fusion'
Now that Mozilla has officially taken over the works of integrating Tor into Firefox through Project Fusion, things could change for the better. With the intention of creating a 'super-private' mode in Firefox that supports First Party Isolation (which prevents cookies from tracking you across domains), Fingerprinting Resistance (which blocks user tracking through canvas elements), and Tor proxy, 'Project Fusion' is aiming big. To put it together, the goals of 'Project Fusion' can be condescend into four points.
- Implementing fingerprinting resistance, make more user friendly and reduce web breakage.
- Implement proxy bypass framework.
- Figure out the best way to integrate Tor proxy into Firefox.
- Real private browsing mode in Firefox, with First Party Isolation, Fingerprinting Resistance, and Tor proxy.
"Our ultimate goal is a long way away because of the amount of work to do and the necessity to match the safety of Tor Browser in Firefox when providing a Tor mode. There's no guarantee this will happen, but I hope it will and we will keep working towards it."As If you want to help, Firefox bugs tagged 'fingerprinting' in the whiteboard are a good place to start. Further reading at TOR 'Project Fusion' page.
City of Bern Awards Switzerland's Largest Open Source Contract for its Schools [Tech Drive-in]
In another major win in a span of weeks for the proponents of open source solutions in EU, Bern, the capital of Switzerland, is pushing ahead with its plans to adopt open source tools as its software of choice for all its public schools. If all goes well, some 10,000 students in Switzerland schools could soon start getting their training using an IT infrastructure that is largely open source.

Over 10,000 Students to Benefit
Switzerland's largest open-source deal introduces a brand new IT infrastructure for the public schools of its capital city. The package includes Colabora Cloud Office, an online version of LibreOffice which is to be hosted in the City of Bern's data center, as its core component. Nextcloud, Kolab, Moodle, and Mahara are the other prominent open source tools included in the package. The contract is worth CHF 13.7 million over 6 years.In an interview given to 'Der Bund', one of Switzerland's oldest news publications, open-source advocate Matthias Stürmer, EPP city council and IT expert, told that this is probably the largest ever open-source deal in Switzerland.
Many European countries are clamoring to adopt open source solutions for their cities and schools. From the recent German Federal Information Technology Centre's (ITZBund) selection of Nexcloud as their cloud solutions partner, to city of Turin's adoption of Ubuntu, to Italian Military's LibreOffice migration, Europe's recognition of open source solutions as a legitimate alternative is gaining ground.
Ironically enough, most of these software will run on proprietary iOS platform, as the clients given to students will be all Apple iPads. But hey, it had to start somewhere. When Europe's richest countries adopt open source, others will surely take notice. Stay tuned for updates. [via inside-channels.ch]
Germany says No to Public Cloud, Chooses Nextcloud's Open Source Solution [Tech Drive-in]
Germany's Federal Information Technology Centre (ITZBund) opts for an on-premise cloud solution which unlike those fancy Public cloud solutions, is completely private and under its direct control.

Germany's Open Source Migration
Given the recent privacy mishaps at some of biggest public cloud solution providers on the planet, it is only natural that government agencies across the world are opting for solutions that could provide users with more privacy and security. If the recent Facebook - Cambridge Analytica debacle is any indication, data vulnerability has become a serious national security concern for all countries.
"Nextcloud is pleased to announce that the German Federal Information Technology Center (ITZBund) has chosen Nextcloud as their solution for efficient and secure file sharing and collaboration in a public tender. Nextcloud is operated by the ITZBund, the central IT service provider of the federal government, and made available to around 300,000 users. ITZBund uses a Nextcloud Enterprise Subscription to gain access to operational, scaling and security expertise of Nextcloud GmbH as well as long-term support of the software."ITZBund employs about 2,700 people that include IT specialists, engineers and network and security professionals. After the successful completion of the pilot, a public tender was floated by ITZBund which eventually selected Nextcloud as their preferred partner. Nextcloud scored high on security requirements and scalability, which it addressed through its unique Apps concept.
LG Makes its webOS Operating System Open Source, Again! [Tech Drive-in]
Not many might remember HP's capable webOS. The open source webOS operating system was HP's answer to Android and iOS platforms. It was slick and very user-friendly from the start, some even considered it a better alternative to Android for Tablets at the time. But like many other smaller players, HP's webOS just couldn't find enough takers, and the project was abruptly ended and sold off of to LG.

The Open Source LG webOS
Under the 2013 agreement with HP Inc., LG Electronics had unlimited access to all webOS related documentation and source code. When LG took the project underground, webOS was still an open-source project.After many years of development, webOS is now LG's platform of choice for its Smart TV division. It is generally considered as one of the better sorted Smart TV user interfaces. LG is now ready to take the platform beyond Smart TVs. LG has developed an open source version of its platform, called webOS Open Source Edition, now available to the public at webosose.org.
Dr. I.P. Park, CTO at LG Electronics had this to say, "webOS has come a long way since then and is now a mature and stable platform ready to move beyond TVs to join the very exclusive group of operating systems that have been successfully commercialization at such a mass level. As we move from an app-based environment to a web-based one, we believe the true potential of webOS has yet to be seen."
By open sourcing webOS, it looks like LG is gunning for Samsung's Tizen OS, which is also open source and built on top of Linux. In our opinion, device manufacturers preferring open platforms (like Automotive Grade Linux), over Android or iOS is a welcome development for the long-term health of the industry in general.
08-02-2024
18:33
13-12-2023
10:29
Staat New York doet kerstinkopen bij ASML [Computable]
De Amerikaanse staat New York gaat voor een miljard dollar chipmachines aanschaffen bij ASML. De investering maakt deel uit van een tien miljard kostend plan om nabij de Universiteit van Albany een nanotech-complex neer te zetten.
Sogeti mag verder sleutelen aan datawarehouse KB [Computable]
Sogeti wordt de komende drie jaar opnieuw de datapartner van de Koninklijke Bibliotheek (KB). Met een optie op verlenging tot maximaal zes jaar. Het it-bedrijf is sinds 2016 beheerder van het datawarehouse en krijgt nu als...
HPE haalt gen-ai-banden met Nvidia aan [Computable]
Infrastructuurspecialist Hewlett Packard Enterprise (HPE) gaat nauwer samenwerken met ai-hardware en softwareleverancier Nvidia. Samen bieden ze vanaf januari 2024 een krachtige enterprise computingoplossing voor generatieve artificiële intelligentie (gen-ai).
Econocom kondigt internationale tak aan: Gather [Computable]
De Frans-Belgische it-dienstverlener Econocom heeft een apart, internationaal opererend bedrijfsonderdeel opgezet onder de naam Gather. Deze tak bundelt de expertise op het gebied van audio-visuele oplossingen, unified communications en it-producten en -diensten, gericht op grotere organisaties...
Coalitie: verbeter fietsveiligheid met sensoren [Computable]
De pas opgerichte Coalition for Cyclist Safety, met fietsfabrikant Koninklijke Gazelle aan boord, spant zich in om de fietsveiligheid te verbeteren met behulp van sensortechnologie, ook wel vehicle-to-everything-technologie (v2x) genoemd. De auto-industrie geldt als lichtend voorbeeld;...
12-12-2023
13:39
Ambtenaar mag onder voorwaarden oefenen met gen-ai [Computable]
Het lukt het kabinet niet meer dit jaar nog met een totale visie op generatieve ai (gen-ai) te komen. De Tweede Kamer kan zo’n integraal beeld van de impact die deze technologie heeft op onze maatschappij...
Softwareleverancier Topdesk ontvangt groeigeld [Computable]
Topdesk uit Delft krijgt een kapitaalinjectie van tweehonderd miljoen euro voor groei en verdere ontwikkeling. CVC Capital Partners dat een minderheidsbelang neemt, gaat de leverancier van software voor servicemanagement meer slagkracht bieden.
Vier miljoen voor stimulering datacenter-onderwijs EU [Computable]
De Europese Commissie (EC) heeft een subsidie van vier miljoen euro toegekend aan het project Colleges for European Datacenter Education (Cedce). Doel hiervan is het aanbieden van kwalitatief hoogwaardig onderwijs gericht op datacenters. Het project start...
11-12-2023
22:26
Startup Nedscaper haalt Fox-IT-oprichter aan boord [Computable]
Mede-oprichter van ict-beveiliger Fox-IT, Menno van der Marel, wordt strategisch directeur van Nedscaper. Die Nederlands/Zuid-Afrikaanse startup levert securitydiensten voor Microsoft-omgevingen. Van der Marel steekt ook 2,2 miljoen euro in het bedrijf.
PQR-ceo Marijke Kasius schuift door naar Bechtle [Computable]
Bechtle benoemt per 1 januari Marijke Kasius tot landendirecteur voor de bedrijven van de groep in Nederland. De 39-jarige Kasius geeft momenteel samen met Marco Lesmeister leiding aan it-dienstverlener PQR. Die positie wordt ingenomen door Marc...
Oud-IBM- en Ajax-directeur Frank Kales overleden [Computable]
Frank Kales is op 8 december jongstleden overleden op 81-jarige leeftijd. Hij was onder voetbalkenners bekend als algemeen directeur van voetbalclub Ajax in de turbulente periode 1999-2000. Daarvoor werkte hij decennialang bij IBM waar hij uiteindelijk...
09-12-2023
23:56
EU AI Act jaagt softwarebedrijven op kosten [Computable]
De komst van de uitgebreide en soms ook diepgaande artificiële intelligentie (ai)-regelgeving waartoe EU-onderhandelaars afgelopen nacht overeenstemming hebben bereikt, zal niet zonder financiële gevolgen blijven voor ondernemers. 'We hebben een ai-deal. Maar wel een dure,' zegt...
18:10
Historisch ai-akkoord EU legt ChatGPT aan banden [Computable]
De EU AI Act krijgt regels voor de ‘foundation models’ die aan de basis liggen van de enorme vooruitgang op gebied van ai. De Europese Commissie is het afgelopen nacht hierover eens geworden met het Europees...
Eset levert dns-filtering aan KPN-klanten [Computable]
Ict-beveiliger Eset levert domain name system (dns)-filtering aan telecombedrijf KPN. Met deze dienst zouden thuisnetwerken van KPN-klanten beter worden beschermd tegen malware, phishing en ongewenste inhoud.
08-12-2023
18:02
Overheden werken nog niet goed met Woo [Computable]
Overheidsorganisaties passen de nieuwe Wet open overheid (Woo) vaak nog niet effectief toe, voornamelijk door beperkte capaciteit en een gebrek aan prioriteit. Ambtenaren voelen zich bovendien beperkt in hun vrijheid om advies te geven. Dit blijkt...
West-Brabantse scholen helpen mkb via hackathon [Computable]
Studenten van de West-Brabantse onderwijsinstellingen Avans, BUas en Curio gaan ondernemers ondersteunen bij hun digitale ontwikkeling. In de zogeheten Digiwerkplaats Mkb vindt deze vrijdag een hackathon plaats, waarbij twintig Avans-studenten in groepjes een duurzaamheidsdashboard voor drie...
CWI organiseert Cobol-event voor meer urgentie [Computable]
Het Centrum Wiskunde & Informatica (CWI) organiseert 18 januari een evenement over de toekomst van Cobol en mainframes. Voor deze strategische Cobol-dag werkt het centrum samen met Quuks en Software Improvement Group (SIG). Volgens de organisatie...
Plan voor cloud-restricties splijt EU [Computable]
Een groot front vormt zich tegen de plannen van de Europese Commissie voor soevereiniteit-vereisten die vooral Franse cloudbedrijven bevoordelen. Nederland heeft zich in zijn verzet inmiddels verzekerd van de steun van dertien andere EU-lidstaten, waaronder Duitsland....
Unilever kiest weer voor warehousesysteem SAP [Computable]
Wegens de verdubbeling van de productiecapaciteit van de fabriek in het Hongaarse Nyirbator moest Unilever een nieuw plaatselijk, groter magazijn in gebruik nemen. Mét een nieuw warehousemanagementsysteem (wms). De keuze van het levensmiddelenconcern viel wederom op...
Lyvia Group neemt Facility Kwadraat over [Computable]
De Zweedse Lyvia Group pleegt zijn eerste overname in Nederland: Facility Kwadraat. Dit bedrijf uit Den Bosch levert software-as-a-service (saas) voor facility management, meerjarenonderhoud, huurbeheer en vastgoedbeheer.
Adoptie van generatieve ai verloopt traag [Computable]
Ondanks de grote belangstelling maakt een meerderheid van de grote ondernemingen nog geen gebruik van generatieve ai (gen-ai) zoals ChatGPT. Vooral de infrastructuur vormt een barrière bij de implementatie van de grote taalmodellen (llm's) die aan...
ASM steekt 300 miljoen in Amerikaanse expansie [Computable]
ASM, de toeleverancier van de chipindustrie die tot voor kort ASM International heette, gaat de komende vijf jaar driehonderd miljoen dollar investeren in de uitbreiding van zijn Amerikaanse operaties. De vestiging in Arizona wordt flink uitgebreid.
07-12-2023
10:03
Google met Gemini heel dicht bij OpenAI [Computable]
Met de lancering van Gemini, het grootste en meest ingenieuze artificiële intelligentie (ai)-taalmodel van Google, doet het techbedrijf een aanval op de leidende positie van OpenAI’s GPT-4. Volgens ai-experts is het verschil tussen beide grote taalmodellen...
06-12-2023
21:15
Hack Booking.com stelt reissector voor uitdaging [Computable]
De recente hack gericht op Booking.com zegt alles over de impact van cybercriminaliteit op de hotel- en reissector. Bij de oplichting werden de gegevens van klanten gestolen en te koop aangeboden op het darkweb. Hierbij werden...
13:56
Van Oord brengt klimaatrisico's in kaart [Computable]
Van Oord heeft een opensourcetool ontwikkeld die inzicht moet geven in de klimaatverandering en risico’s die daarmee gepaard gaan. Het bagger- en waterbouwbedrijf wil met die software die meerdere datalagen combineert, wereldwijd kustgebieden en ecosystemen in...
30-08-2021
11:12
Django Authentication Video Tutorial [Simple is Better Than Complex]
In this tutorial series, we are going to explore Django’s authentication system by implementing sign up, login, logout, password change, password reset and protected views from non-authenticated users. This tutorial is organized in 8 videos, one for each topic, ranging from 4 min to 15 min each.
- Setup
- Sign Up
- Login
- Logout
- Password Change
- Password Reset
- Protecting Views
- Bootstrap 4 Forms (Extra)
- Conclusions
Setup
Starting a Django project from scratch, creating a virtual environment and an initial Django app. After that, we are going to setup the templates and create an initial view to start working on the authentication.
If you are already familiar with Django, you can skip this video and jump to the Sign Up tutorial below.
Sign Up
First thing we are going to do is implement a sign up view using the built-in UserCreationForm. In this video you
are also going to get some insights on basic Django form processing.
Login
In this video tutorial we are going to first include the built-in Django auth URLs to our project and proceed to implement the login view.
Logout
In this tutorial we are going to include Django logout and also start playing with conditional templates, displaying different content depending if the user is authenticated or not.
Password Change
Next The password change is a view where an authenticated user can change their password.
Password Reset
This tutorial is perhaps the most complicated one, because it involves several views and also sending emails. In this video tutorial you are going to learn how to use the default implementation of the password reset process and how to change the email messages.
Protecting Views
After implementing the whole authentication system, this video gives you an overview on how to protect some views from
non authenticated users by using the @login_required decorator and also using class-based views mixins.
Bootstrap 4 Forms
Extra video showing how to integrate Django with Bootstrap 4 and how to use Django Crispy Forms to render Bootstrap forms properly. This video also include some general advices and tips about using Bootstrap 4.
Conclusions
If you want to learn more about Django authentication and some extra stuff related to it, like how to use Bootstrap to make your auth forms look good, or how to write unit tests for your auth-related views, you can read the forth part of my beginners guide to Django: A Complete Beginner’s Guide to Django - Part 4 - Authentication.
Of course the official documentation is the best source of information: Using the Django authentication system
The code used in this tutorial: github.com/sibtc/django-auth-tutorial-example
This was my first time recording this kind of content, so your feedback is highly appreciated. Please let me know what you think!
And don’t forget to subscribe to my YouTube channel! I will post exclusive Django tutorials there. So stay tuned! :-)
09-07-2021
20:56
What You Should Know About The Django User Model [Simple is Better Than Complex]
The goal of this article is to discuss the caveats of the default Django user model implementation and also to give you some advice on how to address them. It is important to know the limitations of the current implementation so to avoid the most common pitfalls.
Something to keep in mind is that the Django user model is heavily based on its initial implementation that is at least 16 years old. Because user and authentication is a core part of the majority of the web applications using Django, most of its quirks persisted on the subsequent releases so to maintain backward compatibility.
The good news is that Django offers many ways to override and customize its default implementation so to fit your application needs. But some of those changes must be done right at the beginning of the project, otherwise it would be too much of a hassle to change the database structure after your application is in production.
Below, the topics that we are going to cover in this article:
- User Model Limitations
- The username field is case-sensitive
- The username field validates against unicode letters
- The email field is not unique
- The email field is not mandatory
- A user without password cannot initiate a password reset
- Swapping the default user model is very difficult after you created the initial migrations
- Detailed Solutions
- Conclusions
User Model Limitations
First, let’s explore the caveats and next we discuss the options.
The username field is case-sensitive
Even though the username field is marked as unique, by default it is not case-sensitive. That means the username
john.doe and John.doe identifies two different users in your application.
This can be a security issue if your application has social aspects that builds around the username providing a
public URL to a profile like Twitter, Instagram or GitHub for example.
It also delivers a poor user experience because people doesn’t expect that john.doe is a different username than
John.Doe, and if the user does not type the username exactly in the same way when they created their account, they
might be unable to log in to your application.
Possible Solutions:
- If you are using PostgreSQL, you can replace the username
CharFieldwith theCICharFieldinstead (which is case-insensitive) - You can override the method
get_by_natural_keyfrom theUserManagerto query the database usingiexact - Create a custom authentication backend based on the
ModelBackendimplementation
The username field validates against unicode letters
This is not necessarily an issue, but it is important for you to understand what that means and what are the effects.
By default the username field accepts letters, numbers and the characters: @, ., +, -, and _.
The catch here is on which letters it accepts.
For example, joão would be a valid username. Similarly, Джон or 約翰 would also be a valid username.
Django ships with two username validators: ASCIIUsernameValidator and UnicodeUsernameValidator. If the intended
behavior is to only accept letters from A-Z, you may want to switch the username validator to use ASCII letters only
by using the ASCIIUsernameValidator.
Possible Solutions:
- Replace the default user model and change the username validator to
ASCIIUsernameValidator - If you can’t replace the default user model, you can change the validator on the form you use to create/update the user
The email field is not unique
Multiple users can have the same email address associated with their account.
By default the email is used to recover a password. If there is more than one user with the same email address, the password reset will be initiated for all accounts and the user will receive an email for each active account.
It also may not be an issue but this will certainly make it impossible to offer the option to authenticate the user using the email address (like those sites that allow you to login with username or email address).
Possible Solutions:
- Replace the default user model using the
AbstractBaseUserto define the email field from scratch - If you can’t replace the user model, enforce the validation on the forms used to create/update
The email field is not mandatory
By default the email field does not allow null, however it allow blank values, so it pretty much allows users to
not inform a email address.
Also, this may not be an issue for your application. But if you intend to allow users to log in with email it may be a good idea to enforce the registration of this field.
When using the built-in resources like user creation forms or when using model forms you need to pay attention to this detail if the desired behavior is to always have the user email.
Possible Solutions:
- Replace the default user model using the
AbstractBaseUserto define the email field from scratch - If you can’t replace the user model, enforce the validation on the forms used to create/update
A user without password cannot initiate a password reset
There is a small catch on the user creation process that if the set_password method is called passing None as a
parameter, it will produce an unusable password. And that also means that the user will be unable to start a password
reset to set the first password.
You can end up in that situation if you are using social networks like Facebook or Twitter to allow the user to create an account on your website.
Another way of ending up in this situation is simply by creating a user using the User.objects.create_user() or
User.objects.create_superuser() without providing an initial password.
Possible Solutions:
- If in you user creation flow you allow users to get started without setting a password, remember to pass a random (and lengthy) initial password so the user can later on go through the password reset flow and set an initial password.
Swapping the default user model is very difficult after you created the initial migrations
Changing the user model is something you want to do early on. After your database schema is generated and your database is populated it will be very tricky to swap the user model.
The reason why is that you are likely going to have some foreign key created referencing the user table, also Django internal tables will create hard references to the user table. And if you plan to change that later on you will need to change and migrate the database by yourself.
Possible Solutions:
- Whenever you are starting a new Django project, always swap the default user model. Even if the default
implementation fit all your needs. You can simply extend the
AbstractUserand change a single configuration on the settings module. This will give you a tremendous freedom and it will make things way easier in the future should the requirements change.
Detailed Solutions
To address the limitations we discussed in this article we have two options: (1) implement workarounds to fix the behavior of the default user model; (2) replace the default user model altogether and fix the issues for good.
What is going to dictate what approach you need to use is in what stage your project currently is.
- If you have an existing project running in production that is using the default
django.contrib.auth.models.User, go with the first solution implementing the workarounds; - If you are just starting your Django, start with the right foot and go with the solution number 2.
Workarounds
First let’s have a look on a few workarounds that you can implement if you project is already in production. Keep in
mind that those solutions assume that you don’t have direct access to the User model, that is, you are currently using
the default User model importing it from django.contrib.auth.models.
If you did replace the User model, then jump to the next section to get better tips on how to fix the issues.
Making username field case-insensitive
Before making any changes you need to make sure you don’t have conflicting usernames on your database. For example,
if you have a User with the username maria and another with the username Maria you have to plan a data migration
first. It is difficult to tell you what to do because it really depends on how you want to handle it. One option is
to append some digits after the username, but that can disturb the user experience.
Now let’s say you checked your database and there are no conflicting usernames and you are good to go.
First thing you need to do is to protect your sign up forms to not allow conflicting usernames to create accounts.
Then on your user creation form, used to sign up, you could validate the username like this:
def clean_username(self):
    username = self.cleaned_data.get("username")
    if User.objects.filter(username__iexact=username).exists():
        self.add_error("username", "A user with this username already exists.")
    return username
If you are handling user creation in a rest API using DRF, you can do something similar in your serializer:
def validate_username(self, value):
    if User.objects.filter(username__iexact=value).exists():
        raise serializers.ValidationError("A user with this username already exists.")
    return value
In the previous example the mentioned ValidationError is the one defined in the DRF.
The iexact notation on the queryset parameter will query the database ignoring the case.
Now that the user creation is sanitized we can proceed to define a custom authentication backend.
Create a module named backends.py anywhere in your project and add the following snippet:
backends.py
from django.contrib.auth import get_user_model
from django.contrib.auth.backends import ModelBackend


class CaseInsensitiveModelBackend(ModelBackend):
    def authenticate(self, request, username=None, password=None, **kwargs):
        UserModel = get_user_model()
        if username is None:
            username = kwargs.get(UserModel.USERNAME_FIELD)
        try:
            case_insensitive_username_field = '{}__iexact'.format(UserModel.USERNAME_FIELD)
            user = UserModel._default_manager.get(**{case_insensitive_username_field: username})
        except UserModel.DoesNotExist:
            # Run the default password hasher once to reduce the timing
            # difference between an existing and a non-existing user (#20760).
            UserModel().set_password(password)
        else:
            if user.check_password(password) and self.user_can_authenticate(user):
                return user
Now switch the authentication backend in the settings.py module:
settings.py
AUTHENTICATION_BACKENDS = ('mysite.core.backends.CaseInsensitiveModelBackend', )Please note that 'mysite.core.backends.CaseInsensitiveModelBackend' must be changed to the valid path, where you
created the backends.py module.
It is important to have handled all conflicting users before changing the authentication backend because otherwise it
could raise a 500 exception MultipleObjectsReturned.
Fixing the username validation to use accept ASCII letters only
Here we can borrow the built-in UsernameField and customize it to append the ASCIIUsernameValidator to the list of
validators:
from django.contrib.auth.forms import UsernameField
from django.contrib.auth.validators import ASCIIUsernameValidator

class ASCIIUsernameField(UsernameField):
    def __init__(self, *args, **kwargs):
        super().__init__(*args, **kwargs)
        self.validators.append(ASCIIUsernameValidator())
Then on the Meta of your User creation form you can replace the form field class:
class UserCreationForm(forms.ModelForm):
    # field definitions...

    class Meta:
        model = User
        fields = ("username",)
        field_classes = {'username': ASCIIUsernameField}
Fixing the email uniqueness and making it mandatory
Here all you can do is to sanitize and handle the user input in all views where you user can modify its email address.
You have to include the email field on your sign up form/serializer as well.
Then just make it mandatory like this:
class UserCreationForm(forms.ModelForm):
    email = forms.EmailField(required=True)
    # other field definitions...

    class Meta:
        model = User
        fields = ("username",)
        field_classes = {'username': ASCIIUsernameField}

    def clean_email(self):
        email = self.cleaned_data.get("email")
        if User.objects.filter(email__iexact=email).exists():
            self.add_error("email", _("A user with this email already exists."))
        return email
You can also check a complete and detailed example of this form on the project shared together with this post: userworkarounds
Replacing the default User model
Now I’m going to show you how I usually like to extend and replace the default User model. It is a little bit verbose but that is the strategy that will allow you to access all the inner parts of the User model and make it better.
To replace the User model you have two options: extending the AbstractBaseUser or extending the AbstractUser.
To illustrate what that means I draw the following diagram of how the default Django model is implemented:
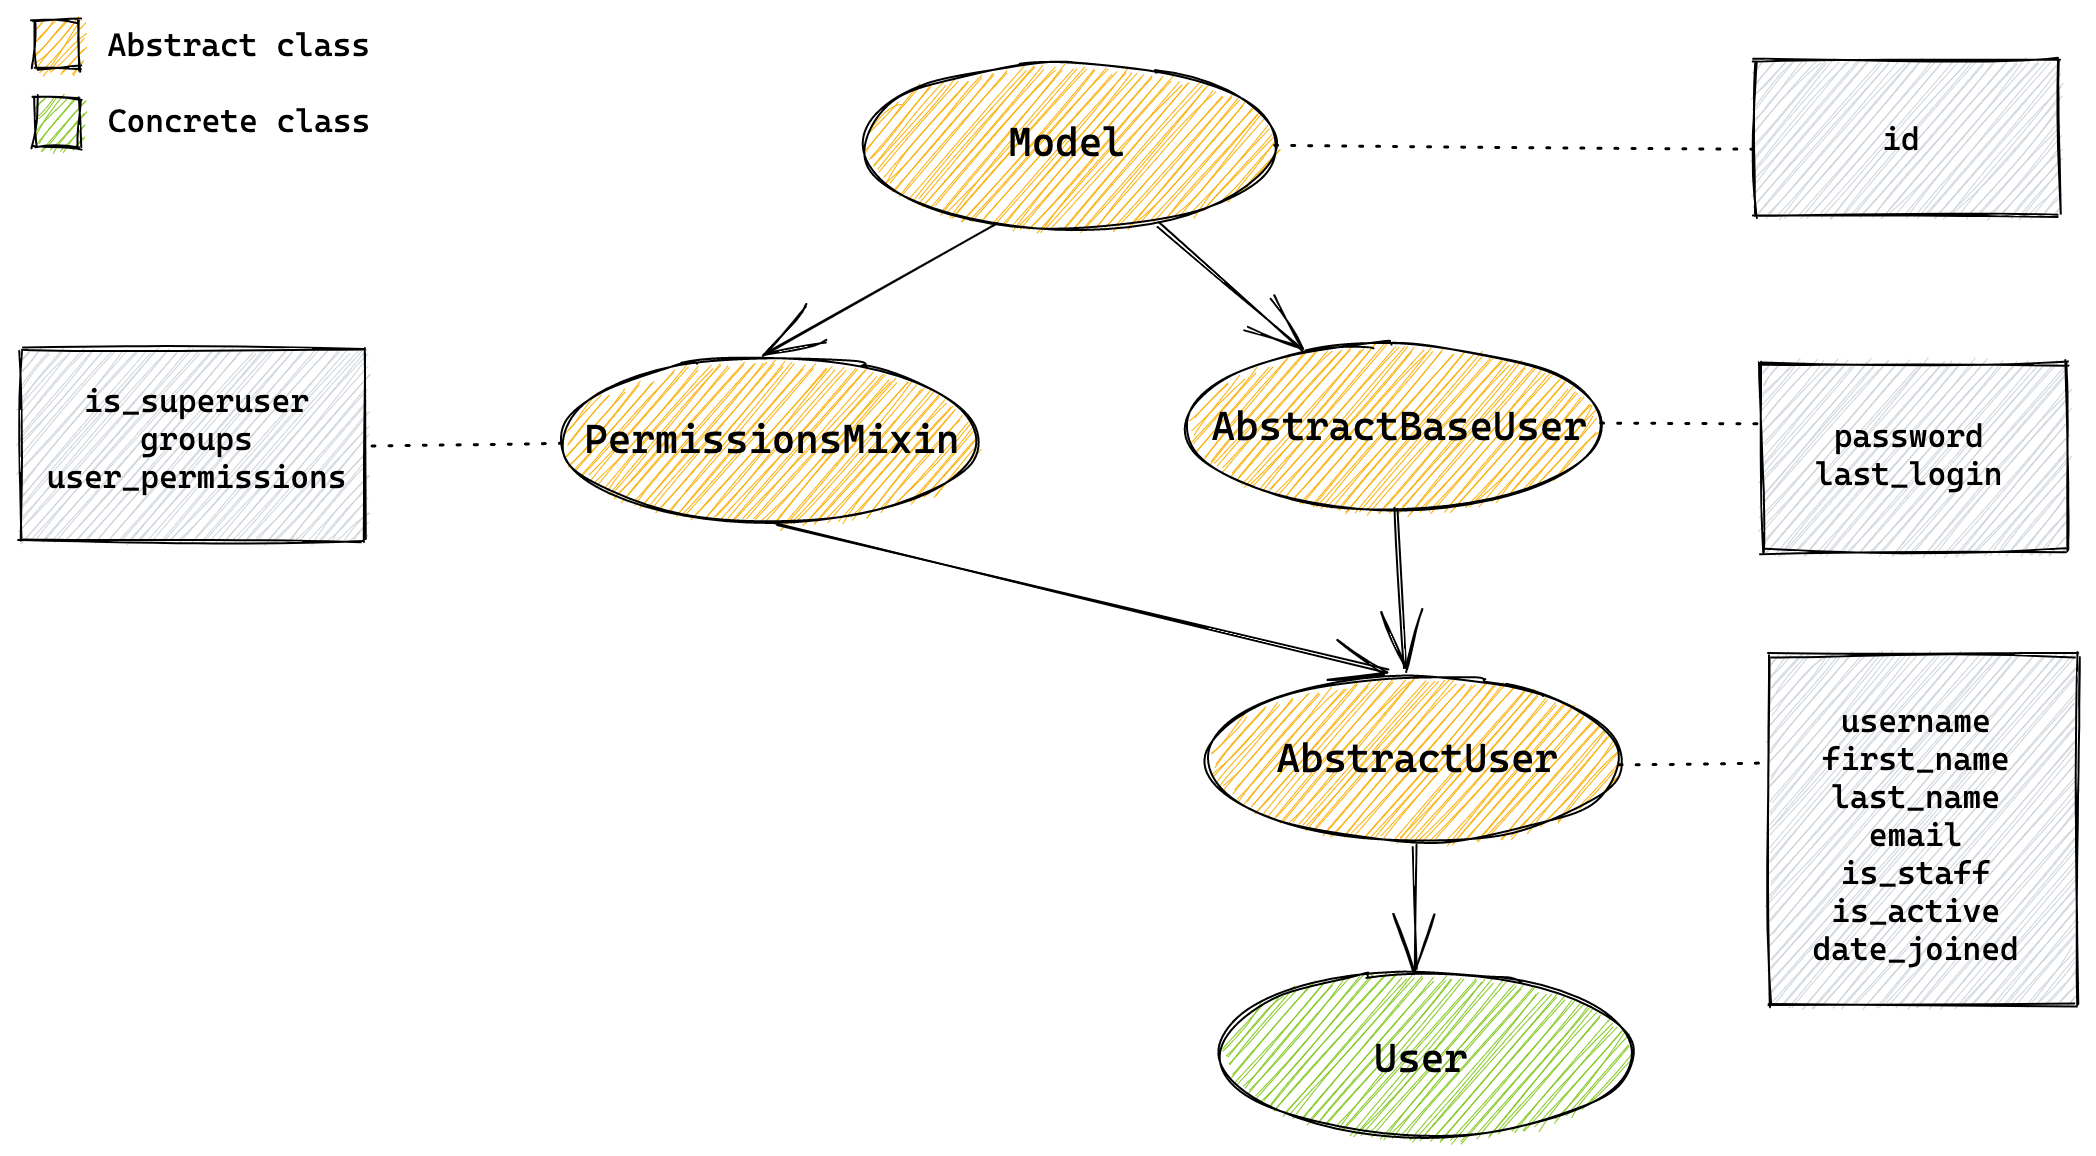
The green circle identified with the label User is actually the one you import from django.contrib.auth.models and
that is the implementation that we discussed in this article.
If you look at the source code, its implementation looks like this:
class User(AbstractUser):
    class Meta(AbstractUser.Meta):
        swappable = 'AUTH_USER_MODEL'
So basically it is just an implementation of the AbstractUser. Meaning all the fields and logic are implemented in the
abstract class.
It is done that way so we can easily extend the User model by creating a sub-class of the AbstractUser and add other
features and fields you like.
But there is a limitation that you can’t override an existing model field. For example, you can re-define the email field to make it mandatory or to change its length.
So extending the AbstractUser class is only useful when you want to modify its methods, add more fields or swap the
objects manager.
If you want to remove a field or change how the field is defined, you have to extend the user model from the
AbstractBaseUser.
The best strategy to have full control over the user model is creating a new concrete class from the PermissionsMixin
and the AbstractBaseUser.
Note that the PermissionsMixin is only necessary if you intend to use the Django admin or the built-in permissions
framework. If you are not planning to use it you can leave it out. And in the future if things change you can add
the mixin and migrate the model and you are ready to go.
So the implementation strategy looks like this:
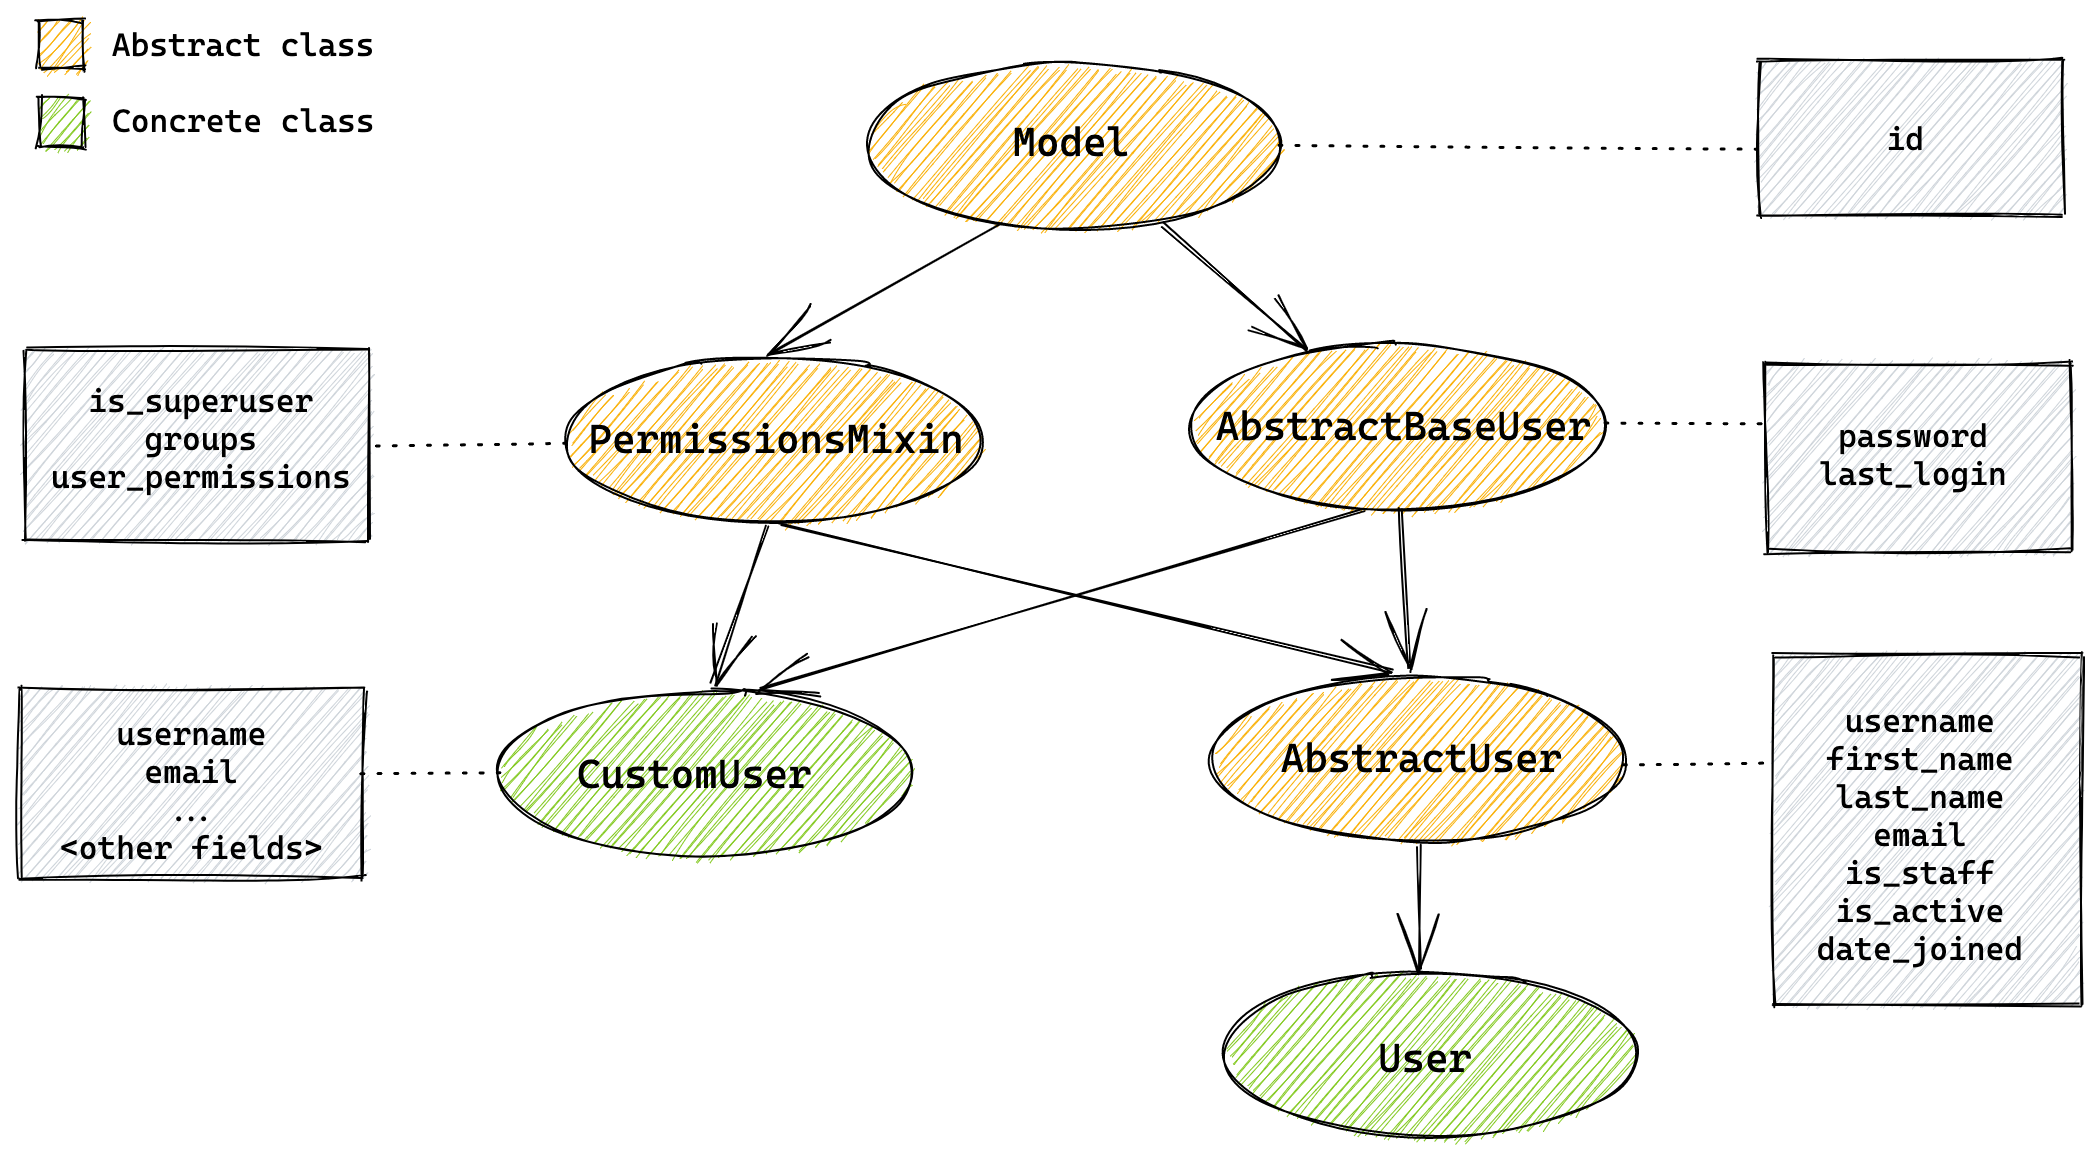
Now I’m going to show you my go-to implementation. I always use PostgreSQL which, in my opinion, is the best database
to use with Django. At least it is the one with most support and features anyway. So I’m going to show an approach
that use the PostgreSQL’s CITextExtension. Then I will show some options if you are using other database engines.
For this implementation I always create an app named accounts:
django-admin startapp accountsThen before adding any code I like to create an empty migration to install the PostgreSQL extensions that we are going to use:
python manage.py makemigrations accounts --empty --name="postgres_extensions"Inside the migrations directory of the accounts app you will find an empty migration called
0001_postgres_extensions.py.
Modify the file to include the extension installation:
migrations/0001_postgres_extensions.py
from django.contrib.postgres.operations import CITextExtension
from django.db import migrations

class Migration(migrations.Migration):

    dependencies = [
    ]

    operations = [
        CITextExtension()
    ]
Now let’s implement our model. Open the models.py file inside the accounts app.
I always grab the initial code directly from Django’s source on GitHub, copying the AbstractUser implementation, and
modify it accordingly:
accounts/models.py
from django.contrib.auth.base_user import AbstractBaseUser
from django.contrib.auth.models import PermissionsMixin, UserManager
from django.contrib.auth.validators import ASCIIUsernameValidator
from django.contrib.postgres.fields import CICharField, CIEmailField
from django.core.mail import send_mail
from django.db import models
from django.utils import timezone
from django.utils.translation import gettext_lazy as _


class CustomUser(AbstractBaseUser, PermissionsMixin):
    username_validator = ASCIIUsernameValidator()

    username = CICharField(
        _("username"),
        max_length=150,
        unique=True,
        help_text=_("Required. 150 characters or fewer. Letters, digits and @/./+/-/_ only."),
        validators=[username_validator],
        error_messages={
            "unique": _("A user with that username already exists."),
        },
    )
    first_name = models.CharField(_("first name"), max_length=150, blank=True)
    last_name = models.CharField(_("last name"), max_length=150, blank=True)
    email = CIEmailField(
        _("email address"),
        unique=True,
        error_messages={
            "unique": _("A user with that email address already exists."),
        },
    )
    is_staff = models.BooleanField(
        _("staff status"),
        default=False,
        help_text=_("Designates whether the user can log into this admin site."),
    )
    is_active = models.BooleanField(
        _("active"),
        default=True,
        help_text=_(
            "Designates whether this user should be treated as active. Unselect this instead of deleting accounts."
        ),
    )
    date_joined = models.DateTimeField(_("date joined"), default=timezone.now)

    objects = UserManager()

    EMAIL_FIELD = "email"
    USERNAME_FIELD = "username"
    REQUIRED_FIELDS = ["email"]

    class Meta:
        verbose_name = _("user")
        verbose_name_plural = _("users")

    def clean(self):
        super().clean()
        self.email = self.__class__.objects.normalize_email(self.email)

    def get_full_name(self):
        """
        Return the first_name plus the last_name, with a space in between.
        """
        full_name = "%s %s" % (self.first_name, self.last_name)
        return full_name.strip()

    def get_short_name(self):
        """Return the short name for the user."""
        return self.first_name

    def email_user(self, subject, message, from_email=None, **kwargs):
        """Send an email to this user."""
        send_mail(subject, message, from_email, [self.email], **kwargs)
Let’s review what we changed here:
- We switched the
username_validatorto useASCIIUsernameValidator - The
usernamefield now is usingCICharFieldwhich is not case-sensitive - The
emailfield is now mandatory, unique and is usingCIEmailFieldwhich is not case-sensitive
On the settings module, add the following configuration:
settings.py
AUTH_USER_MODEL = "accounts.CustomUser"Now we are ready to create our migrations:
python manage.py makemigrations Apply the migrations:
python manage.py migrateAnd you should get a similar result if you are just creating your project and if there is no other models/apps:
Operations to perform:
  Apply all migrations: accounts, admin, auth, contenttypes, sessions
Running migrations:
  Applying contenttypes.0001_initial... OK
  Applying contenttypes.0002_remove_content_type_name... OK
  Applying auth.0001_initial... OK
  Applying auth.0002_alter_permission_name_max_length... OK
  Applying auth.0003_alter_user_email_max_length... OK
  Applying auth.0004_alter_user_username_opts... OK
  Applying auth.0005_alter_user_last_login_null... OK
  Applying auth.0006_require_contenttypes_0002... OK
  Applying auth.0007_alter_validators_add_error_messages... OK
  Applying auth.0008_alter_user_username_max_length... OK
  Applying auth.0009_alter_user_last_name_max_length... OK
If you check your database scheme you will see that there is no auth_user table (which is the default one), and now
the user is stored on the table accounts_customuser:
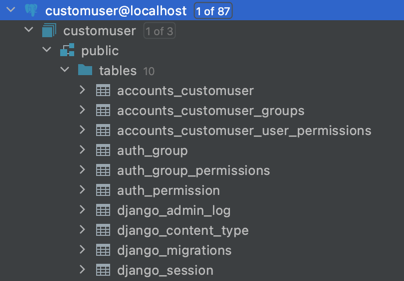
And all the Foreign Keys to the user model will be created pointing to this table. That’s why it is important to do it right in the beginning of your project, before you created the database scheme.
Now you have all the freedom. You can replace the first_name and last_name and use just one field called name.
You could remove the username field and identify your User model with the email (then just make sure you change
the property USERNAME_FIELD to email).
You can grab the source code on GitHub: customuser
Handling case-insensitive without PostgreSQL
If you are not using PostgreSQL and want to implement case-insensitive authentication and you have direct access to the User model, a nice hack is to create a custom manager for the User model, like this:
accounts/models.py
from django.contrib.auth.models import AbstractUser, UserManager

class CustomUserManager(UserManager):
    def get_by_natural_key(self, username):
        case_insensitive_username_field = '{}__iexact'.format(self.model.USERNAME_FIELD)
        return self.get(**{case_insensitive_username_field: username})

class CustomUser(AbstractBaseUser, PermissionsMixin):
    # all the fields, etc...

    objects = CustomUserManager()

    # meta, methods, etc...
Then you could also sanitize the username field on the clean() method to always save it as lowercase so you don’t have
to bother having case variant/conflicting usernames:
def clean(self):
    super().clean()
    self.email = self.__class__.objects.normalize_email(self.email)
    self.username = self.username.lower()
Conclusions
In this tutorial we discussed a few caveats of the default User model implementation and presented a few options to address those issues.
The takeaway message here is: always replace the default User model.
If your project is already in production, don’t panic: there are ways to fix those issues following the recommendations in this post.
I also have two detailed blog posts on how to make the username field case-insensitive and other about how to extend the django user model:
You can also explore the source code presented in this post on GitHub:
27-06-2021
09:33
How to Start a Production-Ready Django Project [Simple is Better Than Complex]
In this tutorial I’m going to show you how I usually start and organize a new Django project nowadays. I’ve tried many different configurations and ways to organize the project, but for the past 4 years or so this has been consistently my go-to setup.
Please note that this is not intended to be a “best practice” guide or to fit every use case. It’s just the way I like to use Django and that’s also the way that I found that allow your project to grow in healthy way.
Index
- Premises
- Environments/Modes
- Project Configuration
- Apps Configuration
- Code style and formatting
- Conclusions
Premises
Usually those are the premises I take into account when setting up a project:
- Separation of code and configuration
- Multiple environments (production, staging, development, local)
- Local/development environment first
- Internationalization and localization
- Testing and documentation
- Static checks and styling rules
- Not all apps must be pluggable
- Debugging and logging
Environments/Modes
Usually I work with three environment dimensions in my code: local, tests and production. I like to see it
as a “mode” how I run the project. What dictates which mode I’m running the project is which settings.py I’m currently
using.
Local
The local dimension always come first. It is the settings and setup that a developer will use on their local machine.
All the defaults and configurations must be done to attend the local development environment first.
The reason why I like to do it that way is that the project must be as simple as possible for a new hire to clone the repository, run the project and start coding.
The production environment usually will be configured and maintained by experienced developers and by those who are more familiar with the code base itself. And because the deployment should be automated, there is no reason for people being re-creating the production server over and over again. So it is perfectly fine for the production setup require a few extra steps and configuration.
Tests
The tests environment will be also available locally, so developers can test the code and run the static checks.
But the idea of the tests environment is to expose it to a CI environment like Travis CI, Circle CI, AWS Code Pipeline, etc.
It is a simple setup that you can install the project and run all the unit tests.
Production
The production dimension is the real deal. This is the environment that goes live without the testing and debugging utilities.
I also use this “mode” or dimension to run the staging server.
A staging server is where you roll out new features and bug fixes before applying to the production server.
The idea here is that your staging server should run in production mode, and the only difference is going to be your static/media server and database server. And this can be achieved just by changing the configuration to tell what is the database connection string for example.
But the main thing is that you should not have any conditional in your code that checks if it is the production or staging server. The project should run exactly in the same way as in production.
Project Configuration
Right from the beginning it is a good idea to setup a remote version control service. My go-to option is Git on GitHub. Usually I create the remote repository first then clone it on my local machine to get started.
Let’s say our project is called simple, after creating the repository on GitHub I will create a directory named
simple on my local machine, then within the simple directory I will clone the repository, like shown on the
structure below:
simple/
└── simple/  (git repo)
Then I create the virtualenv outside of the Git repository:
simple/
├── simple/
└── venv/
Then alongside the simple and venv directories I may place some other support files related to the project which I
do not plan to commit to the Git repository.
The reason I do that is because it is more convenient to destroy and re-create/re-clone both the virtual environment or the repository itself.
It is also good to store your virtual environment outside of the git repository/project root so you don’t need to bother ignoring its path when using libs like flake8, isort, black, tox, etc.
You can also use tools like virtualenvwrapper to manage your virtual environments, but I prefer doing it that way
because everything is in one place. And if I no longer need to keep a given project on my local machine, I can delete
it completely without leaving behind anything related to the project on my machine.
The next step is installing Django inside the virtualenv so we can use the django-admin commands.
source venv/bin/activate
pip install django
Inside the simple directory (where the git repository was cloned) start a new project:
django-admin startproject simple .Attention to the . in the end of the command. It is necessary to not create yet another directory called simple.
So now the structure should be something like this:
simple/                   <- (1) Wrapper directory with all project contents including the venv
├── simple/               <- (2) Project root and git repository
│   ├── .git/
│   ├── manage.py
│   └── simple/           <- (3) Project package, apps, templates, static, etc
│       ├── __init__.py
│       ├── asgi.py
│       ├── settings.py
│       ├── urls.py
│       └── wsgi.py
└── venv/
At this point I already complement the project package directory with three extra directories for templates, static
and locale.
Both templates and static we are going to manage at a project-level and app-level. Those are refer to the global
templates and static files.
The locale is necessary in case you are using i18n to translate your application to other languages. So here
is where you are going to store the .mo and .po files.
So the structure now should be something like this:
simple/
├── simple/
│   ├── .git/
│   ├── manage.py
│   └── simple/
│       ├── locale/
│       ├── static/
│       ├── templates/
│       ├── __init__.py
│       ├── asgi.py
│       ├── settings.py
│       ├── urls.py
│       └── wsgi.py
└── venv/
Requirements
Inside the project root (2) I like to create a directory called requirements with all the .txt files, breaking down
the project dependencies like this:
base.txt: Main dependencies, strictly necessary to make the project run. Common to all environmentstests.txt: Inherits frombase.txt+ test utilitieslocal.txt: Inherits fromtests.txt+ development utilitiesproduction.txt: Inherits frombase.txt+ production only dependencies
Note that I do not have a staging.txt requirements file, that’s because the staging environment is going to use the
production.txt requirements so we have an exact copy of the production environment.
simple/
├── simple/
│   ├── .git/
│   ├── manage.py
│   ├── requirements/
│   │   ├── base.txt
│   │   ├── local.txt
│   │   ├── production.txt
│   │   └── tests.txt
│   └── simple/
│       ├── locale/
│       ├── static/
│       ├── templates/
│       ├── __init__.py
│       ├── asgi.py
│       ├── settings.py
│       ├── urls.py
│       └── wsgi.py
└── venv/
Now let’s have a look inside each of those requirements file and what are the python libraries that I always use no matter what type of Django project I’m developing.
base.txt
dj-database-url==0.5.0
Django==3.2.4
psycopg2-binary==2.9.1
python-decouple==3.4
pytz==2021.1- dj-database-url: This is a very handy Django library to create an one line database connection string which is convenient for storing in
.envfiles in a safe way - Django: Django itself
- psycopg2-binary: PostgreSQL is my go-to database when working with Django. So I always have it here for all my environments
- python-decouple: A typed environment variable manager to help protect sensitive data that goes to your
settings.pymodule. It also helps with decoupling configuration from source code - pytz: For timezone aware datetime fields
tests.txt
-r base.txt

black==21.6b0
coverage==5.5
factory-boy==3.2.0
flake8==3.9.2
isort==5.9.1
tox==3.23.1
The -r base.txt inherits all the requirements defined in the base.txt file
- black: A Python auto-formatter so you don’t have to bother with styling and formatting your code. It let you focus on what really matters while coding and doing code reviews
- coverage: Lib to generate test coverage reports of your project
- factory-boy: A model factory to help you setup complex test cases where the code you are testing rely on multiple models being set in a certain way
- flake8: Checks for code complexity, PEPs, formatting rules, etc
- isort: Auto-formatter for your imports so all imports are organized by blocks (standard library, Django, third-party, first-party, etc)
- tox: I use tox as an interface for CI tools to run all code checks and unit tests
local.txt
-r tests.txt

django-debug-toolbar==3.2.1
ipython==7.25.0
The -r tests.txt inherits all the requirements defined in the base.txt and tests.txt file
- django-debug-toolbar: 99% of the time I use it to debug the query count on complex views so you can optimize your database access
- ipython: Improved Python shell. I use it all the time during the development phase to start some implementation or to inspect code
production.txt
-r base.txt

gunicorn==20.1.0
sentry-sdk==1.1.0
The -r base.txt inherits all the requirements defined in the base.txt file
- gunicorn: A Python WSGI HTTP server for production used behind a proxy server like Nginx
- sentry-sdk: Error reporting/logging tool to catch exceptions raised in production
Settings
Also following the environments and modes premise I like to setup multiple settings modules. Those are going to serve as the entry point to determine in which mode I’m running the project.
Inside the simple project package, I create a new directory called settings and break down the files like this:
simple/                       (1)
├── simple/                   (2)
│   ├── .git/
│   ├── manage.py
│   ├── requirements/
│   │   ├── base.txt
│   │   ├── local.txt
│   │   ├── production.txt
│   │   └── tests.txt
│   └── simple/              (3)
│       ├── locale/
│       ├── settings/
│       │   ├── __init__.py
│       │   ├── base.py
│       │   ├── local.py
│       │   ├── production.py
│       │   └── tests.py
│       ├── static/
│       ├── templates/
│       ├── __init__.py
│       ├── asgi.py
│       ├── urls.py
│       └── wsgi.py
└── venv/
Note that I removed the settings.py that used to live inside the simple/ (3) directory.
The majority of the code will live inside the base.py settings module.
Everything that we can set only once in the base.py and change its value using python-decouple we should keep in the
base.py and never repeat/override in the other settings modules.
After the removal of the main settings.py a nice touch is to modify the manage.py file to set the
local.py as the default settings module so we can still run commands like python manage.py runserver without any
further parameters:
manage.py
#!/usr/bin/env python
"""Django's command-line utility for administrative tasks."""
import os
import sys


def main():
    """Run administrative tasks."""
    os.environ.setdefault('DJANGO_SETTINGS_MODULE', 'simple.settings.local')  # <- here!
    try:
        from django.core.management import execute_from_command_line
    except ImportError as exc:
        raise ImportError(
            "Couldn't import Django. Are you sure it's installed and "
            "available on your PYTHONPATH environment variable? Did you "
            "forget to activate a virtual environment?"
        ) from exc
    execute_from_command_line(sys.argv)


if __name__ == '__main__':
    main()
Now let’s have a look on each of those settings modules.
base.py
from pathlib import Path

import dj_database_url
from decouple import Csv, config

BASE_DIR = Path(__file__).resolve().parent.parent


# ==============================================================================
# CORE SETTINGS
# ==============================================================================

SECRET_KEY = config("SECRET_KEY", default="django-insecure$simple.settings.local")

DEBUG = config("DEBUG", default=True, cast=bool)

ALLOWED_HOSTS = config("ALLOWED_HOSTS", default="127.0.0.1,localhost", cast=Csv())

INSTALLED_APPS = [
    "django.contrib.admin",
    "django.contrib.auth",
    "django.contrib.contenttypes",
    "django.contrib.sessions",
    "django.contrib.messages",
    "django.contrib.staticfiles",
]

DEFAULT_AUTO_FIELD = "django.db.models.BigAutoField"

ROOT_URLCONF = "simple.urls"

INTERNAL_IPS = ["127.0.0.1"]

WSGI_APPLICATION = "simple.wsgi.application"


# ==============================================================================
# MIDDLEWARE SETTINGS
# ==============================================================================

MIDDLEWARE = [
    "django.middleware.security.SecurityMiddleware",
    "django.contrib.sessions.middleware.SessionMiddleware",
    "django.middleware.common.CommonMiddleware",
    "django.middleware.csrf.CsrfViewMiddleware",
    "django.contrib.auth.middleware.AuthenticationMiddleware",
    "django.contrib.messages.middleware.MessageMiddleware",
    "django.middleware.clickjacking.XFrameOptionsMiddleware",
]


# ==============================================================================
# TEMPLATES SETTINGS
# ==============================================================================

TEMPLATES = [
    {
        "BACKEND": "django.template.backends.django.DjangoTemplates",
        "DIRS": [BASE_DIR / "templates"],
        "APP_DIRS": True,
        "OPTIONS": {
            "context_processors": [
                "django.template.context_processors.debug",
                "django.template.context_processors.request",
                "django.contrib.auth.context_processors.auth",
                "django.contrib.messages.context_processors.messages",
            ],
        },
    },
]


# ==============================================================================
# DATABASES SETTINGS
# ==============================================================================

DATABASES = {
    "default": dj_database_url.config(
        default=config("DATABASE_URL", default="postgres://simple:simple@localhost:5432/simple"),
        conn_max_age=600,
    )
}


# ==============================================================================
# AUTHENTICATION AND AUTHORIZATION SETTINGS
# ==============================================================================

AUTH_PASSWORD_VALIDATORS = [
    {
        "NAME": "django.contrib.auth.password_validation.UserAttributeSimilarityValidator",
    },
    {
        "NAME": "django.contrib.auth.password_validation.MinimumLengthValidator",
    },
    {
        "NAME": "django.contrib.auth.password_validation.CommonPasswordValidator",
    },
    {
        "NAME": "django.contrib.auth.password_validation.NumericPasswordValidator",
    },
]


# ==============================================================================
# I18N AND L10N SETTINGS
# ==============================================================================

LANGUAGE_CODE = config("LANGUAGE_CODE", default="en-us")

TIME_ZONE = config("TIME_ZONE", default="UTC")

USE_I18N = True

USE_L10N = True

USE_TZ = True

LOCALE_PATHS = [BASE_DIR / "locale"]


# ==============================================================================
# STATIC FILES SETTINGS
# ==============================================================================

STATIC_URL = "/static/"

STATIC_ROOT = BASE_DIR.parent.parent / "static"

STATICFILES_DIRS = [BASE_DIR / "static"]

STATICFILES_FINDERS = (
    "django.contrib.staticfiles.finders.FileSystemFinder",
    "django.contrib.staticfiles.finders.AppDirectoriesFinder",
)


# ==============================================================================
# MEDIA FILES SETTINGS
# ==============================================================================

MEDIA_URL = "/media/"

MEDIA_ROOT = BASE_DIR.parent.parent / "media"


# ==============================================================================
# THIRD-PARTY SETTINGS
# ==============================================================================


# ==============================================================================
# FIRST-PARTY SETTINGS
# ==============================================================================

SIMPLE_ENVIRONMENT = config("SIMPLE_ENVIRONMENT", default="local")
A few comments on the overall base settings file contents:
- The
config()are from thepython-decouplelibrary. It is exposing the configuration to an environment variable and retrieving its value accordingly to the expected data type. Read more aboutpython-decoupleon this guide: How to Use Python Decouple - See how configurations like
SECRET_KEY,DEBUGandALLOWED_HOSTSdefaults to local/development environment values. That means a new developer won’t need to set a local.envand provide some initial value to run locally - On the database settings block we are using the
dj_database_urlto translate this one line string to a Python dictionary as Django expects - Note that how on the
MEDIA_ROOTwe are navigating two directories up to create amediadirectory outside the git repository but inside our project workspace (inside the directorysimple/ (1)). So everything is handy and we won’t be committing test uploads to our repository - In the end of the
base.pysettings I reserve two blocks for third-party Django libraries that I may install, such as Django Rest Framework or Django Crispy Forms. And the first-party settings refer to custom settings that I may create exclusively for our project. Usually I will prefix them with the project name, likeSIMPLE_XXX
local.py
# flake8: noqa

from .base import *

INSTALLED_APPS += ["debug_toolbar"]

MIDDLEWARE.insert(0, "debug_toolbar.middleware.DebugToolbarMiddleware")


# ==============================================================================
# EMAIL SETTINGS
# ==============================================================================

EMAIL_BACKEND = "django.core.mail.backends.console.EmailBackend"
Here is where I will setup Django Debug Toolbar for example. Or set the email backend to display the sent emails on console instead of having to setup a valid email server to work on the project.
All the code that is only relevant for the development process goes here.
You can use it to setup other libs like Django Silk to run profiling without exposing it to production.
tests.py
# flake8: noqa

from .base import *

PASSWORD_HASHERS = ["django.contrib.auth.hashers.MD5PasswordHasher"]


class DisableMigrations:
    def __contains__(self, item):
        return True

    def __getitem__(self, item):
        return None


MIGRATION_MODULES = DisableMigrations()
Here I add configurations that help us run the test cases faster. Sometimes disabling the migrations may not work if you have interdependencies between the apps models so Django may fail to create a database without the migrations.
In some projects it is better to keep the test database after the execution.
production.py
# flake8: noqa

import sentry_sdk
from sentry_sdk.integrations.django import DjangoIntegration

import simple
from .base import *

# ==============================================================================
# SECURITY SETTINGS
# ==============================================================================

CSRF_COOKIE_SECURE = True
CSRF_COOKIE_HTTPONLY = True

SECURE_HSTS_SECONDS = 60 * 60 * 24 * 7 * 52  # one year
SECURE_HSTS_INCLUDE_SUBDOMAINS = True
SECURE_SSL_REDIRECT = True
SECURE_BROWSER_XSS_FILTER = True
SECURE_CONTENT_TYPE_NOSNIFF = True
SECURE_PROXY_SSL_HEADER = ("HTTP_X_FORWARDED_PROTO", "https")

SESSION_COOKIE_SECURE = True


# ==============================================================================
# THIRD-PARTY APPS SETTINGS
# ==============================================================================

sentry_sdk.init(
    dsn=config("SENTRY_DSN", default=""),
    environment=SIMPLE_ENVIRONMENT,
    release="simple@%s" % simple.__version__,
    integrations=[DjangoIntegration()],
)
The most important part here on the production settings is to enable all the security settings Django offer. I like to do it that way because you can’t run the development server with most of those configurations on.
The other thing is the Sentry configuration.
Note the simple.__version__ on the release. Next we are going to explore how I usually manage the version of the
project.
Version
I like to reuse Django’s get_version utility for a simple and PEP 440 complaint version identification.
Inside the project’s __init__.py module:
simple/
├── simple/
│   ├── .git/
│   ├── manage.py
│   ├── requirements/
│   └── simple/
│       ├── locale/
│       ├── settings/
│       ├── static/
│       ├── templates/
│       ├── __init__.py     <-- here!
│       ├── asgi.py
│       ├── urls.py
│       └── wsgi.py
└── venv/
You can do something like this:
from django import get_version

VERSION = (1, 0, 0, "final", 0)

__version__ = get_version(VERSION)
The only down side of using the get_version directly from the Django module is that it won’t be able to resolve the
git hash for alpha versions.
A possible solution is making a copy of the django/utils/version.py file to your project, and then you import it
locally, so it will be able to identify your git repository within the project folder.
But it also depends what kind of versioning you are using for your project. If the version of your project is not really relevant to the end user and you want to keep track of it for internal management like to identify the release on a Sentry issue, you could use a date-based release versioning.
Apps Configuration
A Django app is a Python package that you “install” using the INSTALLED_APPS in your settings file. An app can live pretty
much anywhere: inside or outside the project package or even in a library that you installed using pip.
Indeed, your Django apps may be reusable on other projects. But that doesn’t mean it should. Don’t let it destroy your project design or don’t get obsessed over it. Also, it shouldn’t necessarily represent a “part” of your website/web application.
It is perfectly fine for some apps to not have models, or other apps have only views. Some of your modules doesn’t even need to be a Django app at all. I like to see my Django projects as a big Python package and organize it in a way that makes sense, and not try to place everything inside reusable apps.
The general recommendation of the official Django documentation is to place your apps in the project root (alongside
the manage.py file, identified here in this tutorial by the simple/ (2) folder).
But actually I prefer to create my apps inside the project package (identified in this tutorial by the simple/ (3)
folder). I create a module named apps and then inside the apps I create my Django apps. The main reason why is that
it creates a nice namespace for the app. It helps you easily identify that a particular import is part of your
project. Also this namespace helps when creating logging rules to handle events in a different way.
Here is an example of how I do it:
simple/                      (1)
├── simple/                  (2)
│   ├── .git/
│   ├── manage.py
│   ├── requirements/
│   └── simple/              (3)
│       ├── apps/            <-- here!
│       │   ├── __init__.py
│       │   ├── accounts/
│       │   └── core/
│       ├── locale/
│       ├── settings/
│       ├── static/
│       ├── templates/
│       ├── __init__.py
│       ├── asgi.py
│       ├── urls.py
│       └── wsgi.py
└── venv/
In the example above the folders accounts/ and core/ are Django apps created with the command django-admin startapp.
Those two apps are also always in my project. The accounts app is the one that I use the replace the default Django
User model and also the place where I eventually create password reset, account activation, sign ups, etc.
The core app I use for general/global implementations. For example to define a model that will be used across most
of the other apps. I try to keep it decoupled from other apps, not importing other apps resources. It usually is a good
place to implement general purpose or reusable views and mixins.
Something to pay attention when using this approach is that you need to change the name of the apps configuration,
inside the apps.py file of the Django app:
accounts/apps.py
from django.apps import AppConfig

class AccountsConfig(AppConfig):
    default_auto_field = 'django.db.models.BigAutoField'
    name = 'accounts'  # <- this is the default name created by the startapp command
You should rename it like this, to respect the namespace:
from django.apps import AppConfig

class AccountsConfig(AppConfig):
    default_auto_field = 'django.db.models.BigAutoField'
    name = 'simple.apps.accounts'  # <- change to this!
Then on your INSTALLED_APPS you are going to create a reference to your models like this:
INSTALLED_APPS = [
    "django.contrib.admin",
    "django.contrib.auth",
    "django.contrib.contenttypes",
    "django.contrib.sessions",
    "django.contrib.messages",
    "django.contrib.staticfiles",

    "simple.apps.accounts",
    "simple.apps.core",
]
The namespace also helps to organize your INSTALLED_APPS making your project apps easily recognizable.
App Structure
This is what my app structure looks like:
simple/                              (1)
├── simple/                          (2)
│   ├── .git/
│   ├── manage.py
│   ├── requirements/
│   └── simple/                      (3)
│       ├── apps/
│       │   ├── accounts/            <- My app structure
│       │   │   ├── migrations/
│       │   │   │   └── __init__.py
│       │   │   ├── static/
│       │   │   │   └── accounts/
│       │   │   ├── templates/
│       │   │   │   └── accounts/
│       │   │   ├── tests/
│       │   │   │   ├── __init__.py
│       │   │   │   └── factories.py
│       │   │   ├── __init__.py
│       │   │   ├── admin.py
│       │   │   ├── apps.py
│       │   │   ├── constants.py
│       │   │   ├── models.py
│       │   │   └── views.py
│       │   ├── core/
│       │   └── __init__.py
│       ├── locale/
│       ├── settings/
│       ├── static/
│       ├── templates/
│       ├── __init__.py
│       ├── asgi.py
│       ├── urls.py
│       └── wsgi.py
└── venv/
The first thing I do is create a folder named tests so I can break down my tests into several files. I always add a
factories.py to create my model factories using the factory-boy library.
For both static and templates always create first a directory with the same name as the app to avoid name collisions
when Django collect all static files and try to resolve the templates.
The admin.py may be there or not depending if I’m using the Django Admin contrib app.
Other common modules that you may have is a utils.py, forms.py, managers.py, services.py etc.
Code style and formatting
Now I’m going to show you the configuration that I use for tools like isort, black, flake8, coverage and tox.
Editor Config
The .editorconfig file is a standard recognized by all major IDEs and code editors. It helps the editor understand
what is the file formatting rules used in the project.
It tells the editor if the project is indented with tabs or spaces. How many spaces/tabs. What’s the max length for a line of code.
I like to use Django’s .editorconfig file. Here is what it looks like:
.editorconfig
# https://editorconfig.org/

root = true

[*]
indent_style = space
indent_size = 4
insert_final_newline = true
trim_trailing_whitespace = true
end_of_line = lf
charset = utf-8

# Docstrings and comments use max_line_length = 79
[*.py]
max_line_length = 119

# Use 2 spaces for the HTML files
[*.html]
indent_size = 2

# The JSON files contain newlines inconsistently
[*.json]
indent_size = 2
insert_final_newline = ignore

[**/admin/js/vendor/**]
indent_style = ignore
indent_size = ignore

# Minified JavaScript files shouldn't be changed
[**.min.js]
indent_style = ignore
insert_final_newline = ignore

# Makefiles always use tabs for indentation
[Makefile]
indent_style = tab

# Batch files use tabs for indentation
[*.bat]
indent_style = tab

[docs/**.txt]
max_line_length = 79

[*.yml]
indent_size = 2
Flake8
Flake8 is a Python library that wraps PyFlakes, pycodestyle and Ned Batchelder’s McCabe script. It is a great toolkit for checking your code base against coding style (PEP8), programming errors (like “library imported but unused” and “Undefined name”) and to check cyclomatic complexity.
To learn more about flake8, check this tutorial I posted a while a go: How to Use Flake8.
setup.cfg
[flake8]
exclude = .git,.tox,*/migrations/*
max-line-length = 119
isort
isort is a Python utility / library to sort imports alphabetically, and automatically separated into sections.
To learn more about isort, check this tutorial I posted a while a go: How to Use Python isort Library.
setup.cfg
[isort]
force_grid_wrap = 0
use_parentheses = true
combine_as_imports = true
include_trailing_comma = true
line_length = 119
multi_line_output = 3
skip = migrations
default_section = THIRDPARTY
known_first_party = simple
known_django = django
sections=FUTURE,STDLIB,DJANGO,THIRDPARTY,FIRSTPARTY,LOCALFOLDER
Pay attention to the known_first_party, it should be the name of your project so isort can group your project’s
imports.
Black
Black is a life changing library to auto-format your Python applications. There is no way I’m coding with Python nowadays without using Black.
Here is the basic configuration that I use:
pyproject.toml
[tool.black]
line-length = 119
target-version = ['py38']
include = '\.pyi?$'
exclude = '''
  /(
      \.eggs
    | \.git
    | \.hg
    | \.mypy_cache
    | \.tox
    | \.venv
    | _build
    | buck-out
    | build
    | dist
    | migrations
  )/
'''
Conclusions
In this tutorial I described my go-to project setup when working with Django. That’s pretty much how I start all my projects nowadays.
Here is the final project structure for reference:
simple/
├── simple/
│   ├── .git/
│   ├── .gitignore
│   ├── .editorconfig
│   ├── manage.py
│   ├── pyproject.toml
│   ├── requirements/
│   │   ├── base.txt
│   │   ├── local.txt
│   │   ├── production.txt
│   │   └── tests.txt
│   ├── setup.cfg
│   └── simple/
│       ├── __init__.py
│       ├── apps/
│       │   ├── accounts/
│       │   │   ├── migrations/
│       │   │   │   └── __init__.py
│       │   │   ├── static/
│       │   │   │   └── accounts/
│       │   │   ├── templates/
│       │   │   │   └── accounts/
│       │   │   ├── tests/
│       │   │   │   ├── __init__.py
│       │   │   │   └── factories.py
│       │   │   ├── __init__.py
│       │   │   ├── admin.py
│       │   │   ├── apps.py
│       │   │   ├── constants.py
│       │   │   ├── models.py
│       │   │   └── views.py
│       │   ├── core/
│       │   │   ├── migrations/
│       │   │   │   └── __init__.py
│       │   │   ├── static/
│       │   │   │   └── core/
│       │   │   ├── templates/
│       │   │   │   └── core/
│       │   │   ├── tests/
│       │   │   │   ├── __init__.py
│       │   │   │   └── factories.py
│       │   │   ├── __init__.py
│       │   │   ├── admin.py
│       │   │   ├── apps.py
│       │   │   ├── constants.py
│       │   │   ├── models.py
│       │   │   └── views.py
│       │   └── __init__.py
│       ├── locale/
│       ├── settings/
│       │   ├── __init__.py
│       │   ├── base.py
│       │   ├── local.py
│       │   ├── production.py
│       │   └── tests.py
│       ├── static/
│       ├── templates/
│       ├── asgi.py
│       ├── urls.py
│       └── wsgi.py
└── venv/
You can also explore the code on GitHub: django-production-template.
04-03-2021
18:25
Zo installeer je Chrome OS op je (oude) computer [Laatste Artikelen - Webwereld]
Google timmert al jaren hard aan de weg met Chrome OS en brengt samen met verschillende computerfabrikanten Chrome-apparaten uit met dat besturingssysteem. Maar je hoeft niet per se een dedicated apparaat aan te schaffen, je kan het systeem ook zelf op je (oude) computer zetten en wij laten je zien hoe.
29-01-2021
12:47
How to Use Chart.js with Django [Simple is Better Than Complex]
Chart.js is a cool open source JavaScript library that helps you render HTML5 charts. It is responsive and counts with 8 different chart types.
In this tutorial we are going to explore a little bit of how to make Django talk with Chart.js and render some simple charts based on data extracted from our models.
Installation
For this tutorial all you are going to do is add the Chart.js lib to your HTML page:
<script src="https://cdn.jsdelivr.net/npm/chart.js@2.9.3/dist/Chart.min.js"></script>You can download it from Chart.js official website and use it locally, or you can use it from a CDN using the URL above.
Example Scenario
I’m going to use the same example I used for the tutorial How to Create Group By Queries With Django ORM which is a good complement to this tutorial because actually the tricky part of working with charts is to transform the data so it can fit in a bar chart / line chart / etc.
We are going to use the two models below, Country and City:
class Country(models.Model):
    name = models.CharField(max_length=30)

class City(models.Model):
    name = models.CharField(max_length=30)
    country = models.ForeignKey(Country, on_delete=models.CASCADE)
    population = models.PositiveIntegerField()
And the raw data stored in the database:
| cities | |||
|---|---|---|---|
| id | name | country_id | population |
| 1 | Tokyo | 28 | 36,923,000 |
| 2 | Shanghai | 13 | 34,000,000 |
| 3 | Jakarta | 19 | 30,000,000 |
| 4 | Seoul | 21 | 25,514,000 |
| 5 | Guangzhou | 13 | 25,000,000 |
| 6 | Beijing | 13 | 24,900,000 |
| 7 | Karachi | 22 | 24,300,000 |
| 8 | Shenzhen | 13 | 23,300,000 |
| 9 | Delhi | 25 | 21,753,486 |
| 10 | Mexico City | 24 | 21,339,781 |
| 11 | Lagos | 9 | 21,000,000 |
| 12 | São Paulo | 1 | 20,935,204 |
| 13 | Mumbai | 25 | 20,748,395 |
| 14 | New York City | 20 | 20,092,883 |
| 15 | Osaka | 28 | 19,342,000 |
| 16 | Wuhan | 13 | 19,000,000 |
| 17 | Chengdu | 13 | 18,100,000 |
| 18 | Dhaka | 4 | 17,151,925 |
| 19 | Chongqing | 13 | 17,000,000 |
| 20 | Tianjin | 13 | 15,400,000 |
| 21 | Kolkata | 25 | 14,617,882 |
| 22 | Tehran | 11 | 14,595,904 |
| 23 | Istanbul | 2 | 14,377,018 |
| 24 | London | 26 | 14,031,830 |
| 25 | Hangzhou | 13 | 13,400,000 |
| 26 | Los Angeles | 20 | 13,262,220 |
| 27 | Buenos Aires | 8 | 13,074,000 |
| 28 | Xi'an | 13 | 12,900,000 |
| 29 | Paris | 6 | 12,405,426 |
| 30 | Changzhou | 13 | 12,400,000 |
| 31 | Shantou | 13 | 12,000,000 |
| 32 | Rio de Janeiro | 1 | 11,973,505 |
| 33 | Manila | 18 | 11,855,975 |
| 34 | Nanjing | 13 | 11,700,000 |
| 35 | Rhine-Ruhr | 16 | 11,470,000 |
| 36 | Jinan | 13 | 11,000,000 |
| 37 | Bangalore | 25 | 10,576,167 |
| 38 | Harbin | 13 | 10,500,000 |
| 39 | Lima | 7 | 9,886,647 |
| 40 | Zhengzhou | 13 | 9,700,000 |
| 41 | Qingdao | 13 | 9,600,000 |
| 42 | Chicago | 20 | 9,554,598 |
| 43 | Nagoya | 28 | 9,107,000 |
| 44 | Chennai | 25 | 8,917,749 |
| 45 | Bangkok | 15 | 8,305,218 |
| 46 | Bogotá | 27 | 7,878,783 |
| 47 | Hyderabad | 25 | 7,749,334 |
| 48 | Shenyang | 13 | 7,700,000 |
| 49 | Wenzhou | 13 | 7,600,000 |
| 50 | Nanchang | 13 | 7,400,000 |
| 51 | Hong Kong | 13 | 7,298,600 |
| 52 | Taipei | 29 | 7,045,488 |
| 53 | Dallas–Fort Worth | 20 | 6,954,330 |
| 54 | Santiago | 14 | 6,683,852 |
| 55 | Luanda | 23 | 6,542,944 |
| 56 | Houston | 20 | 6,490,180 |
| 57 | Madrid | 17 | 6,378,297 |
| 58 | Ahmedabad | 25 | 6,352,254 |
| 59 | Toronto | 5 | 6,055,724 |
| 60 | Philadelphia | 20 | 6,051,170 |
| 61 | Washington, D.C. | 20 | 6,033,737 |
| 62 | Miami | 20 | 5,929,819 |
| 63 | Belo Horizonte | 1 | 5,767,414 |
| 64 | Atlanta | 20 | 5,614,323 |
| 65 | Singapore | 12 | 5,535,000 |
| 66 | Barcelona | 17 | 5,445,616 |
| 67 | Munich | 16 | 5,203,738 |
| 68 | Stuttgart | 16 | 5,200,000 |
| 69 | Ankara | 2 | 5,150,072 |
| 70 | Hamburg | 16 | 5,100,000 |
| 71 | Pune | 25 | 5,049,968 |
| 72 | Berlin | 16 | 5,005,216 |
| 73 | Guadalajara | 24 | 4,796,050 |
| 74 | Boston | 20 | 4,732,161 |
| 75 | Sydney | 10 | 5,000,500 |
| 76 | San Francisco | 20 | 4,594,060 |
| 77 | Surat | 25 | 4,585,367 |
| 78 | Phoenix | 20 | 4,489,109 |
| 79 | Monterrey | 24 | 4,477,614 |
| 80 | Inland Empire | 20 | 4,441,890 |
| 81 | Rome | 3 | 4,321,244 |
| 82 | Detroit | 20 | 4,296,611 |
| 83 | Milan | 3 | 4,267,946 |
| 84 | Melbourne | 10 | 4,650,000 |
| countries | |
|---|---|
| id | name |
| 1 | Brazil |
| 2 | Turkey |
| 3 | Italy |
| 4 | Bangladesh |
| 5 | Canada |
| 6 | France |
| 7 | Peru |
| 8 | Argentina |
| 9 | Nigeria |
| 10 | Australia |
| 11 | Iran |
| 12 | Singapore |
| 13 | China |
| 14 | Chile |
| 15 | Thailand |
| 16 | Germany |
| 17 | Spain |
| 18 | Philippines |
| 19 | Indonesia |
| 20 | United States |
| 21 | South Korea |
| 22 | Pakistan |
| 23 | Angola |
| 24 | Mexico |
| 25 | India |
| 26 | United Kingdom |
| 27 | Colombia |
| 28 | Japan |
| 29 | Taiwan |
Example 1: Pie Chart
For the first example we are only going to retrieve the top 5 most populous cities and render it as a pie chart. In this strategy we are going to return the chart data as part of the view context and inject the results in the JavaScript code using the Django Template language.
views.py
from django.shortcuts import render
from mysite.core.models import City

def pie_chart(request):
    labels = []
    data = []

    queryset = City.objects.order_by('-population')[:5]
    for city in queryset:
        labels.append(city.name)
        data.append(city.population)

    return render(request, 'pie_chart.html', {
        'labels': labels,
        'data': data,
    })
Basically in the view above we are iterating through the City queryset and building a list of labels and a list of
data. Here in this case the data is the population count saved in the City model.
For the urls.py just a simple routing:
urls.py
from django.urls import path
from mysite.core import views

urlpatterns = [
    path('pie-chart/', views.pie_chart, name='pie-chart'),
]
Now the template. I got a basic snippet from the Chart.js Pie Chart Documentation.
pie_chart.html
{% extends 'base.html' %}

{% block content %}
  <div id="container" style="width: 75%;">
    <canvas id="pie-chart"></canvas>
  </div>

  <script src="https://cdn.jsdelivr.net/npm/chart.js@2.9.3/dist/Chart.min.js"></script>
  <script>

    var config = {
      type: 'pie',
      data: {
        datasets: [{
          data: {{ data|safe }},
          backgroundColor: [
            '#696969', '#808080', '#A9A9A9', '#C0C0C0', '#D3D3D3'
          ],
          label: 'Population'
        }],
        labels: {{ labels|safe }}
      },
      options: {
        responsive: true
      }
    };

    window.onload = function() {
      var ctx = document.getElementById('pie-chart').getContext('2d');
      window.myPie = new Chart(ctx, config);
    };

  </script>

{% endblock %}
In the example above the base.html template is not important but you can see it in the code example I shared in the
end of this post.
This strategy is not ideal but works fine. The bad thing is that we are using the Django Template Language to interfere
with the JavaScript logic. When we put {{ data|safe}} we are injecting a variable that came from
the server directly in the JavaScript code.
The code above looks like this:
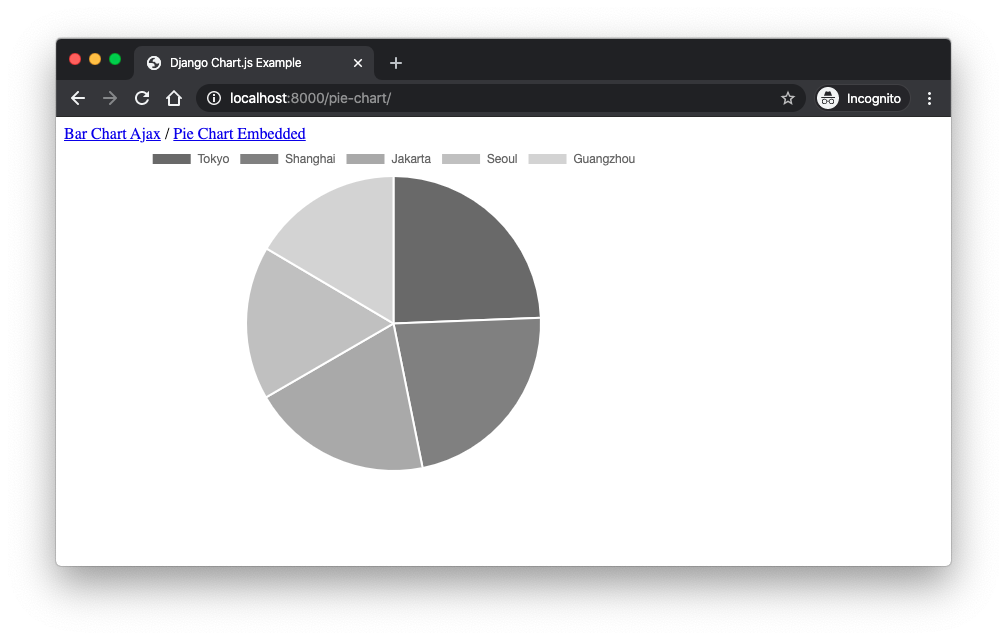
Example 2: Bar Chart with Ajax
As the title says, we are now going to render a bar chart using an async call.
views.py
from django.shortcuts import render
from django.db.models import Sum
from django.http import JsonResponse
from mysite.core.models import City

def home(request):
    return render(request, 'home.html')

def population_chart(request):
    labels = []
    data = []

    queryset = City.objects.values('country__name').annotate(country_population=Sum('population')).order_by('-country_population')
    for entry in queryset:
        labels.append(entry['country__name'])
        data.append(entry['country_population'])

    return JsonResponse(data={
        'labels': labels,
        'data': data,
    })
So here we are using two views. The home view would be the main page where the chart would be loaded at. The other
view population_chart would be the one with the sole responsibility to aggregate the data the return a JSON response
with the labels and data.
If you are wondering about what this queryset is doing, it is grouping the cities by the country and aggregating the total population of each country. The result is going to be a list of country + total population. To learn more about this kind of query have a look on this post: How to Create Group By Queries With Django ORM
urls.py
from django.urls import path
from mysite.core import views

urlpatterns = [
    path('', views.home, name='home'),
    path('population-chart/', views.population_chart, name='population-chart'),
]
home.html
{% extends 'base.html' %}

{% block content %}

  <div id="container" style="width: 75%;">
    <canvas id="population-chart" data-url="{% url 'population-chart' %}"></canvas>
  </div>

  <script src="https://code.jquery.com/jquery-3.4.1.min.js"></script>
  <script src="https://cdn.jsdelivr.net/npm/chart.js@2.9.3/dist/Chart.min.js"></script>
  <script>

    $(function () {

      var $populationChart = $("#population-chart");
      $.ajax({
        url: $populationChart.data("url"),
        success: function (data) {

          var ctx = $populationChart[0].getContext("2d");

          new Chart(ctx, {
            type: 'bar',
            data: {
              labels: data.labels,
              datasets: [{
                label: 'Population',
                backgroundColor: 'blue',
                data: data.data
              }]
            },
            options: {
              responsive: true,
              legend: {
                position: 'top',
              },
              title: {
                display: true,
                text: 'Population Bar Chart'
              }
            }
          });

        }
      });

    });

  </script>

{% endblock %}
Now we have a better separation of concerns. Looking at the chart container:
<canvas id="population-chart" data-url="{% url 'population-chart' %}"></canvas>We added a reference to the URL that holds the chart rendering logic. Later on we are using it to execute the Ajax call.
var $populationChart = $("#population-chart");
$.ajax({
  url: $populationChart.data("url"),
  success: function (data) {
    // ...
  }
});
Inside the success callback we then finally execute the Chart.js related code using the JsonResponse data.
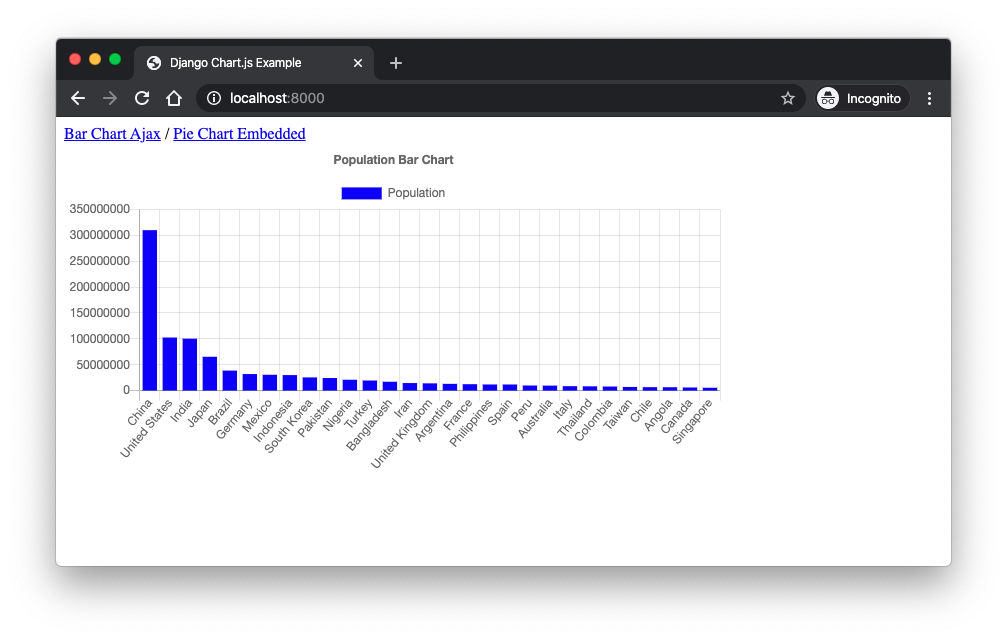
Conclusions
I hope this tutorial helped you to get started with working with charts using Chart.js. I published another tutorial on the same subject a while ago but using the Highcharts library. The approach is pretty much the same: How to Integrate Highcharts.js with Django.
If you want to grab the code I used in this tutorial you can find it here: github.com/sibtc/django-chartjs-example.
How to Save Extra Data to a Django REST Framework Serializer [Simple is Better Than Complex]
In this tutorial you are going to learn how to pass extra data to your serializer, before saving it to the database.
Introduction
When using regular Django forms, there is this common pattern where we save the form with commit=False and then pass
some extra data to the instance before saving it to the database, like this:
form = InvoiceForm(request.POST)
if form.is_valid():
    invoice = form.save(commit=False)
    invoice.user = request.user
    invoice.save()
This is very useful because we can save the required information using only one database query and it also make it possible to handle not nullable columns that was not defined in the form.
To simulate this pattern using a Django REST Framework serializer you can do something like this:
serializer = InvoiceSerializer(data=request.data)
if serializer.is_valid():
    serializer.save(user=request.user)
You can also pass several parameters at once:
serializer = InvoiceSerializer(data=request.data)
if serializer.is_valid():
    serializer.save(user=request.user, date=timezone.now(), status='sent')
Example Using APIView
In this example I created an app named core.
models.py
from django.contrib.auth.models import User
from django.db import models

class Invoice(models.Model):
    SENT = 1
    PAID = 2
    VOID = 3
    STATUS_CHOICES = (
        (SENT, 'sent'),
        (PAID, 'paid'),
        (VOID, 'void'),
    )

    user = models.ForeignKey(User, on_delete=models.CASCADE, related_name='invoices')
    number = models.CharField(max_length=30)
    date = models.DateTimeField(auto_now_add=True)
    status = models.PositiveSmallIntegerField(choices=STATUS_CHOICES)
    amount = models.DecimalField(max_digits=10, decimal_places=2)
serializers.py
from rest_framework import serializers
from core.models import Invoice

class InvoiceSerializer(serializers.ModelSerializer):
    class Meta:
        model = Invoice
        fields = ('number', 'amount')
views.py
from rest_framework import status
from rest_framework.response import Response
from rest_framework.views import APIView
from core.models import Invoice
from core.serializers import InvoiceSerializer

class InvoiceAPIView(APIView):
    def post(self, request):
        serializer = InvoiceSerializer(data=request.data)
        serializer.is_valid(raise_exception=True)
        serializer.save(user=request.user, status=Invoice.SENT)
        return Response(status=status.HTTP_201_CREATED)
Example Using ViewSet
Very similar example, using the same models.py and serializers.py as in the previous example.
views.py
from rest_framework.viewsets import ModelViewSet
from core.models import Invoice
from core.serializers import InvoiceSerializer

class InvoiceViewSet(ModelViewSet):
    queryset = Invoice.objects.all()
    serializer_class = InvoiceSerializer

    def perform_create(self, serializer):
        serializer.save(user=self.request.user, status=Invoice.SENT)
How to Use Date Picker with Django [Simple is Better Than Complex]
In this tutorial we are going to explore three date/datetime pickers options that you can easily use in a Django project. We are going to explore how to do it manually first, then how to set up a custom widget and finally how to use a third-party Django app with support to datetime pickers.
- Introduction
- Tempus Dominus Bootstrap 4
- XDSoft DateTimePicker
- Fengyuan Chen’s Datepicker
- Conclusions
Introduction
The implementation of a date picker is mostly done on the front-end.
The key part of the implementation is to assure Django will receive the date input value in the correct format, and also that Django will be able to reproduce the format when rendering a form with initial data.
We can also use custom widgets to provide a deeper integration between the front-end and back-end and also to promote better reuse throughout a project.
In the next sections we are going to explore following date pickers:
Tempus Dominus Bootstrap 4 Docs Source
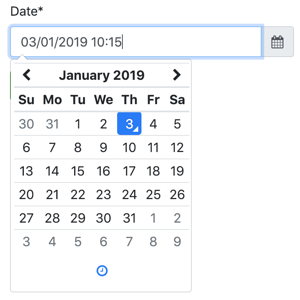
XDSoft DateTimePicker Docs Source
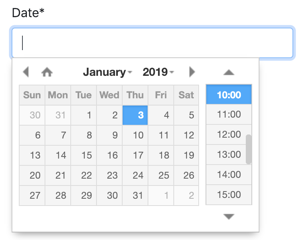
Fengyuan Chen’s Datepicker Docs Source
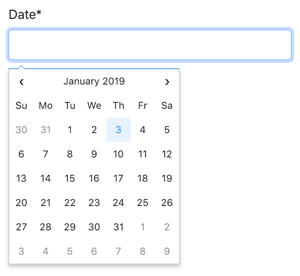
Tempus Dominus Bootstrap 4
This is a great JavaScript library and it integrate well with Bootstrap 4. The downside is that it requires moment.js and sort of need Font-Awesome for the icons.
It only make sense to use this library with you are already using Bootstrap 4 + jQuery, otherwise the list of CSS and JS may look a little bit overwhelming.
To install it you can use their CDN or download the latest release from their GitHub Releases page.
If you downloaded the code from the releases page, grab the processed code from the build/ folder.
Below, a static HTML example of the datepicker:
<!doctype html>
<html lang="en">
  <head>
    <meta charset="utf-8">
    <meta name="viewport" content="width=device-width, initial-scale=1, shrink-to-fit=no">
    <title>Static Example</title>

    <!-- Bootstrap 4 -->
    <link rel="stylesheet" href="https://stackpath.bootstrapcdn.com/bootstrap/4.2.1/css/bootstrap.min.css" integrity="sha384-GJzZqFGwb1QTTN6wy59ffF1BuGJpLSa9DkKMp0DgiMDm4iYMj70gZWKYbI706tWS" crossorigin="anonymous">
    <script src="https://code.jquery.com/jquery-3.3.1.slim.min.js" integrity="sha384-q8i/X+965DzO0rT7abK41JStQIAqVgRVzpbzo5smXKp4YfRvH+8abtTE1Pi6jizo" crossorigin="anonymous"></script>
    <script src="https://cdnjs.cloudflare.com/ajax/libs/popper.js/1.14.6/umd/popper.min.js" integrity="sha384-wHAiFfRlMFy6i5SRaxvfOCifBUQy1xHdJ/yoi7FRNXMRBu5WHdZYu1hA6ZOblgut" crossorigin="anonymous"></script>
    <script src="https://stackpath.bootstrapcdn.com/bootstrap/4.2.1/js/bootstrap.min.js" integrity="sha384-B0UglyR+jN6CkvvICOB2joaf5I4l3gm9GU6Hc1og6Ls7i6U/mkkaduKaBhlAXv9k" crossorigin="anonymous"></script>

    <!-- Font Awesome -->
    <link href="https://stackpath.bootstrapcdn.com/font-awesome/4.7.0/css/font-awesome.min.css" rel="stylesheet" integrity="sha384-wvfXpqpZZVQGK6TAh5PVlGOfQNHSoD2xbE+QkPxCAFlNEevoEH3Sl0sibVcOQVnN" crossorigin="anonymous">

    <!-- Moment.js -->
    <script src="https://cdnjs.cloudflare.com/ajax/libs/moment.js/2.23.0/moment.min.js" integrity="sha256-VBLiveTKyUZMEzJd6z2mhfxIqz3ZATCuVMawPZGzIfA=" crossorigin="anonymous"></script>

    <!-- Tempus Dominus Bootstrap 4 -->
    <link rel="stylesheet" href="https://cdnjs.cloudflare.com/ajax/libs/tempusdominus-bootstrap-4/5.1.2/css/tempusdominus-bootstrap-4.min.css" integrity="sha256-XPTBwC3SBoWHSmKasAk01c08M6sIA5gF5+sRxqak2Qs=" crossorigin="anonymous" />
    <script src="https://cdnjs.cloudflare.com/ajax/libs/tempusdominus-bootstrap-4/5.1.2/js/tempusdominus-bootstrap-4.min.js" integrity="sha256-z0oKYg6xiLq3yJGsp/LsY9XykbweQlHl42jHv2XTBz4=" crossorigin="anonymous"></script>

  </head>
  <body>

    <div class="input-group date" id="datetimepicker1" data-target-input="nearest">
      <input type="text" class="form-control datetimepicker-input" data-target="#datetimepicker1"/>
      <div class="input-group-append" data-target="#datetimepicker1" data-toggle="datetimepicker">
        <div class="input-group-text"><i class="fa fa-calendar"></i></div>
      </div>
    </div>

    <script>
      $(function () {
        $("#datetimepicker1").datetimepicker();
      });
    </script>

  </body>
</html>
Direct Usage
The challenge now is to have this input snippet integrated with a Django form.
forms.py
from django import forms

class DateForm(forms.Form):
    date = forms.DateTimeField(
        input_formats=['%d/%m/%Y %H:%M'],
        widget=forms.DateTimeInput(attrs={
            'class': 'form-control datetimepicker-input',
            'data-target': '#datetimepicker1'
        })
    )
template
<div class="input-group date" id="datetimepicker1" data-target-input="nearest">
  {{ form.date }}
  <div class="input-group-append" data-target="#datetimepicker1" data-toggle="datetimepicker">
    <div class="input-group-text"><i class="fa fa-calendar"></i></div>
  </div>
</div>

<script>
  $(function () {
    $("#datetimepicker1").datetimepicker({
      format: 'DD/MM/YYYY HH:mm',
    });
  });
</script>
The script tag can be placed anywhere because the snippet $(function () { ... }); will run the datetimepicker
initialization when the page is ready. The only requirement is that this script tag is placed after the jQuery script
tag.
Custom Widget
You can create the widget in any app you want, here I’m going to consider we have a Django app named core.
core/widgets.py
from django.forms import DateTimeInput

class BootstrapDateTimePickerInput(DateTimeInput):
    template_name = 'widgets/bootstrap_datetimepicker.html'

    def get_context(self, name, value, attrs):
        datetimepicker_id = 'datetimepicker_{name}'.format(name=name)
        if attrs is None:
            attrs = dict()
        attrs['data-target'] = '#{id}'.format(id=datetimepicker_id)
        attrs['class'] = 'form-control datetimepicker-input'
        context = super().get_context(name, value, attrs)
        context['widget']['datetimepicker_id'] = datetimepicker_id
        return context
In the implementation above we generate a unique ID datetimepicker_id and also include it in the widget context.
Then the front-end implementation is done inside the widget HTML snippet.
widgets/bootstrap_datetimepicker.html
<div class="input-group date" id="{{ widget.datetimepicker_id }}" data-target-input="nearest">
  {% include "django/forms/widgets/input.html" %}
  <div class="input-group-append" data-target="#{{ widget.datetimepicker_id }}" data-toggle="datetimepicker">
    <div class="input-group-text"><i class="fa fa-calendar"></i></div>
  </div>
</div>

<script>
  $(function () {
    $("#{{ widget.datetimepicker_id }}").datetimepicker({
      format: 'DD/MM/YYYY HH:mm',
    });
  });
</script>
Note how we make use of the built-in django/forms/widgets/input.html template.
Now the usage:
core/forms.py
from .widgets import BootstrapDateTimePickerInput

class DateForm(forms.Form):
    date = forms.DateTimeField(
        input_formats=['%d/%m/%Y %H:%M'],
        widget=BootstrapDateTimePickerInput()
    )
Now simply render the field:
template
{{ form.date }}The good thing about having the widget is that your form could have several date fields using the widget and you could simply render the whole form like:
<form method="post">
  {% csrf_token %}
  {{ form.as_p }}
  <input type="submit" value="Submit">
</form>
XDSoft DateTimePicker
The XDSoft DateTimePicker is a very versatile date picker and doesn’t rely on moment.js or Bootstrap, although it looks good in a Bootstrap website.
It is easy to use and it is very straightforward.
You can download the source from GitHub releases page.
Below, a static example so you can see the minimum requirements and how all the pieces come together:
<!doctype html>
<html lang="en">
<head>
  <meta charset="utf-8">
  <meta name="viewport" content="width=device-width, initial-scale=1, shrink-to-fit=no">
  <title>Static Example</title>

  <!-- jQuery -->
  <script src="https://code.jquery.com/jquery-3.3.1.slim.min.js" integrity="sha384-q8i/X+965DzO0rT7abK41JStQIAqVgRVzpbzo5smXKp4YfRvH+8abtTE1Pi6jizo" crossorigin="anonymous"></script>

  <!-- XDSoft DateTimePicker -->
  <link rel="stylesheet" href="https://cdnjs.cloudflare.com/ajax/libs/jquery-datetimepicker/2.5.20/jquery.datetimepicker.min.css" integrity="sha256-DOS9W6NR+NFe1fUhEE0PGKY/fubbUCnOfTje2JMDw3Y=" crossorigin="anonymous" />
  <script src="https://cdnjs.cloudflare.com/ajax/libs/jquery-datetimepicker/2.5.20/jquery.datetimepicker.full.min.js" integrity="sha256-FEqEelWI3WouFOo2VWP/uJfs1y8KJ++FLh2Lbqc8SJk=" crossorigin="anonymous"></script>
</head>
<body>

  <input id="datetimepicker" type="text">

  <script>
    $(function () {
      $("#datetimepicker").datetimepicker();
    });
  </script>

</body>
</html>
Direct Usage
A basic integration with Django would look like this:
forms.py
from django import forms

class DateForm(forms.Form):
    date = forms.DateTimeField(input_formats=['%d/%m/%Y %H:%M'])
Simple form, default widget, nothing special.
Now using it on the template:
template
{{ form.date }}

<script>
  $(function () {
    $("#id_date").datetimepicker({
      format: 'd/m/Y H:i',
    });
  });
</script>
The id_date is the default ID Django generates for the form fields (id_ + name).
Custom Widget
core/widgets.py
from django.forms import DateTimeInput

class XDSoftDateTimePickerInput(DateTimeInput):
    template_name = 'widgets/xdsoft_datetimepicker.html'
widgets/xdsoft_datetimepicker.html
{% include "django/forms/widgets/input.html" %}

<script>
  $(function () {
    $("input[name='{{ widget.name }}']").datetimepicker({
      format: 'd/m/Y H:i',
    });
  });
</script>
To have a more generic implementation, this time we are selecting the field to initialize the component using its name instead of its id, should the user change the id prefix.
Now the usage:
core/forms.py
from django import forms
from .widgets import XDSoftDateTimePickerInput

class DateForm(forms.Form):
    date = forms.DateTimeField(
        input_formats=['%d/%m/%Y %H:%M'],
        widget=XDSoftDateTimePickerInput()
    )
template
{{ form.date }}Fengyuan Chen’s Datepicker
This is a very beautiful and minimalist date picker. Unfortunately there is no time support. But if you only need dates this is a great choice.
To install this datepicker you can either use their CDN or download the sources from their GitHub releases page. Please note that they do not provide a compiled/processed JavaScript files. But you can download those to your local machine using the CDN.
<!doctype html>
<html lang="en">
<head>
  <meta charset="utf-8">
  <meta name="viewport" content="width=device-width, initial-scale=1, shrink-to-fit=no">
  <title>Static Example</title>
  <style>body {font-family: Arial, sans-serif;}</style>

  <!-- jQuery -->
  <script src="https://code.jquery.com/jquery-3.3.1.slim.min.js" integrity="sha384-q8i/X+965DzO0rT7abK41JStQIAqVgRVzpbzo5smXKp4YfRvH+8abtTE1Pi6jizo" crossorigin="anonymous"></script>

  <!-- Fengyuan Chen's Datepicker -->
  <link rel="stylesheet" href="https://cdnjs.cloudflare.com/ajax/libs/datepicker/0.6.5/datepicker.min.css" integrity="sha256-b88RdwbRJEzRx95nCuuva+hO5ExvXXnpX+78h8DjyOE=" crossorigin="anonymous" />
  <script src="https://cdnjs.cloudflare.com/ajax/libs/datepicker/0.6.5/datepicker.min.js" integrity="sha256-/7FLTdzP6CfC1VBAj/rsp3Rinuuu9leMRGd354hvk0k=" crossorigin="anonymous"></script>
</head>
<body>

  <input id="datepicker">

  <script>
    $(function () {
      $("#datepicker").datepicker();
    });
  </script>

</body>
</html>
Direct Usage
A basic integration with Django (note that we are now using DateField instead of DateTimeField):
forms.py
from django import forms

class DateForm(forms.Form):
    date = forms.DateTimeField(input_formats=['%d/%m/%Y %H:%M'])
template
{{ form.date }}

<script>
  $(function () {
    $("#id_date").datepicker({
      format:'dd/mm/yyyy',
    });
  });
</script>
Custom Widget
core/widgets.py
from django.forms import DateInput

class FengyuanChenDatePickerInput(DateInput):
    template_name = 'widgets/fengyuanchen_datepicker.html'
widgets/fengyuanchen_datepicker.html
{% include "django/forms/widgets/input.html" %}

<script>
  $(function () {
    $("input[name='{{ widget.name }}']").datepicker({
      format:'dd/mm/yyyy',
    });
  });
</script>
Usage:
core/forms.py
from django import forms
from .widgets import FengyuanChenDatePickerInput

class DateForm(forms.Form):
    date = forms.DateTimeField(
        input_formats=['%d/%m/%Y %H:%M'],
        widget=FengyuanChenDatePickerInput()
    )
template
{{ form.date }}Conclusions
The implementation is very similar no matter what date/datetime picker you are using. Hopefully this tutorial provided some insights on how to integrate this kind of frontend library to a Django project.
As always, the best source of information about each of those libraries are their official documentation.
I also created an example project to show the usage and implementation of the widgets for each of the libraries presented in this tutorial. Grab the source code at github.com/sibtc/django-datetimepicker-example.
How to Implement Grouped Model Choice Field [Simple is Better Than Complex]
The Django forms API have two field types to work with multiple options: ChoiceField and ModelChoiceField.
Both use select input as the default widget and they work in a similar way, except that ModelChoiceField is designed
to handle QuerySets and work with foreign key relationships.
A basic implementation using a ChoiceField would be:
class ExpenseForm(forms.Form):
    CHOICES = (
        (11, 'Credit Card'),
        (12, 'Student Loans'),
        (13, 'Taxes'),
        (21, 'Books'),
        (22, 'Games'),
        (31, 'Groceries'),
        (32, 'Restaurants'),
    )
    amount = forms.DecimalField()
    date = forms.DateField()
    category = forms.ChoiceField(choices=CHOICES)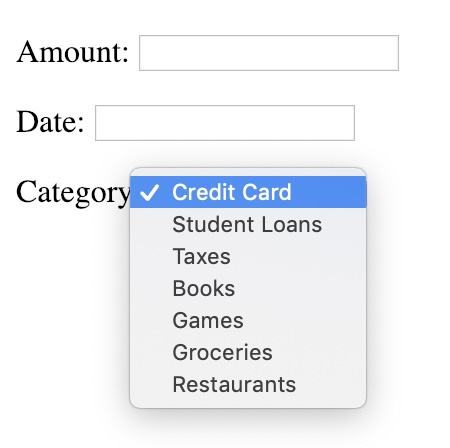
Grouped Choice Field
You can also organize the choices in groups to generate the <optgroup> tags like this:
class ExpenseForm(forms.Form):
    CHOICES = (
        ('Debt', (
            (11, 'Credit Card'),
            (12, 'Student Loans'),
            (13, 'Taxes'),
        )),
        ('Entertainment', (
            (21, 'Books'),
            (22, 'Games'),
        )),
        ('Everyday', (
            (31, 'Groceries'),
            (32, 'Restaurants'),
        )),
    )
    amount = forms.DecimalField()
    date = forms.DateField()
    category = forms.ChoiceField(choices=CHOICES)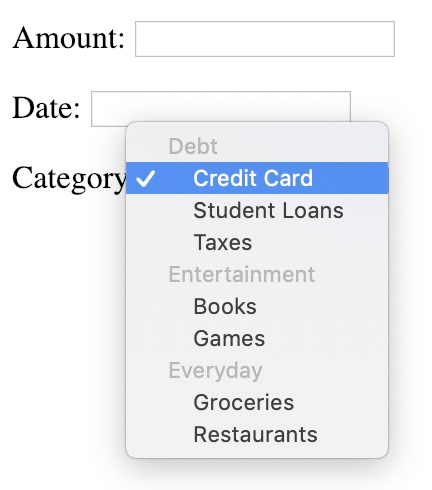
Grouped Model Choice Field
When you are using a ModelChoiceField unfortunately there is no built-in solution.
Recently I found a nice solution on Django’s ticket tracker, where
someone proposed adding an opt_group argument to the ModelChoiceField.
While the discussion is still ongoing, Simon Charette proposed a really good solution.
Let’s see how we can integrate it in our project.
First consider the following models:
models.py
from django.db import models

class Category(models.Model):
    name = models.CharField(max_length=30)
    parent = models.ForeignKey('Category', on_delete=models.CASCADE, null=True)

    def __str__(self):
        return self.name

class Expense(models.Model):
    amount = models.DecimalField(max_digits=10, decimal_places=2)
    date = models.DateField()
    category = models.ForeignKey(Category, on_delete=models.CASCADE)

    def __str__(self):
        return self.amount
So now our category instead of being a regular choices field it is now a model and the Expense model have a
relationship with it using a foreign key.
If we create a ModelForm using this model, the result will be very similar to our first example.
To simulate a grouped categories you will need the code below. First create a new module named fields.py:
fields.py
from functools import partial
from itertools import groupby
from operator import attrgetter

from django.forms.models import ModelChoiceIterator, ModelChoiceField


class GroupedModelChoiceIterator(ModelChoiceIterator):
    def __init__(self, field, groupby):
        self.groupby = groupby
        super().__init__(field)

    def __iter__(self):
        if self.field.empty_label is not None:
            yield ("", self.field.empty_label)
        queryset = self.queryset
        # Can't use iterator() when queryset uses prefetch_related()
        if not queryset._prefetch_related_lookups:
            queryset = queryset.iterator()
        for group, objs in groupby(queryset, self.groupby):
            yield (group, [self.choice(obj) for obj in objs])


class GroupedModelChoiceField(ModelChoiceField):
    def __init__(self, *args, choices_groupby, **kwargs):
        if isinstance(choices_groupby, str):
            choices_groupby = attrgetter(choices_groupby)
        elif not callable(choices_groupby):
            raise TypeError('choices_groupby must either be a str or a callable accepting a single argument')
        self.iterator = partial(GroupedModelChoiceIterator, groupby=choices_groupby)
        super().__init__(*args, **kwargs)
And here is how you use it in your forms:
forms.py
from django import forms
from .fields import GroupedModelChoiceField
from .models import Category, Expense

class ExpenseForm(forms.ModelForm):
    category = GroupedModelChoiceField(
        queryset=Category.objects.exclude(parent=None),
        choices_groupby='parent'
    )

    class Meta:
        model = Expense
        fields = ('amount', 'date', 'category')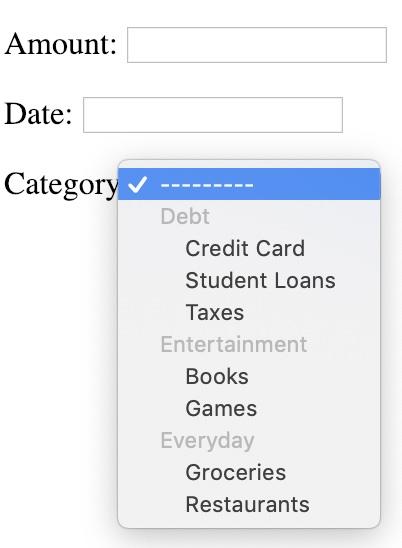
Because in the example above I used a self-referencing relationship I had to add the exclude(parent=None) to hide
the “group categories” from showing up in the select input as a valid option.
Further Reading
You can download the code used in this tutorial from GitHub: github.com/sibtc/django-grouped-choice-field-example
Credits to the solution Simon Charette on Django Ticket Track.
How to Use JWT Authentication with Django REST Framework [Simple is Better Than Complex]
JWT stand for JSON Web Token and it is an authentication strategy used by client/server applications where the client is a Web application using JavaScript and some frontend framework like Angular, React or VueJS.
In this tutorial we are going to explore the specifics of JWT authentication. If you want to learn more about Token-based authentication using Django REST Framework (DRF), or if you want to know how to start a new DRF project you can read this tutorial: How to Implement Token Authentication using Django REST Framework. The concepts are the same, we are just going to switch the authentication backend.
- How JWT Works?
- Installation & Setup
- Example Code
- Usage
- What’s The Point of The Refresh Token?
- Further Reading
How JWT Works?
The JWT is just an authorization token that should be included in all requests:
curl http://127.0.0.1:8000/hello/ -H 'Authorization: Bearer eyJ0eXAiOiJKV1QiLCJhbGciOiJIUzI1NiJ9.eyJ0b2tlbl90eXBlIjoiYWNjZXNzIiwiZXhwIjoxNTQzODI4NDMxLCJqdGkiOiI3ZjU5OTdiNzE1MGQ0NjU3OWRjMmI0OTE2NzA5N2U3YiIsInVzZXJfaWQiOjF9.Ju70kdcaHKn1Qaz8H42zrOYk0Jx9kIckTn9Xx7vhikY'The JWT is acquired by exchanging an username + password for an access token and an refresh token.
The access token is usually short-lived (expires in 5 min or so, can be customized though).
The refresh token lives a little bit longer (expires in 24 hours, also customizable). It is comparable to an authentication session. After it expires, you need a full login with username + password again.
Why is that?
It’s a security feature and also it’s because the JWT holds a little bit more information. If you look closely the example I gave above, you will see the token is composed by three parts:
xxxxx.yyyyy.zzzzzThose are three distinctive parts that compose a JWT:
header.payload.signatureSo we have here:
header = eyJ0eXAiOiJKV1QiLCJhbGciOiJIUzI1NiJ9
payload = eyJ0b2tlbl90eXBlIjoiYWNjZXNzIiwiZXhwIjoxNTQzODI4NDMxLCJqdGkiOiI3ZjU5OTdiNzE1MGQ0NjU3OWRjMmI0OTE2NzA5N2U3YiIsInVzZXJfaWQiOjF9
signature = Ju70kdcaHKn1Qaz8H42zrOYk0Jx9kIckTn9Xx7vhikY
This information is encoded using Base64. If we decode, we will see something like this:
header
{
  "typ": "JWT",
  "alg": "HS256"
}
payload
{
  "token_type": "access",
  "exp": 1543828431,
  "jti": "7f5997b7150d46579dc2b49167097e7b",
  "user_id": 1
}
signature
The signature is issued by the JWT backend, using the header base64 + payload base64 + SECRET_KEY. Upon each request
this signature is verified. If any information in the header or in the payload was changed by the client it will
invalidate the signature. The only way of checking and validating the signature is by using your application’s
SECRET_KEY. Among other things, that’s why you should always keep your SECRET_KEY secret!
Installation & Setup
For this tutorial we are going to use the djangorestframework_simplejwt
library, recommended by the DRF developers.
pip install djangorestframework_simplejwtsettings.py
REST_FRAMEWORK = {
    'DEFAULT_AUTHENTICATION_CLASSES': [
        'rest_framework_simplejwt.authentication.JWTAuthentication',
    ],
}
urls.py
from django.urls import path
from rest_framework_simplejwt import views as jwt_views

urlpatterns = [
    # Your URLs...
    path('api/token/', jwt_views.TokenObtainPairView.as_view(), name='token_obtain_pair'),
    path('api/token/refresh/', jwt_views.TokenRefreshView.as_view(), name='token_refresh'),
]
Example Code
For this tutorial I will use the following route and API view:
views.py
from rest_framework.views import APIView
from rest_framework.response import Response
from rest_framework.permissions import IsAuthenticated


class HelloView(APIView):
    permission_classes = (IsAuthenticated,)

    def get(self, request):
        content = {'message': 'Hello, World!'}
        return Response(content)
urls.py
from django.urls import path
from myapi.core import views

urlpatterns = [
    path('hello/', views.HelloView.as_view(), name='hello'),
]
Usage
I will be using HTTPie to consume the API endpoints via the terminal. But you can also use cURL (readily available in many OS) to try things out locally.
Or alternatively, use the DRF web interface by accessing the endpoint URLs like this:
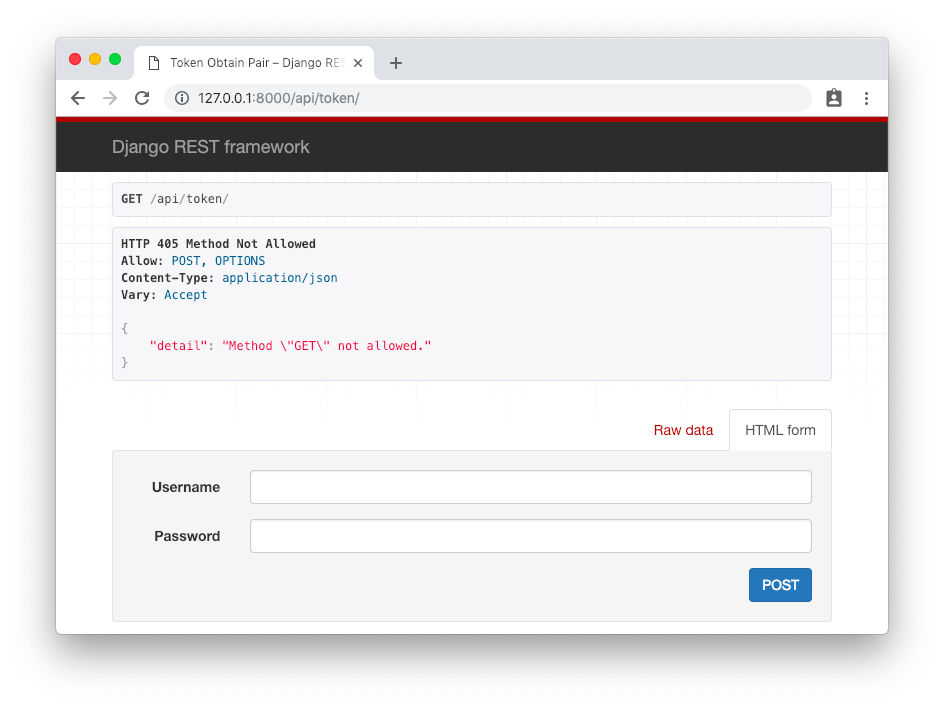
Obtain Token
First step is to authenticate and obtain the token. The endpoint is /api/token/ and it only accepts POST requests.
http post http://127.0.0.1:8000/api/token/ username=vitor password=123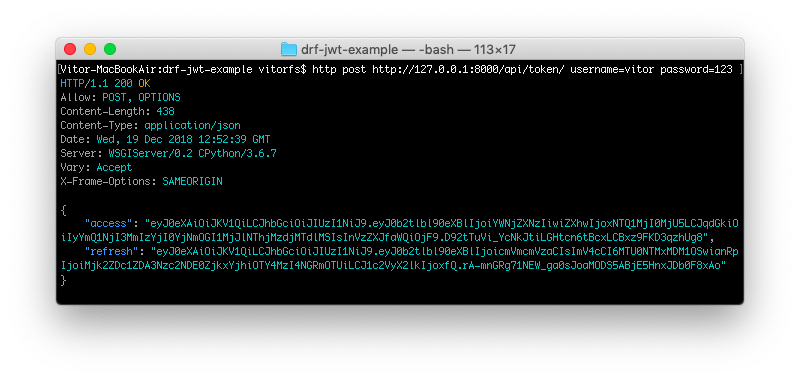
So basically your response body is the two tokens:
{
    "access": "eyJ0eXAiOiJKV1QiLCJhbGciOiJIUzI1NiJ9.eyJ0b2tlbl90eXBlIjoiYWNjZXNzIiwiZXhwIjoxNTQ1MjI0MjU5LCJqdGkiOiIyYmQ1NjI3MmIzYjI0YjNmOGI1MjJlNThjMzdjMTdlMSIsInVzZXJfaWQiOjF9.D92tTuVi_YcNkJtiLGHtcn6tBcxLCBxz9FKD3qzhUg8",
    "refresh": "eyJ0eXAiOiJKV1QiLCJhbGciOiJIUzI1NiJ9.eyJ0b2tlbl90eXBlIjoicmVmcmVzaCIsImV4cCI6MTU0NTMxMDM1OSwianRpIjoiMjk2ZDc1ZDA3Nzc2NDE0ZjkxYjhiOTY4MzI4NGRmOTUiLCJ1c2VyX2lkIjoxfQ.rA-mnGRg71NEW_ga0sJoaMODS5ABjE5HnxJDb0F8xAo"
}
After that you are going to store both the access token and the refresh token on the client side, usually in the localStorage.
In order to access the protected views on the backend (i.e., the API endpoints that require authentication), you should include the access token in the header of all requests, like this:
http http://127.0.0.1:8000/hello/ "Authorization: Bearer eyJ0eXAiOiJKV1QiLCJhbGciOiJIUzI1NiJ9.eyJ0b2tlbl90eXBlIjoiYWNjZXNzIiwiZXhwIjoxNTQ1MjI0MjAwLCJqdGkiOiJlMGQxZDY2MjE5ODc0ZTY3OWY0NjM0ZWU2NTQ2YTIwMCIsInVzZXJfaWQiOjF9.9eHat3CvRQYnb5EdcgYFzUyMobXzxlAVh_IAgqyvzCE"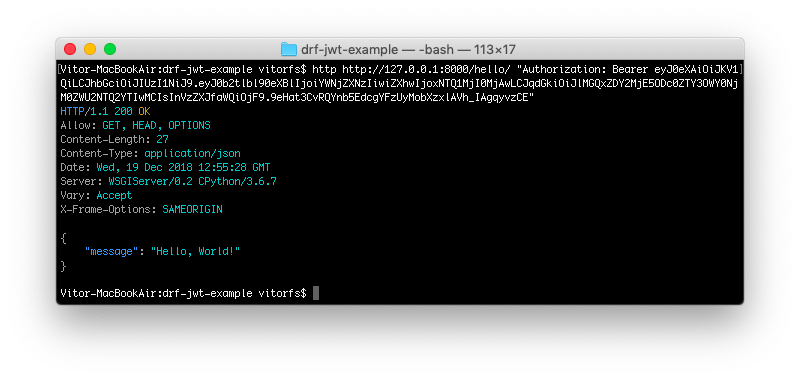
You can use this access token for the next five minutes.
After five min, the token will expire, and if you try to access the view again, you are going to get the following error:
http http://127.0.0.1:8000/hello/ "Authorization: Bearer eyJ0eXAiOiJKV1QiLCJhbGciOiJIUzI1NiJ9.eyJ0b2tlbl90eXBlIjoiYWNjZXNzIiwiZXhwIjoxNTQ1MjI0MjAwLCJqdGkiOiJlMGQxZDY2MjE5ODc0ZTY3OWY0NjM0ZWU2NTQ2YTIwMCIsInVzZXJfaWQiOjF9.9eHat3CvRQYnb5EdcgYFzUyMobXzxlAVh_IAgqyvzCE"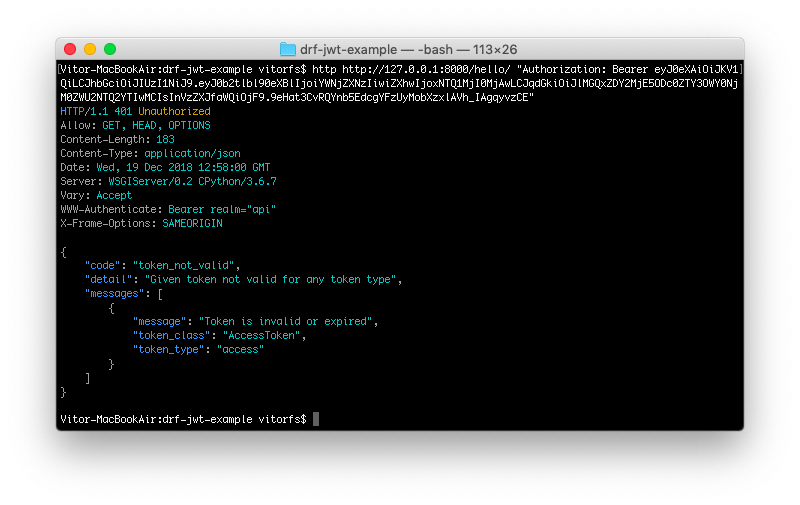
Refresh Token
To get a new access token, you should use the refresh token endpoint /api/token/refresh/ posting the
refresh token:
http post http://127.0.0.1:8000/api/token/refresh/ refresh=eyJ0eXAiOiJKV1QiLCJhbGciOiJIUzI1NiJ9.eyJ0b2tlbl90eXBlIjoicmVmcmVzaCIsImV4cCI6MTU0NTMwODIyMiwianRpIjoiNzAyOGFlNjc0ZTdjNDZlMDlmMzUwYjg3MjU1NGUxODQiLCJ1c2VyX2lkIjoxfQ.Md8AO3dDrQBvWYWeZsd_A1J39z6b6HEwWIUZ7ilOiPE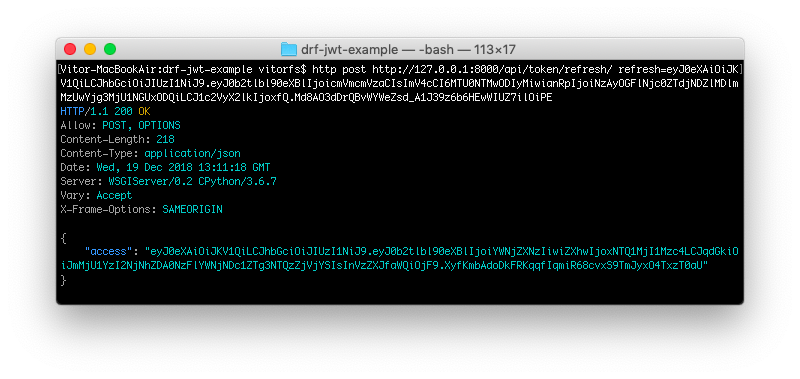
The return is a new access token that you should use in the subsequent requests.
The refresh token is valid for the next 24 hours. When it finally expires too, the user will need to perform a full authentication again using their username and password to get a new set of access token + refresh token.
What’s The Point of The Refresh Token?
At first glance the refresh token may look pointless, but in fact it is necessary to make sure the user still have the correct permissions. If your access token have a long expire time, it may take longer to update the information associated with the token. That’s because the authentication check is done by cryptographic means, instead of querying the database and verifying the data. So some information is sort of cached.
There is also a security aspect, in a sense that the refresh token only travel in the POST data. And the access token is sent via HTTP header, which may be logged along the way. So this also give a short window, should your access token be compromised.
Further Reading
This should cover the basics on the backend implementation. It’s worth checking the djangorestframework_simplejwt settings for further customization and to get a better idea of what the library offers.
The implementation on the frontend depends on what framework/library you are using. Some libraries and articles covering popular frontend frameworks like angular/react/vue.js:
- Angular JWT library
- Angular 2 JWT library
- Secure Your React and Redux App with JWT Authentication
- Authenticating via JWT using Django, Axios, and Vue
The code used in this tutorial is available at github.com/sibtc/drf-jwt-example.
Advanced Form Rendering with Django Crispy Forms [Simple is Better Than Complex]
[Django 2.1.3 / Python 3.6.5 / Bootstrap 4.1.3]
In this tutorial we are going to explore some of the Django Crispy Forms features to handle advanced/custom forms rendering. This blog post started as a discussion in our community forum, so I decided to compile the insights and solutions in a blog post to benefit a wider audience.
Table of Contents
- Introduction
- Installation
- Basic Form Rendering
- Basic Crispy Form Rendering
- Custom Fields Placement with Crispy Forms
- Crispy Forms Layout Helpers
- Custom Crispy Field
- Conclusions
Introduction
Throughout this tutorial we are going to implement the following Bootstrap 4 form using Django APIs:
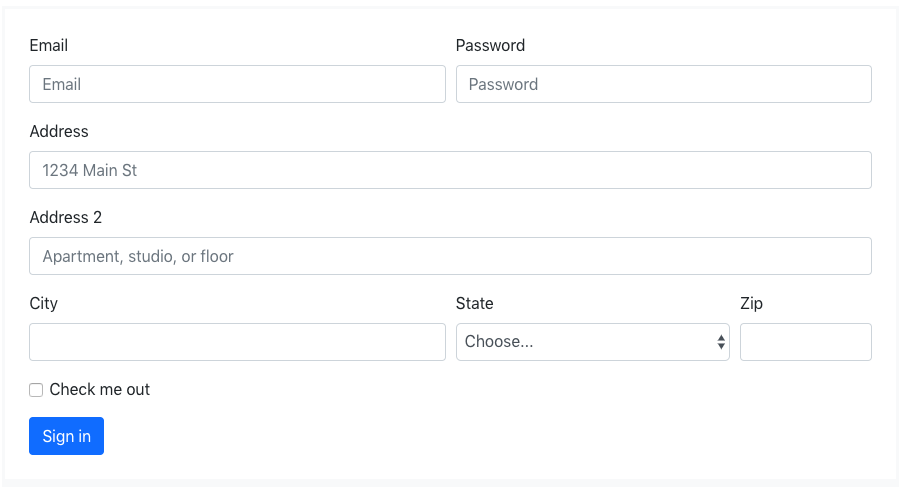
This was taken from Bootstrap 4 official documentation as an example of how to use form rows.
NOTE!
The examples below refer to a base.html template. Consider the code below:
base.html
<!doctype html>
<html lang="en">
<head>
  <meta charset="utf-8">
  <meta name="viewport" content="width=device-width, initial-scale=1, shrink-to-fit=no">
  <link rel="stylesheet" href="https://stackpath.bootstrapcdn.com/bootstrap/4.1.3/css/bootstrap.min.css" integrity="sha384-MCw98/SFnGE8fJT3GXwEOngsV7Zt27NXFoaoApmYm81iuXoPkFOJwJ8ERdknLPMO" crossorigin="anonymous">
</head>
<body>
  <div class="container">
    {% block content %}
    {% endblock %}
  </div>
</body>
</html>
Installation
Install it using pip:
pip install django-crispy-formsAdd it to your INSTALLED_APPS and select which styles to use:
settings.py
INSTALLED_APPS = [
    ...

    'crispy_forms',
]

CRISPY_TEMPLATE_PACK = 'bootstrap4'
For detailed instructions about how to install django-crispy-forms, please refer to this tutorial:
How to Use Bootstrap 4 Forms With Django
Basic Form Rendering
The Python code required to represent the form above is the following:
from django import forms

STATES = (
    ('', 'Choose...'),
    ('MG', 'Minas Gerais'),
    ('SP', 'Sao Paulo'),
    ('RJ', 'Rio de Janeiro')
)

class AddressForm(forms.Form):
    email = forms.CharField(widget=forms.TextInput(attrs={'placeholder': 'Email'}))
    password = forms.CharField(widget=forms.PasswordInput())
    address_1 = forms.CharField(
        label='Address',
        widget=forms.TextInput(attrs={'placeholder': '1234 Main St'})
    )
    address_2 = forms.CharField(
        widget=forms.TextInput(attrs={'placeholder': 'Apartment, studio, or floor'})
    )
    city = forms.CharField()
    state = forms.ChoiceField(choices=STATES)
    zip_code = forms.CharField(label='Zip')
    check_me_out = forms.BooleanField(required=False)
In this case I’m using a regular Form, but it could also be a ModelForm based on a Django model with similar
fields. The state field and the STATES choices could be either a foreign key or anything else. Here I’m just using
a simple static example with three Brazilian states.
Template:
{% extends 'base.html' %}

{% block content %}
  <form method="post">
    {% csrf_token %}
    <table>{{ form.as_table }}</table>
    <button type="submit">Sign in</button>
  </form>
{% endblock %}
Rendered HTML:

Rendered HTML with validation state:
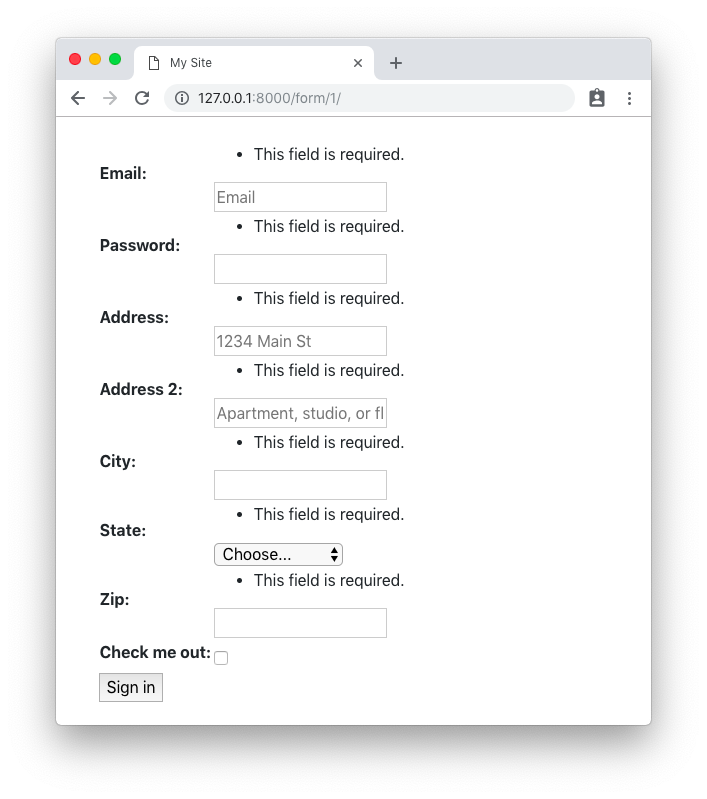
Basic Crispy Form Rendering
Same form code as in the example before.
Template:
{% extends 'base.html' %}

{% load crispy_forms_tags %}

{% block content %}
  <form method="post">
    {% csrf_token %}
    {{ form|crispy }}
    <button type="submit" class="btn btn-primary">Sign in</button>
  </form>
{% endblock %}
Rendered HTML:
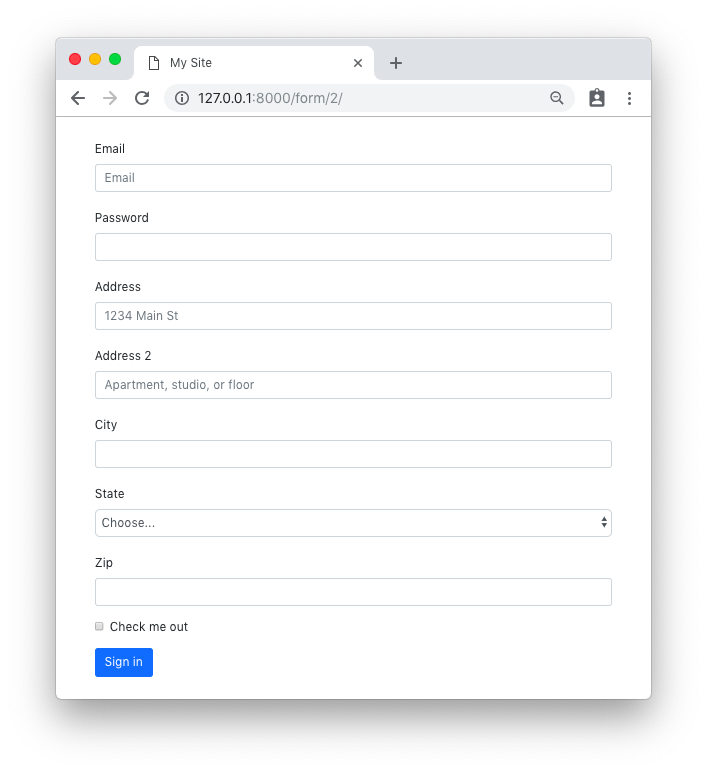
Rendered HTML with validation state:
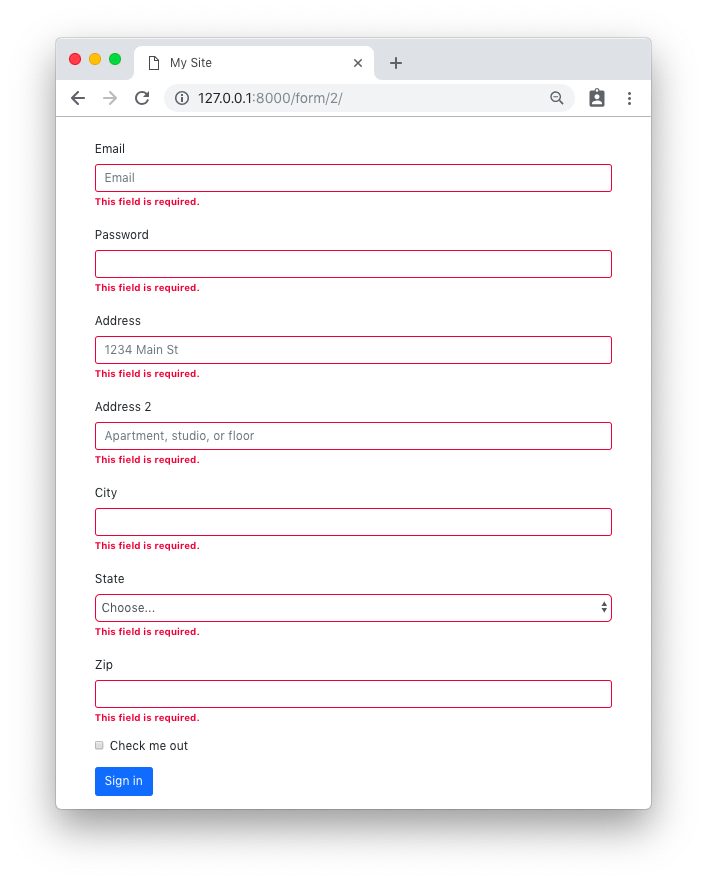
Custom Fields Placement with Crispy Forms
Same form code as in the first example.
Template:
{% extends 'base.html' %}

{% load crispy_forms_tags %}

{% block content %}
  <form method="post">
    {% csrf_token %}
    <div class="form-row">
      <div class="form-group col-md-6 mb-0">
        {{ form.email|as_crispy_field }}
      </div>
      <div class="form-group col-md-6 mb-0">
        {{ form.password|as_crispy_field }}
      </div>
    </div>
    {{ form.address_1|as_crispy_field }}
    {{ form.address_2|as_crispy_field }}
    <div class="form-row">
      <div class="form-group col-md-6 mb-0">
        {{ form.city|as_crispy_field }}
      </div>
      <div class="form-group col-md-4 mb-0">
        {{ form.state|as_crispy_field }}
      </div>
      <div class="form-group col-md-2 mb-0">
        {{ form.zip_code|as_crispy_field }}
      </div>
    </div>
    {{ form.check_me_out|as_crispy_field }}
    <button type="submit" class="btn btn-primary">Sign in</button>
  </form>
{% endblock %}
Rendered HTML:
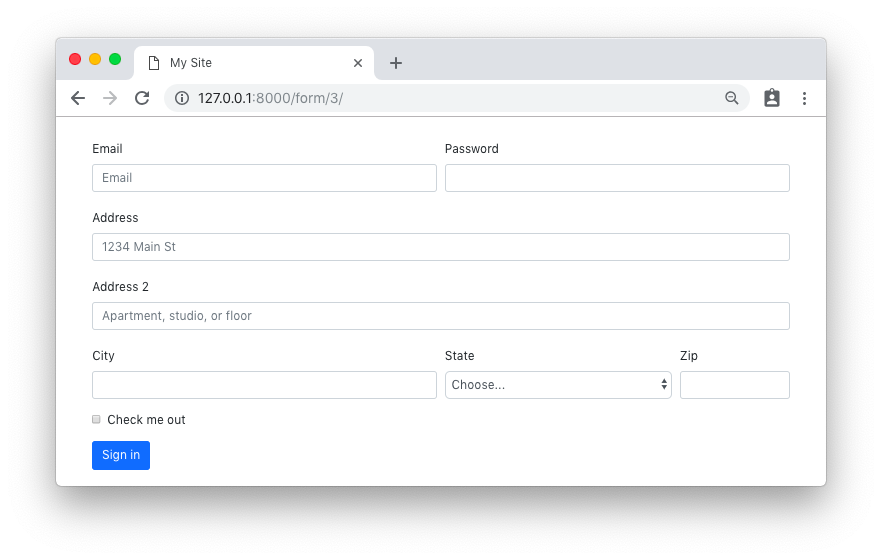
Rendered HTML with validation state:
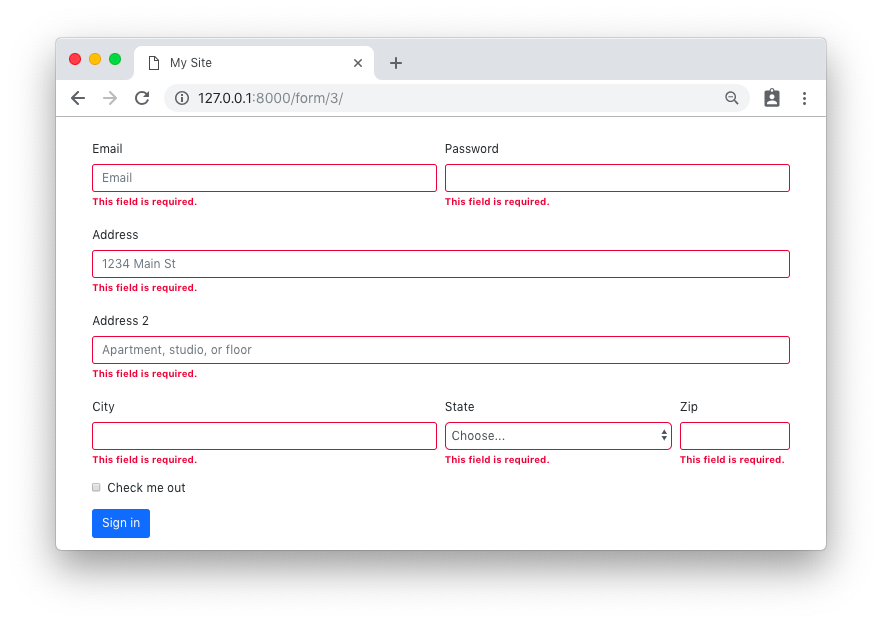
Crispy Forms Layout Helpers
We could use the crispy forms layout helpers to achieve the same result as above. The implementation is done inside
the form __init__ method:
forms.py
from django import forms
from crispy_forms.helper import FormHelper
from crispy_forms.layout import Layout, Submit, Row, Column

STATES = (
    ('', 'Choose...'),
    ('MG', 'Minas Gerais'),
    ('SP', 'Sao Paulo'),
    ('RJ', 'Rio de Janeiro')
)

class AddressForm(forms.Form):
    email = forms.CharField(widget=forms.TextInput(attrs={'placeholder': 'Email'}))
    password = forms.CharField(widget=forms.PasswordInput())
    address_1 = forms.CharField(
        label='Address',
        widget=forms.TextInput(attrs={'placeholder': '1234 Main St'})
    )
    address_2 = forms.CharField(
        widget=forms.TextInput(attrs={'placeholder': 'Apartment, studio, or floor'})
    )
    city = forms.CharField()
    state = forms.ChoiceField(choices=STATES)
    zip_code = forms.CharField(label='Zip')
    check_me_out = forms.BooleanField(required=False)

    def __init__(self, *args, **kwargs):
        super().__init__(*args, **kwargs)
        self.helper = FormHelper()
        self.helper.layout = Layout(
            Row(
                Column('email', css_class='form-group col-md-6 mb-0'),
                Column('password', css_class='form-group col-md-6 mb-0'),
                css_class='form-row'
            ),
            'address_1',
            'address_2',
            Row(
                Column('city', css_class='form-group col-md-6 mb-0'),
                Column('state', css_class='form-group col-md-4 mb-0'),
                Column('zip_code', css_class='form-group col-md-2 mb-0'),
                css_class='form-row'
            ),
            'check_me_out',
            Submit('submit', 'Sign in')
        )
The template implementation is very minimal:
{% extends 'base.html' %}

{% load crispy_forms_tags %}

{% block content %}
  {% crispy form %}
{% endblock %}
The end result is the same.
Rendered HTML:
Rendered HTML with validation state:
Custom Crispy Field
You may also customize the field template and easily reuse throughout your application. Let’s say we want to use the custom Bootstrap 4 checkbox:

From the official documentation, the necessary HTML to output the input above:
<div class="custom-control custom-checkbox">
  <input type="checkbox" class="custom-control-input" id="customCheck1">
  <label class="custom-control-label" for="customCheck1">Check this custom checkbox</label>
</div>
Using the crispy forms API, we can create a new template for this custom field in our “templates” folder:
custom_checkbox.html
{% load crispy_forms_field %}

<div class="form-group">
  <div class="custom-control custom-checkbox">
    {% crispy_field field 'class' 'custom-control-input' %}
    <label class="custom-control-label" for="{{ field.id_for_label }}">{{ field.label }}</label>
  </div>
</div>
Now we can create a new crispy field, either in our forms.py module or in a new Python module named fields.py or something.
forms.py
from crispy_forms.layout import Field

class CustomCheckbox(Field):
    template = 'custom_checkbox.html'
We can use it now in our form definition:
forms.py
class CustomFieldForm(AddressForm):
    def __init__(self, *args, **kwargs):
        super().__init__(*args, **kwargs)
        self.helper = FormHelper()
        self.helper.layout = Layout(
            Row(
                Column('email', css_class='form-group col-md-6 mb-0'),
                Column('password', css_class='form-group col-md-6 mb-0'),
                css_class='form-row'
            ),
            'address_1',
            'address_2',
            Row(
                Column('city', css_class='form-group col-md-6 mb-0'),
                Column('state', css_class='form-group col-md-4 mb-0'),
                Column('zip_code', css_class='form-group col-md-2 mb-0'),
                css_class='form-row'
            ),
            CustomCheckbox('check_me_out'),  # <-- Here
            Submit('submit', 'Sign in')
        )
(PS: the AddressForm was defined here and is the same as in the previous example.)
The end result:
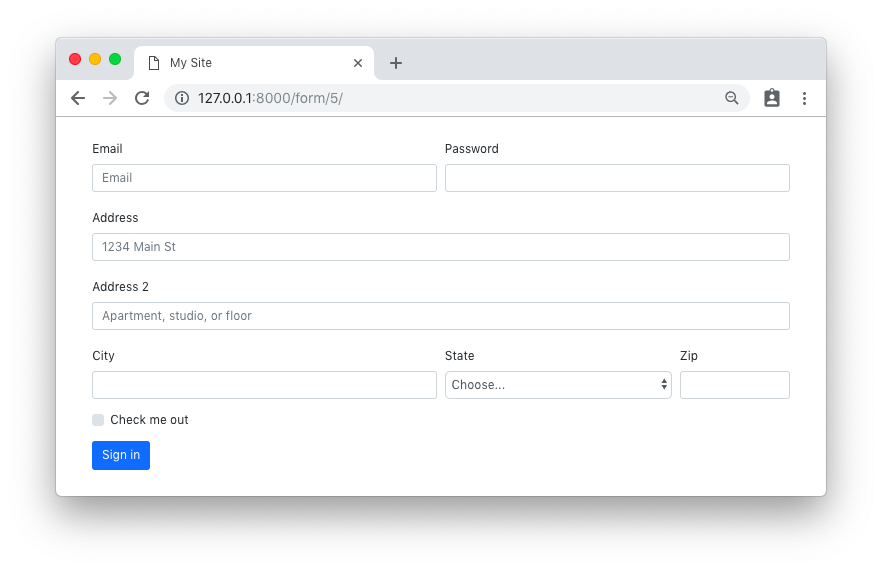
Conclusions
There is much more Django Crispy Forms can do. Hopefully this tutorial gave you some extra insights on how to use the form helpers and layout classes. As always, the official documentation is the best source of information:
Django Crispy Forms layouts docs
Also, the code used in this tutorial is available on GitHub at github.com/sibtc/advanced-crispy-forms-examples.
How to Implement Token Authentication using Django REST Framework [Simple is Better Than Complex]
In this tutorial you are going to learn how to implement Token-based authentication using Django REST Framework (DRF). The token authentication works by exchanging username and password for a token that will be used in all subsequent requests so to identify the user on the server side.
The specifics of how the authentication is handled on the client side vary a lot depending on the technology/language/framework you are working with. The client could be a mobile application using iOS or Android. It could be a desktop application using Python or C++. It could be a Web application using PHP or Ruby.
But once you understand the overall process, it’s easier to find the necessary resources and documentation for your specific use case.
Token authentication is suitable for client-server applications, where the token is safely stored. You should never expose your token, as it would be (sort of) equivalent of a handing out your username and password.
Table of Contents
- Setting Up The REST API Project (If you already know how to start a DRF project you can skip this)
- Implementing the Token Authentication
- User Requesting a Token
- Conclusions
Setting Up The REST API Project
So let’s start from the very beginning. Install Django and DRF:
pip install django
pip install djangorestframework
Create a new Django project:
django-admin.py startproject myapi .Navigate to the myapi folder:
cd myapiStart a new app. I will call my app core:
django-admin.py startapp coreHere is what your project structure should look like:
myapi/
 |-- core/
 |    |-- migrations/
 |    |-- __init__.py
 |    |-- admin.py
 |    |-- apps.py
 |    |-- models.py
 |    |-- tests.py
 |    +-- views.py
 |-- __init__.py
 |-- settings.py
 |-- urls.py
 +-- wsgi.py
manage.py
Add the core app (you created) and the rest_framework app (you installed) to the INSTALLED_APPS, inside the
settings.py module:
myapi/settings.py
INSTALLED_APPS = [
    # Django Apps
    'django.contrib.admin',
    'django.contrib.auth',
    'django.contrib.contenttypes',
    'django.contrib.sessions',
    'django.contrib.messages',
    'django.contrib.staticfiles',

    # Third-Party Apps
    'rest_framework',

    # Local Apps (Your project's apps)
    'myapi.core',
]
Return to the project root (the folder where the manage.py script is), and migrate the database:
python manage.py migrateLet’s create our first API view just to test things out:
myapi/core/views.py
from rest_framework.views import APIView
from rest_framework.response import Response

class HelloView(APIView):
    def get(self, request):
        content = {'message': 'Hello, World!'}
        return Response(content)
Now register a path in the urls.py module:
myapi/urls.py
from django.urls import path
from myapi.core import views

urlpatterns = [
    path('hello/', views.HelloView.as_view(), name='hello'),
]
So now we have an API with just one endpoint /hello/ that we can perform GET requests. We can use the browser to
consume this endpoint, just by accessing the URL http://127.0.0.1:8000/hello/:

We can also ask to receive the response as plain JSON data by passing the format parameter in the querystring like
http://127.0.0.1:8000/hello/?format=json:
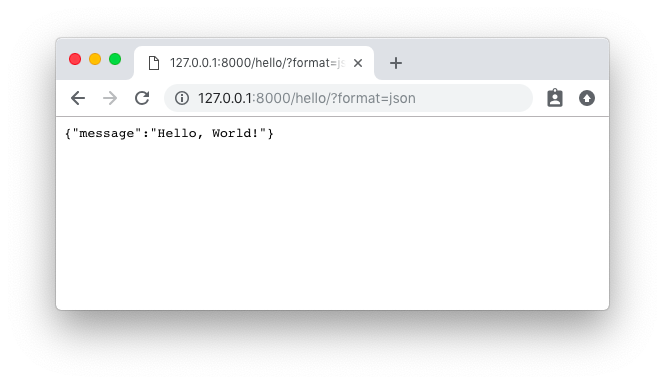
Both methods are fine to try out a DRF API, but sometimes a command line tool is more handy as we can play more easily with the requests headers. You can use cURL, which is widely available on all major Linux/macOS distributions:
curl http://127.0.0.1:8000/hello/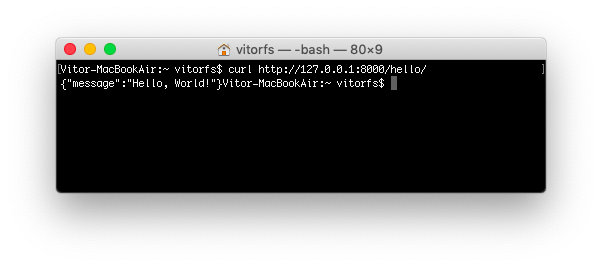
But usually I prefer to use HTTPie, which is a pretty awesome Python command line tool:
http http://127.0.0.1:8000/hello/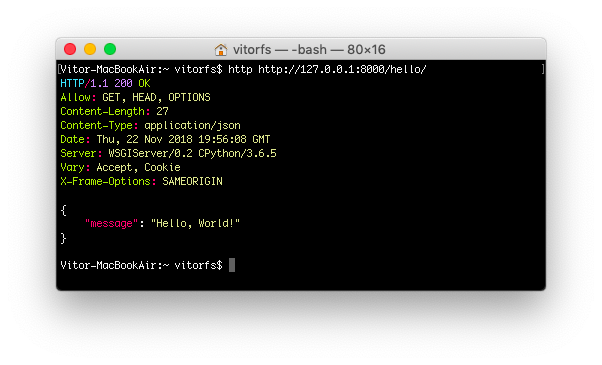
Now let’s protect this API endpoint so we can implement the token authentication:
myapi/core/views.py
from rest_framework.views import APIView
from rest_framework.response import Response
from rest_framework.permissions import IsAuthenticated  # <-- Here


class HelloView(APIView):
    permission_classes = (IsAuthenticated,)             # <-- And here

    def get(self, request):
        content = {'message': 'Hello, World!'}
        return Response(content)
Try again to access the API endpoint:
http http://127.0.0.1:8000/hello/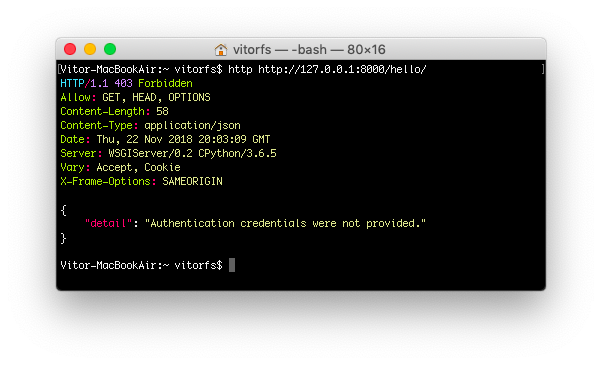
And now we get an HTTP 403 Forbidden error. Now let’s implement the token authentication so we can access this endpoint.
Implementing the Token Authentication
We need to add two pieces of information in our settings.py module. First include rest_framework.authtoken to
your INSTALLED_APPS and include the TokenAuthentication to REST_FRAMEWORK:
myapi/settings.py
INSTALLED_APPS = [
    # Django Apps
    'django.contrib.admin',
    'django.contrib.auth',
    'django.contrib.contenttypes',
    'django.contrib.sessions',
    'django.contrib.messages',
    'django.contrib.staticfiles',

    # Third-Party Apps
    'rest_framework',
    'rest_framework.authtoken',  # <-- Here

    # Local Apps (Your project's apps)
    'myapi.core',
]

REST_FRAMEWORK = {
    'DEFAULT_AUTHENTICATION_CLASSES': [
        'rest_framework.authentication.TokenAuthentication',  # <-- And here
    ],
}
Migrate the database to create the table that will store the authentication tokens:
python manage.py migrate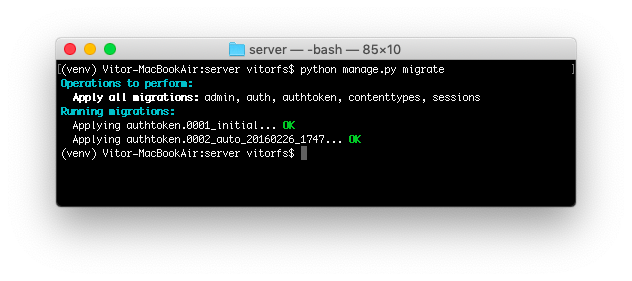
Now we need a user account. Let’s just create one using the manage.py command line utility:
python manage.py createsuperuser --username vitor --email vitor@example.comThe easiest way to generate a token, just for testing purpose, is using the command line utility again:
python manage.py drf_create_token vitor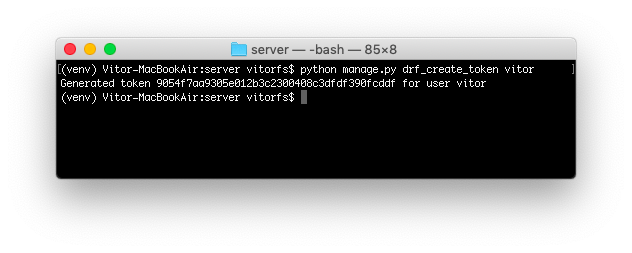
This piece of information, the random string 9054f7aa9305e012b3c2300408c3dfdf390fcddf is what we are going to use
next to authenticate.
But now that we have the TokenAuthentication in place, let’s try to make another request to our /hello/ endpoint:
http http://127.0.0.1:8000/hello/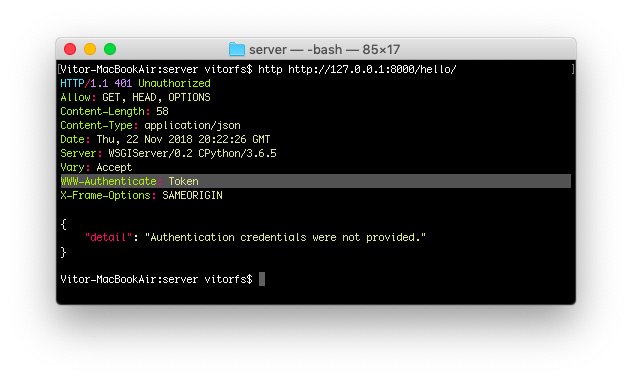
Notice how our API is now providing some extra information to the client on the required authentication method.
So finally, let’s use our token!
http http://127.0.0.1:8000/hello/ 'Authorization: Token 9054f7aa9305e012b3c2300408c3dfdf390fcddf'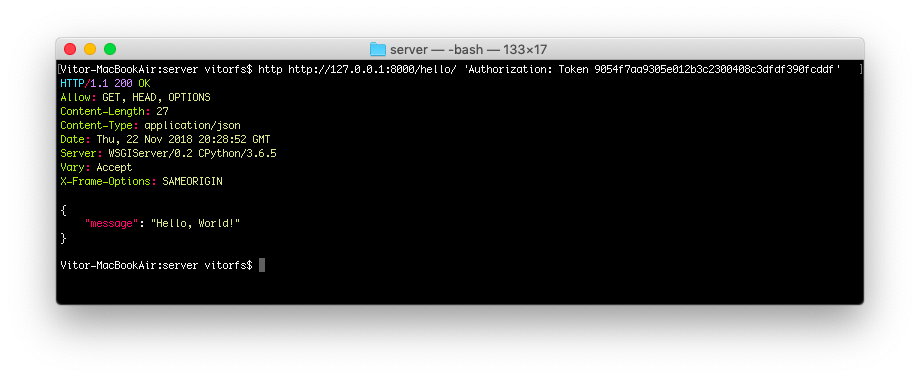
And that’s pretty much it. For now on, on all subsequent request you should include the header Authorization: Token 9054f7aa9305e012b3c2300408c3dfdf390fcddf.
The formatting looks weird and usually it is a point of confusion on how to set this header. It will depend on the client and how to set the HTTP request header.
For example, if we were using cURL, the command would be something like this:
curl http://127.0.0.1:8000/hello/ -H 'Authorization: Token 9054f7aa9305e012b3c2300408c3dfdf390fcddf'Or if it was a Python requests call:
import requests

url = 'http://127.0.0.1:8000/hello/'
headers = {'Authorization': 'Token 9054f7aa9305e012b3c2300408c3dfdf390fcddf'}
r = requests.get(url, headers=headers)
Or if we were using Angular, you could implement an HttpInterceptor and set a header:
import { Injectable } from '@angular/core';
import { HttpRequest, HttpHandler, HttpEvent, HttpInterceptor } from '@angular/common/http';
import { Observable } from 'rxjs';

@Injectable()
export class AuthInterceptor implements HttpInterceptor {
  intercept(request: HttpRequest<any>, next: HttpHandler): Observable<HttpEvent<any>> {
    const user = JSON.parse(localStorage.getItem('user'));
    if (user && user.token) {
      request = request.clone({
        setHeaders: {
          Authorization: `Token ${user.accessToken}`
        }
      });
    }
    return next.handle(request);
  }
}
User Requesting a Token
The DRF provide an endpoint for the users to request an authentication token using their username and password.
Include the following route to the urls.py module:
myapi/urls.py
from django.urls import path
from rest_framework.authtoken.views import obtain_auth_token  # <-- Here
from myapi.core import views

urlpatterns = [
    path('hello/', views.HelloView.as_view(), name='hello'),
    path('api-token-auth/', obtain_auth_token, name='api_token_auth'),  # <-- And here
]
So now we have a brand new API endpoint, which is /api-token-auth/. Let’s first inspect it:
http http://127.0.0.1:8000/api-token-auth/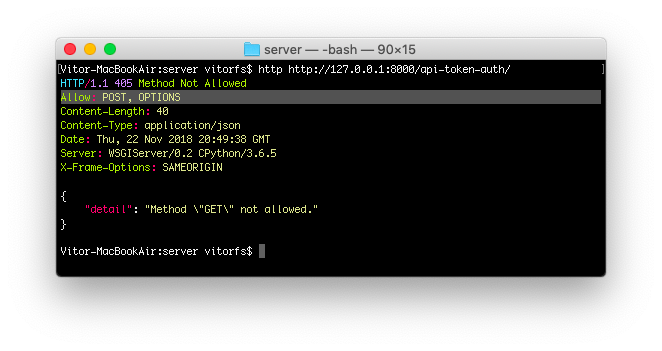
It doesn’t handle GET requests. Basically it’s just a view to receive a POST request with username and password.
Let’s try again:
http post http://127.0.0.1:8000/api-token-auth/ username=vitor password=123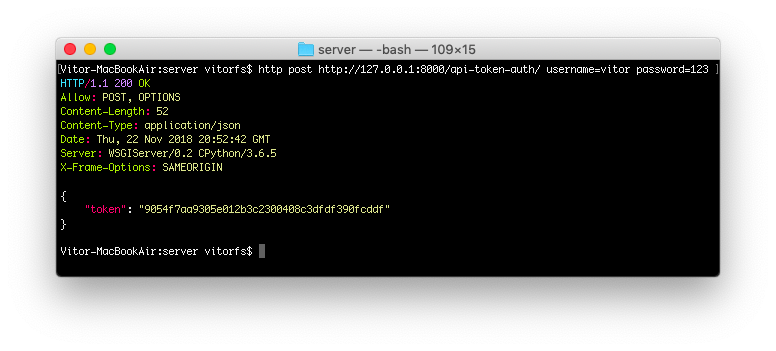
The response body is the token associated with this particular user. After this point you store this token and apply it to the future requests.
Then, again, the way you are going to make the POST request to the API depends on the language/framework you are using.
If this was an Angular client, you could store the token in the localStorage, if this was a Desktop CLI application
you could store in a text file in the user’s home directory in a dot file.
Conclusions
Hopefully this tutorial provided some insights on how the token authentication works. I will try to follow up this tutorial providing some concrete examples of Angular applications, command line applications and Web clients as well.
It is important to note that the default Token implementation has some limitations such as only one token per user, no built-in way to set an expiry date to the token.
You can grab the code used in this tutorial at github.com/sibtc/drf-token-auth-example.
13-11-2020
17:24
Op 1 mei 2019 bestaat mijn blog 10 jaar en dan hou ik er (voorlopig) mee op. Het is meteen tijd om dit blog bij te werken en me bezig te houden m
Op 1 mei 2019 bestaat mijn blog 10 jaar en dan hou ik er (voorlopig) mee op. Het is meteen tijd om dit blog bij te werken en me bezig te houden m
Op 1 mei 2019 bestaat mijn blog 10 jaar en dan hou ik er (voorlopig) mee op. Het is meteen tijd om dit blog bij te werken en me bezig te houden m
Op 1 mei 2019 bestaat mijn blog 10 jaar en dan hou ik er (voorlopig) mee op. Het is meteen tijd om dit blog bij te werken en me bezig te houden m
Op 1 mei 2019 bestaat mijn blog 10 jaar en dan hou ik er (voorlopig) mee op. Het is meteen tijd om dit blog bij te werken en me bezig te houden
Op 1 mei 2019 bestaat mijn blog 10 jaar en dan hou ik er (voorlopig) mee op. Het is meteen tijd om dit blog bij te werken en me bezig te houden m
Op 1 mei 2019 bestaat mijn blog 10 jaar en dan hou ik er (voorlopig) mee op. Het is meteen tijd om dit blog bij te werken en me bezig te houden m
Op 1 mei 2019 bestaat mijn blog 10 jaar en dan hou ik er (voorlopig) mee op. Het is meteen tijd om dit blog bij te werken en me bezig te houden m
Op 1 mei 2019 bestaat mijn blog 10 jaar en dan hou ik er (voorlopig) mee op. Het is meteen tijd om dit blog bij te werken en me bezig te houden m
Op 1 mei 2019 bestaat mijn blog 10 jaar en dan hou ik er (voorlopig) mee op. Het is meteen tijd om dit blog bij te werken en me bezig te houden m
Op 1 mei 2019 bestaat mijn blog 10 jaar en dan hou ik er (voorlopig) mee op. Het is meteen tijd om dit blog bij te werken en me bezig te houden m
Op 1 mei 2019 bestaat mijn blog 10 jaar en dan hou ik er (voorlopig) mee op. Het is meteen tijd om dit blog bij te werken en me bezig te houden m
Op 1 mei 2019 bestaat mijn blog 10 jaar en dan hou ik er (voorlopig) mee op. Het is meteen tijd om dit blog bij te werken en me bezig te houden m
Op 1 mei 2019 bestaat mijn blog 10 jaar en dan hou ik er (voorlopig) mee op. Het is meteen tijd om dit blog bij te werken en me bezig te houden m
Op 1 mei 2019 bestaat mijn blog 10 jaar en dan hou ik er (voorlopig) mee op. Het is meteen tijd om dit blog bij te werken en me bezig te houden m
Op 1 mei 2019 bestaat mijn blog 10 jaar en dan hou ik er (voorlopig) mee op. Het is meteen tijd om dit blog bij te werken en me bezig te houden m
Op 1 mei 2019 bestaat mijn blog 10 jaar en dan hou ik er (voorlopig) mee op. Het is meteen tijd om dit blog bij te werken en me bezig te houden m
Op 1 mei 2019 bestaat mijn blog 10 jaar en dan hou ik er (voorlopig) mee op. Het is meteen tijd om dit blog bij te werken en me bezig te houden m
Op 1 mei 2019 bestaat mijn blog 10 jaar en dan hou ik er (voorlopig) mee op. Het is meteen tijd om dit blog bij te werken en me bezig te houden m
Op 1 mei 2019 bestaat mijn blog 10 jaar en dan hou ik er (voorlopig) mee op. Het is meteen tijd om dit blog bij te werken en me bezig te houden m
Python GUI applicatie consistent backups met fsarchiver [linux blogs franz ulenaers]
Python GUI applicatie consistent backups maken met fsarchiver
Een
partitie van het type = "Linux LVM" kan gebruikt worden
voor logische volumen maar ook als "snapshot"
!
Een snapshot kan een exact kopie zijn van een logische
volume dat bevrozen is op een bepaald ogenblik : dit maakt het
mogelijk om consistente backups te maken van logische
volumen
terwijl de logische volumen in gebruik zijn !
Mijn fysische en logische volumen zijn als volgt aangemaakt :
fysische volume
pvcreate /dev/sda1
fysische volume groep
vgcreate mydell /dev/sda1
logische volumen
lvcreate -L 1G -n boot mydell
lvcreate -L 100G -n data mydell
lvcreate -L 50G -n home mydell
lvcreate -L 50G -n root mydell
lvcreate -L 1G swap mydell
beginscherm
procedures MyCloud [linux blogs franz ulenaers]
Procedures MyCloud
-
Procedure lftpUlefr01Cloudupload wordt gebruikt om een upload te doen van bestanden en mappen naar MyCloud
-
Procedure lftpUlefr01Cloudmirror wordt gebruikt om wijzigingen terug te halen
Beide procedures maken gebruik van het programma lftp ( dit is "Sophisticated file transfer program" ) en worden gebruikt om synchronisatie van laptop en desktop toe te laten
Procedures werden aangepast zodat verborgen bestanden en verborgen mappen ook worden verwerkt ,
alsook werden voor mirror bepaalde meestal onveranderde bestanden en mappen uitgefilterd (--exclude) zodanig dat deze niet opnieuw worden verwerkt
op Cloud blijven ze bestaan als backup maar op de verschillende laptops niet (dit werd gedaan voor oudere mails van 2016 maanden 2016-11 en 2016-12
en voor alle vorige maanden (dit tot en met september) van 2017 !
-
zie bijlagen
python GUI applicatie tune2fs [linux blogs franz ulenaers]
python GUI applicatie tune2fs comando
Created woensdag 18 oktober 2017
geschreven met programmeertaal python met gebruik van Gtk+ 3
starten in terminal met : sudo python mytune2fs.py
ofwel python source compileren en starten met gecompileerde versie
Python GUI applicatie myarchive.py [linux blogs franz ulenaers]
python GUI applicatie backups maken met fsarchiver
Created vrijdag 13 oktober 2017
GUI applicatie backups maken, achiveerinfo en restore met fsarchiver
zie bijgeleverde bestand : python_GUI_applicatie_backups_maken_met_fsarchiver.pdf
start in terminal mode met :
* sudo python myarchive.py
* sudo python myarchive2.py
ofwel door gecompileerde versie te maken en de gegeneerde objecten te starten
python myfsck.py [linux blogs franz ulenaers]
python GUI applicatie fsck commando
Created vrijdag 13 oktober 2017
zie bijgeleverd bestand myfsck.py
Deze applicatie kan devices mounten en umounten maar is hoofdzakelijk bedoeld om het fsck comando uit te voeren
Root rechten zijn nodig !
hulp ?
* starten in terminal mode
* sudo python myfsck.py
Maken dat een bestand niet te wijzigen , niet te hernoemen is niet te deleten is in linux ! [linux blogs franz ulenaers]
Maken dat een bestand niet te wijzigen , niet te hernoemen is niet te deleten is in linux !
bestand .encfs6.xml
hoe : sudo chattr +i /data/Encrypt/.encfs6.xml
je kunt het bestand niet wijzigen, je kunt het bestand niet hernoemen, je kunt het bestand niet deleten zelfs als je root zijt
- zet attribuut
- sudo chattr +i /data/Encrypt/.encfs6.xml
- status bekijken
- lsattr .encfs6.xml
- ----i--------e-- .encfs6.xml
- de i betekent immutable
- ----i--------e-- .encfs6.xml
- lsattr .encfs6.xml
- om immutable attribuut weg te doen
- chattr -i .encfs6.xml
Backup laptop [linux blogs franz ulenaers]
Linken in Linux [linux blogs franz ulenaers]
Op Linux kan men bestanden meervoudige benamingen geven, zo kun je een bestand op verschillende plaatsen in de boomstructuur van de bestanden opslaan , zonder extra plaats op harde schijf in te nemen (+-).
Er zijn twee soorten links :
-
harde links
-
symbolische links
Een harde link maakt gebruik van hetzelfde bestandsnummer (inode).
Een harde link geldt niet voor een directory !
Een harde link moet op zelfde bestandssysteem en oorspronkelijk bestand moet bestaan !
Een symbolische link , het bestand krijgt een nieuw bestandsnummer , het bestand waarop verwezen wordt hoeft niet te bestaan.
Een symbolische link gaat ook voor een directory.
bash-shell gebruiker ulefr01
- pwd
- /home/ulefr01/cgcles/linux
- ls linuxcursus.odt -ila
- 293800 -rw-r--r-- 1 ulefr01 ulefr01 4251348 2005-12-17 21:11 linuxcursus.odt
-
Het bestand linuxcursus is 4,2M groot, inode nr 293800.
bash-shell gebruiker tom
- pwd
- /home/tom
- ln /home/ulefr01/cgcles/linux/linuxcursus.odt cursuslinux.odt
- tom@franz3:~ $ ls cursuslinux.odt -il
- 293800 -rw-r--r-- 2 ulefr01 ulefr01 4251348 2005-12-17 21:11 cursuslinux.odt
- geen extra plaats van 4,2M, zelfde inode nr 293800 !
bash-shell gebruiker root
- pwd
- /root
- root@franz3:~ # ln /home/ulefr01/cgcles/linux/linuxcursus.odt linuxcursus.odt
- root@franz3:~ # ls -il linux*
- 293800 -rw-rw-r-- 3 ulefr01 ulefr01 4251300 2005-12-17 21:31 linuxcursus.odt
- geen extra plaats van 4,2M, zelfde inode nr 293800 !
bash-shell gebruiker ulefr01, symbolische link
- ln -s cgcles/linux/linuxcursus.odt linuxcursus.odt
- ulefr01@franz3:~ $ ls -il linuxcursus.odt
- 1191741 lrwxrwxrwx 1 ulefr01 ulefr01 28 2005-12-17 21:42 linuxcursus.odt -> cgcles/linux/linuxcursus.odt
- slechts 28 bytes
- ln -s linuxcursus.odt test.odt
- 1191898 lrwxrwxrwx 1 ulefr01 ulefr01 15 2005-12-17 22:00 test.odt -> linuxcursus.odt
- slechts 15 bytes
- rm linuxcursus.odt
- ulefr01@franz3:~ $ ls *.odt -il
- 1193723 -rw-r--r-- 1 ulefr01 ulefr01 27521 2005-11-23 20:11 Backup&restore.odt
- 1193942 -rw-r--r-- 1 ulefr01 ulefr01 13535 2005-11-26 16:11 doc.odt
- 1191933 -rw------- 1 ulefr01 ulefr01 6135 2005-12-06 12:00 fru.odt
- 1193753 -rw-r--r-- 1 ulefr01 ulefr01 19865 2005-11-23 22:44 harddiskdata.odt
- 1193576 -rw-r--r-- 1 ulefr01 ulefr01 7198 2005-11-26 21:46 ooo-1.odt
- 1191749 -rw------- 1 ulefr01 ulefr01 22542 2005-12-06 16:16 Regen.odt
- 1191898 lrwxrwxrwx 1 ulefr01 ulefr01 15 2005-12-17 22:00 test.odt -> linuxcursus.odt
- test.odt verwijst naar een bestand dat niet bestaat !
18-02-2020
21:55
Samsung Galaxy Z Flip, S20(+) en S20 Ultra Hands-on [Laatste Artikelen - Webwereld]
Samsung nodigde ons uit op de drie allernieuwste smartphones van dichtbij te bekijken. Daar maakten wij dankbaar gebruik van en wij delen onze bevindingen met je.
02-02-2020
21:29
Hands-on: Synology Virtual Machine Manager [Laatste Artikelen - Webwereld]
Dat je NAS tegenwoordig voor veel meer dan alleen het opslaan van bestanden kan worden gebruikt is inmiddels bekend, maar wist je ook dat je er virtuele machines mee kan beheren? Wij leggen je uit hoe.
23-01-2020
16:42
Wat je moet weten over FIDO-sleutels [Laatste Artikelen - Webwereld]
Dankzij de FIDO2-standaard is het mogelijk om zonder wachtwoord toch veilig in te loggen bij diverse online diensten. Onder meer Microsoft en Google bieden hier al opties voor. Dit jaar volgen er waarschijnlijk meer organisaties die dit aanbieden.
Zo gebruik je je iPhone zonder Apple ID [Laatste Artikelen - Webwereld]
Tegenwoordig moet je voor zo’n beetje alles wat je online wilt doen een account aanmaken, zelfs als je niet van plan bent online te werken of als je gewoon geen zin hebt om je gegevens te delen met de fabrikant. Wij laten je vandaag zien hoe je dat voor elkaar krijgt met je iPhone of iPad.
Groot lek in Internet Explorer wordt al misbruikt in het wild [Laatste Artikelen - Webwereld]
Er is een nieuwe zero-day-kwetsbaarheid ontdekt in Microsoft Internet Explorer. Het nieuwe lek wordt al misbruikt en een beveiligingsupdate is nog niet beschikbaar.
Zo installeer je Chrome-extensies in de nieuwe Edge [Laatste Artikelen - Webwereld]
De nieuwe versie van Edge is gebouwd met code van het Chromium-project, maar in de standaardconfiguratie worden extensies uitsluitend geïnstalleerd via de Microsoft Store. Dat is gelukkig vrij eenvoudig aan te passen.
19-01-2020
12:59
Windows 10-upgrade nog steeds gratis [Laatste Artikelen - Webwereld]
Microsoft gaf gebruikers enkele jaren geleden de mogelijkheid gratis te upgraden van Windows 7 naar Windows 10. Daarbij ging het af en toe zo ver dat zelfs gebruikers die dat niet wilden een upgrade kregen. De aanbieding is al lang en breed voorbij, maar gratis upgraden is nog steeds mogelijk en het is nu makkelijker dan ooit. Wij vertellen je hoe je dat doet.
Chrome, Edge, Firefox: Welke browser is het snelst? [Laatste Artikelen - Webwereld]
Er is veel veranderd op de markt voor pc-browsers. Ongeveer vijf jaar geleden was er nog meer concurrentie en geheel eigen ontwikkeling, nu zijn er nog maar twee engines over: die achter Chrome en die achter Firefox. Met de release van de Blink-gebaseerde Edge van Microsoft deze maand kijken we naar benachmarks en praktijktests.
Cooler Master herontwerpt koelpasta-tubes wegens drugsverdenkingen [Laatste Artikelen - Webwereld]
Cooler Master heeft het uiterlijk van z’n koelpasta-spuiten aangepast omdat het bedrijf het naar eigen zeggen beu is om steeds te moeten uitleggen aan ouders dat de inhoud geen drugs is, maar koelpasta.
06-03-2018
10:08
stick mounten zonder root , labels zetten , maak een bestandensysteem clean [ulefr01 - blog franz ulenaers]
19-09-2017
10:33
Embedded Linux Engineer [Job Openings]
You're eager to work with Linux in an exciting environment. You have a lot of PC equipement experience. Prior experience with embedded Linux or small footprint distributions is considered a plus. Region East/West Flanders
We're looking for someone capable of teaching Linux and/or Solaris professionally. Ideally the candidate has experience with teaching in Linux, possibly other non-Windows OSes as well.
Kernel Developer [Job Openings]
We're looking for someone with kernel device driver developement experience. Preferably, but not necessary with knowledge of AV or TV devices.
C/C++ Developers [Job Openings]
We're searching Linux C/C++ Developers. Region Leuven.